Diablo 4 Death Trap Rogue Build: Endgame Farming and Resets
Death Trap Rogue turns a long-cooldown Ultimate into a repeatable attack. Its strength is fast movement between packs and sustained area damage, but the build only feels smooth when Energy spending, recovery, cooldown and trap arming work together. Equipping a few famous Uniques is not enough.
This guide covers a Season 15 endgame farming setup checked on October 21, 2026 for patch 3.2.3. It is not a leveling build or a promise of a particular Pit clear. The main setup uses the Grenade-tagged Explosive Trigger variant; the expensive Insight and Hellfire optimization is a separate later step.
The reset engine comes before damage
Death Trap's base cooldown is 60 seconds and its base damage type is Shadow. The unmodified trap takes 1.25 seconds to arm. Gear, ranks and modifiers change the effective cooldown and arming time, so the base tooltip is not the target you play around.
Select Preparation. Every 75 Energy spent removes five seconds from the Ultimate cooldown. Beastfall Boots make a non-Channeled Ultimate consume all current Energy and restore 25 Energy when a cooldown is used. At 225 Energy actually spent, Preparation can trigger three times for a total of 15 seconds. Your effective Death Trap cooldown must therefore be 15 seconds or less for this particular reset plan.
Aspect of Aftermath supplies Energy per rank of the Ultimate. At a normal-slot maximum value of eight Energy per rank, 25 total Death Trap ranks provide 200 Energy; the boots' 25 bring the refill to 225. With a five-per-rank roll, that same target takes 40 ranks. These are examples before other modifiers, not two universal rank requirements for every character.
Test four conditions together: enough Energy at the cast, enough cooldown reduction, a full immediate refill and a trap that arms before it is replaced. Maximum Energy on the character sheet is only capacity. Starting a cast below the spending threshold can still break the loop. Adding capacity you cannot refill can also make the next cast worse.
Combo Points and Inner Sight do not replace Preparation in this setup. You are not alternating a Basic attack with a Core spender. Lucky Hit cooldown effects help, but the deterministic spending/refund loop should already work against a durable target without depending on killing trash.
Six skills and a complete point budget
The current skill tree no longer contains the old separate passive nodes or a Key Passive. Do not copy an old allocation with Exposure, Trap Mastery or the former Aftermath passive. Aspect of Aftermath is a current equipment effect, not an instruction to find that old passive in the tree.
The allocation below is an 83-point endgame target: 65 points in the six active skills and 18 in their three selected modifiers each. It assumes the available seasonal skill-point rewards have been earned. These are invested ranks, before equipment and temporary bonuses. Actual total Death Trap ranks must still satisfy your refill calculation.
Active skill and ranks | Three selected modifiers | Job in this setup |
Death Trap - 15 | Dodge; Resolve; Explosive Trigger | Main damage, Grenade interactions and defensive support |
Concealment - 15 | Resolve; Ferocity; Calculation | Stealth cycle, Unstoppable, Resolve and critical support |
Dark Shroud - 15 | Critical Strike; Consume Chance; Shadow Dancer | Maintain protective shadows and dodge/critical bonuses |
Cold Imbuement - 13 | Cooldown; Resolve; Buffered Battery | Imbued mobility hits support Barrier and Weakened |
Smoke Grenade - 6 | Increased Duration and Damage; Vulnerable; Silhouette | A critical-chance cloud at your feet and debuff utility |
Shadow Step - 1 | Cooldown; Unstoppable; Artifice | Target-free repositioning and control escape |
With fewer points, unlock the six skills and essential modifiers first, then prioritize Death Trap ranks, Concealment and Dark Shroud. Cold Imbuement and Smoke Grenade finish later. If mobility is not ready, Dash can temporarily replace Smoke Grenade on the bar; it is a substitution, not a seventh skill.
Explosive Trigger adds the Grenade tag and additional Stun Grenades. It does not include the pull, extra charge and cooldown reduction of the alternative Death Pit branch. Death Pit can help an earlier setup, but swapping variants changes both damage scaling and the cooldown calculation. Do not combine their tooltips into one imaginary skill.
Gear by function and slot
The main loadout below keeps a Legendary bow for Opportunist's Aspect and does not require Insight or a Mythic item. It uses two one-handed swords. Preserve cooldown and resource requirements when replacing any of these slots.
Slot | Main target | What it contributes |
Helm | Leoric's Crown | Optional seasonal gem flexibility; a defensive Legendary helm works earlier |
Chest | Scoundrel's Leathers | Throwing Trap skills, Trap ranks, resource capacity and damage |
Gloves | Sea Lord's Fine Gloves | Momentum from Cutthroat casts supports Energy capacity and damage |
Pants | Eyes in the Dark | Death Trap damage and periodic rearming, plus useful cooldown reduction |
Boots | Beastfall Boots | Required Energy-spending engine; no like-for-like Legendary replacement |
Amulet | Legendary with Aspect of Inner Calm | Useful ranks/cooldown rolls and stationary damage support |
Ring 1 | Legendary with Aspect of Aftermath | Required Energy return |
Ring 2 | Stone of Jordan | Resistance setup; Saboteur's Signet is an offensive alternative |
Melee weapons | Misericorde + a Legendary sword | Trap Lucky Hit support plus a flexible stat/Aspect slot |
Bow | Legendary with Opportunist's Aspect | Grenade multiplier for the Explosive Trigger setup |
Scoundrel's Leathers currently lets Trap skills be thrown and grants 45-60% increased damage. It no longer needs to make Death Trap a Core skill for the boots to spend Energy. Until it drops, a Legendary chest with resource and defensive rolls can keep the reset functioning, but placing traps becomes less convenient.
Eyes in the Dark increases Death Trap damage by 75-90% and can rearm it once every ten seconds. That periodic rearm is not the repeated-cast engine. Use defensive Legendary pants while gearing, then compare the loss of protection against the gain in damage and cooldown rolls.
Misericorde can reduce active Trap cooldowns through Lucky Hit against trapped enemies and build a temporary Trap damage bonus. Treat it as extra support rather than a replacement for the 15-second test. A Legendary sword with useful stats and Alchemical Advantage is a progression alternative.
Sea Lord's gloves build Momentum from Cutthroat skills; at ten stacks their ordinary roll can add 25-30% Maximum Energy. Check capacity with the stacks active instead of copying a town value from another character. A Legendary pair with Vehement Brawler's Aspect can supply Ultimate ranks while you solve Energy elsewhere. A Charm version is another option when the Talisman allows it.
Stone of Jordan makes resistances follow your highest resistance and rewards the corresponding damage element. Shadow Resistance is a sensible pairing for this Shadow-based setup, but do not assume its effect makes you invulnerable. Saboteur's Signet supports Grenade damage and applies Vulnerable or Weakened; its effects can be supplied through an eligible Charm instead of occupying the ring slot. Do not count the same Unique power twice.
Aftermath belongs on a ring by default. If its refill is too small, moving it to the amulet strengthens the effect, but removes Inner Calm from that slot; recalculate with the displayed value. Opportunist's multiplier requires the Grenade version of Death Trap. Do not spend the bow's Aspect slot on a modifier your chosen variant cannot use.
Talisman and expansion boundaries
Lord of Hatred is required for the Talisman, Horadric Cube and War Plans. This endgame loadout uses Applied Alchemy rather than silently copying an older Sightless set. Its two-piece bonus supports Grenade and Trap damage, its three-piece bonus resets Concealment through Ultimate casts, and the five-piece damage bonus was raised to 250% in 3.2.1.
Build toward the five-piece effect with the appropriate set Charms. Seal of the Diamond Mind and Hellfire Torch can alter set/slot planning in an optimized version, but are not permission to equip more Charms than your actual Seal allows. Seek Trap ranks, enough Maximum Resource and defensive rolls; do not fill every slot with capacity that Aftermath cannot replenish.
Runewords and Mercenaries originate in Vessel of Hatred. Cir + Vex is an optional socketed pair for skill-rank support; a Gar pair can help critical chance. These are different from the crafted equipment Runewords Spirit and Insight, whose Cube route requires Lord of Hatred. Without these features, use ordinary gems and Legendary weapons and recalculate the reset. The full Talisman version described here is not a base-game-only loadout.
Raheir with Bastion is a defensive solo companion choice. A reinforcement is a separate ability assignment, not a second fully active companion with every passive. In group play, account for the loss of a hired solo companion's benefits. Mercenaries should supplement a working defensive setup rather than become an assumption behind every survival claim.
Stats, Tempering and Masterworking
First secure cooldown reduction, the spending threshold and enough total Ultimate ranks for recovery. Prefer Greater Affixes that solve one of those problems over an attractive damage roll that leaves the loop stalled. Trap and All Skill ranks can serve the refill; Core ranks are not automatically equivalent in this current variant.
After the engine works, invest in reliable Critical Strike Chance, Critical Strike Damage, Vulnerable support and useful Shadow or All Damage modifiers. Keep Life, Armor and resistances sufficient for the content. Lucky Hit is relevant to Misericorde and Buffered Battery, but stacking it without a stable reset does not fix missing Energy.
Crafting target | Where to check | Priority |
Traps Arm Seconds Faster | Trap Expertise manual, eligible gloves | Let traps activate before rapid replacement |
Death Trap / Trap cooldown reduction | Eligible jewelry tempers and Deadly Ambush nodes | Reach the effective cooldown target |
Mobility cooldown reduction | Eligible boots and mobility-supporting gear | Smooth Shadow Step after the damage loop works |
Defensive or damage temper | Remaining eligible slots | Fix survival first, then add useful damage |
Use the current Blacksmith menu and the actual eligible item. Older guides describing every Unique as untemperable or prescribing removed passive-rank recipes do not provide a safe current crafting plan. Do not assume a recipe is valid on every slot because its name appears in a database.
Current Masterworking improves Quality, with an endgame cap of 25 and a final Capstone affix bonus; it is not the old twelve-rank triple-hit system. Prioritize cooldown reduction until the loop works, then the resource/rank deficit, then damage. Eligible Ancestral Uniques can be Masterworked. Legacy or Unmodifiable restrictions still matter.
For ordinary sockets, use weapon gems that support the chosen damage setup and defensive armor gems while assembling the build. Emeralds in spare armor sockets can add Dexterity; jewelry resistance gems can fill a gap before seasonal gems are safe. Do not sacrifice a necessary rune pair or resistance without checking the resulting character.
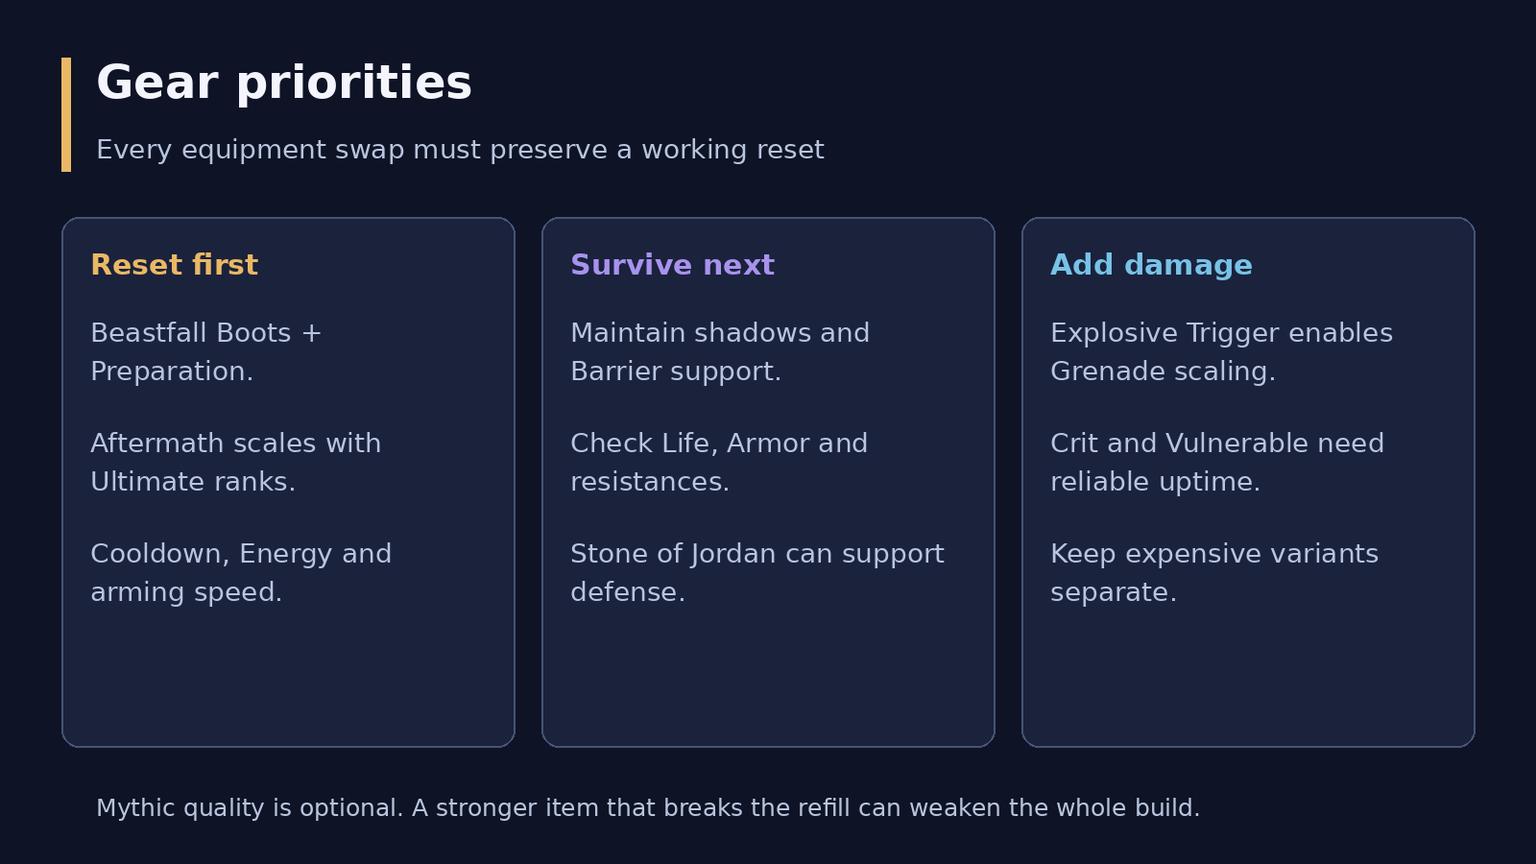
Fix the reset, then survival, then damage. Optional optimization cannot substitute for a functioning engine.
Combat loop and the mistakes that stop it
Before entering a pack, maintain Dark Shroud and activate Cold Imbuement. Reposition with Shadow Step to create a safe firing angle; Artifice leaves a decoy that can help gather nearby enemies. The Explosive Trigger build should not rely on Death Pit's pull to arrange them.
Use Concealment for its selected bonuses and Unstoppable, then place or throw Death Trap into occupied ground. On elites and bosses, place Smoke Grenade so you can benefit from its Silhouette cloud without standing in a dangerous effect. That variant does not keep the base grenade's Daze; crowd-control assumptions must match the selected modifier.
Repeat Death Trap while watching the refill. Refresh shadows and the defensive imbue loop between casts, and use movement before an attack lands rather than after losing every defensive layer. Cold Imbuement supports Barrier through eligible imbued hits and Lucky Hit; it does not turn Death Trap itself into a Cold attack. Unstoppable prevents control effects, not damage immunity.
If casts stop, diagnose in order: was 225 Energy actually spent, did the cooldown reach the target, did Aftermath refill the bar, and did the trap arm in time? Then check whether Momentum, rune bonuses or other temporary effects expired. Fast button presses can replace an unarmed trap; more attack speed can therefore expose an arming problem instead of improving damage.
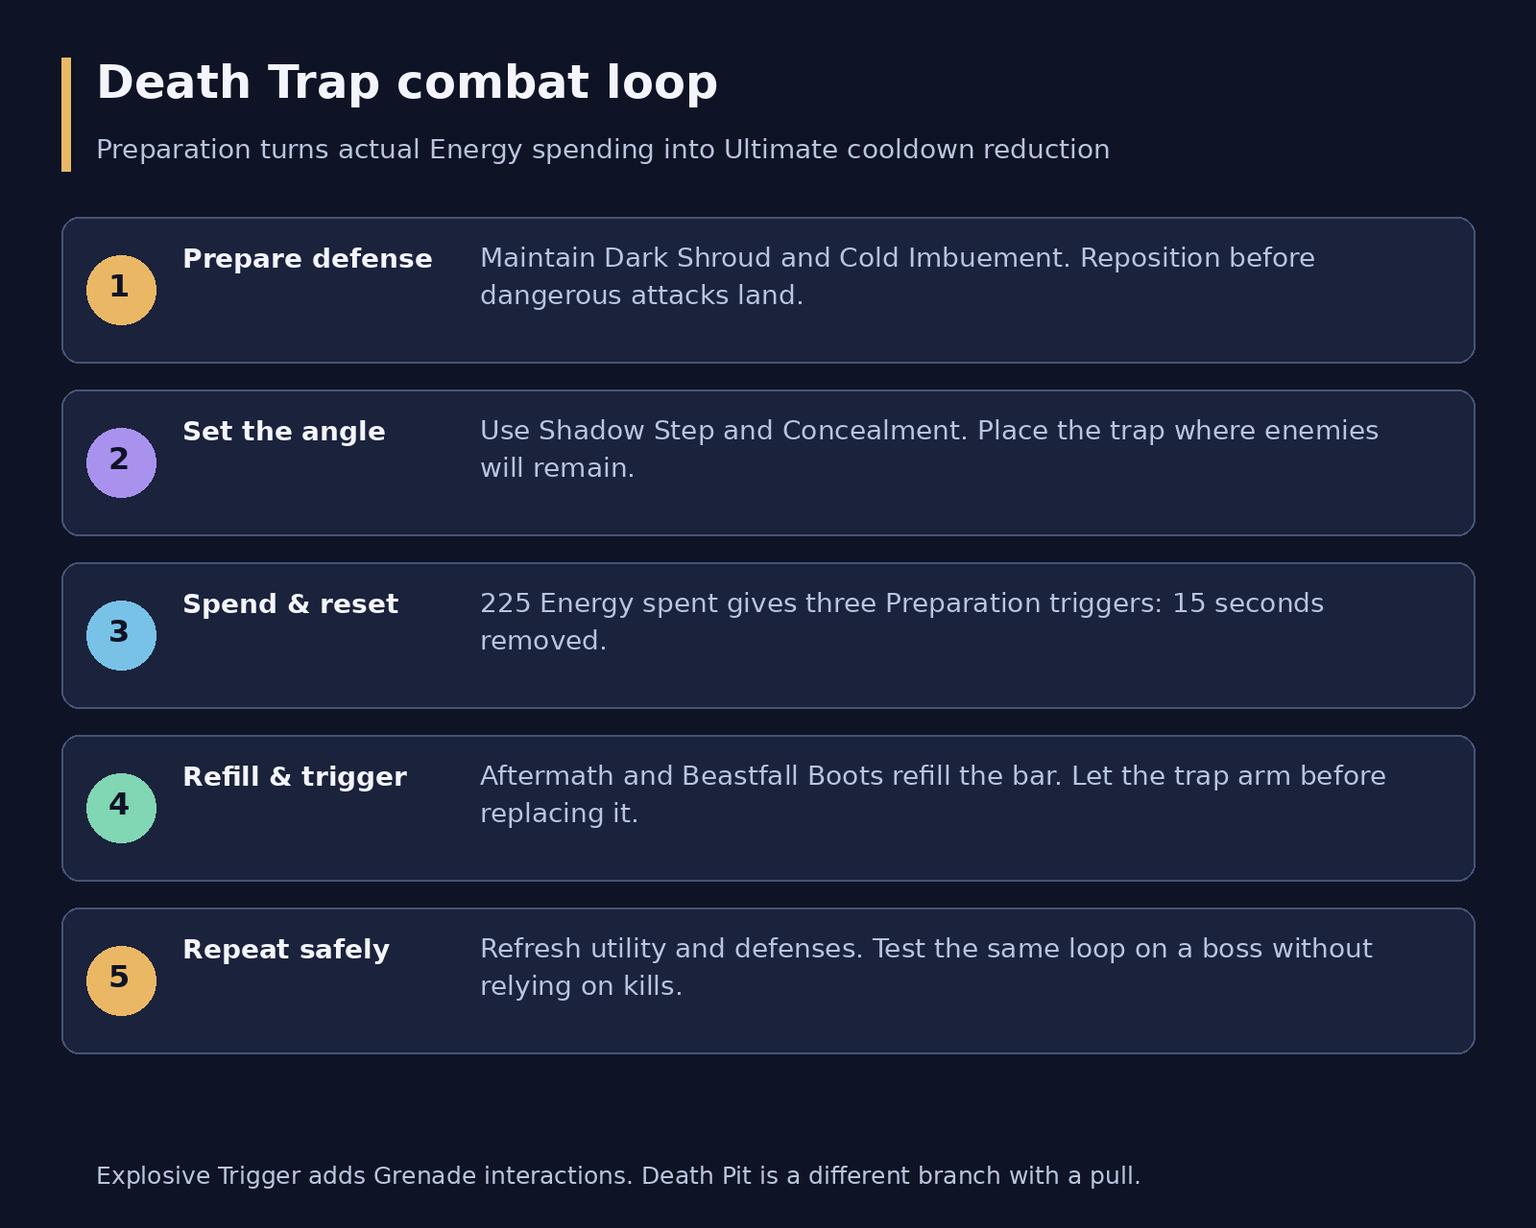
Spend, reset, refill and let the trap activate. Defensive upkeep continues throughout the cycle.
Against a boss, maintain the same resource loop without relying on kills or fresh weak enemies. Bosses cannot be treated as permanently controlled trash: use stagger windows when they occur, continue dodging major attacks and avoid assuming every crowd-control bonus is always active. Test sustained damage on a durable target before judging the build by a single explosion.
Paragon and Glyph progression
The current framework allows five boards including Starter. A practical progression order for this setup is Starter, Deadly Ambush, No Witnesses, Cheap Shot and Eldritch Bounty. This is a recommended route toward functional bonuses, not an instruction to spend a full endgame point budget before playing.
Prioritize Spring-Loaded and Trap cooldown nodes on Deadly Ambush while finishing the engine. Take the useful Legendary effects and Glyph sockets, then fill qualifying attributes and defensive clusters. No Witnesses supports Ultimate progression; Cheap Shot and Deadly Ambush reward the conditions this build applies. Rotate boards for the shortest useful connections instead of copying a screenshot's orientation without its path.
Use the Glyph set Versatility, Ambush, Grenadier, Explosive and Canny. Grenadier belongs on Cheap Shot in the current optimized arrangement. Fit the other Glyphs to sockets with the attributes their bonuses require; leave damage detours until those conditions are met. Level Versatility and Ambush first, then Grenadier, Explosive and Canny through the Pit. Level 150 is the finished Glyph ceiling, not an entry requirement or a guaranteed Pit tier.
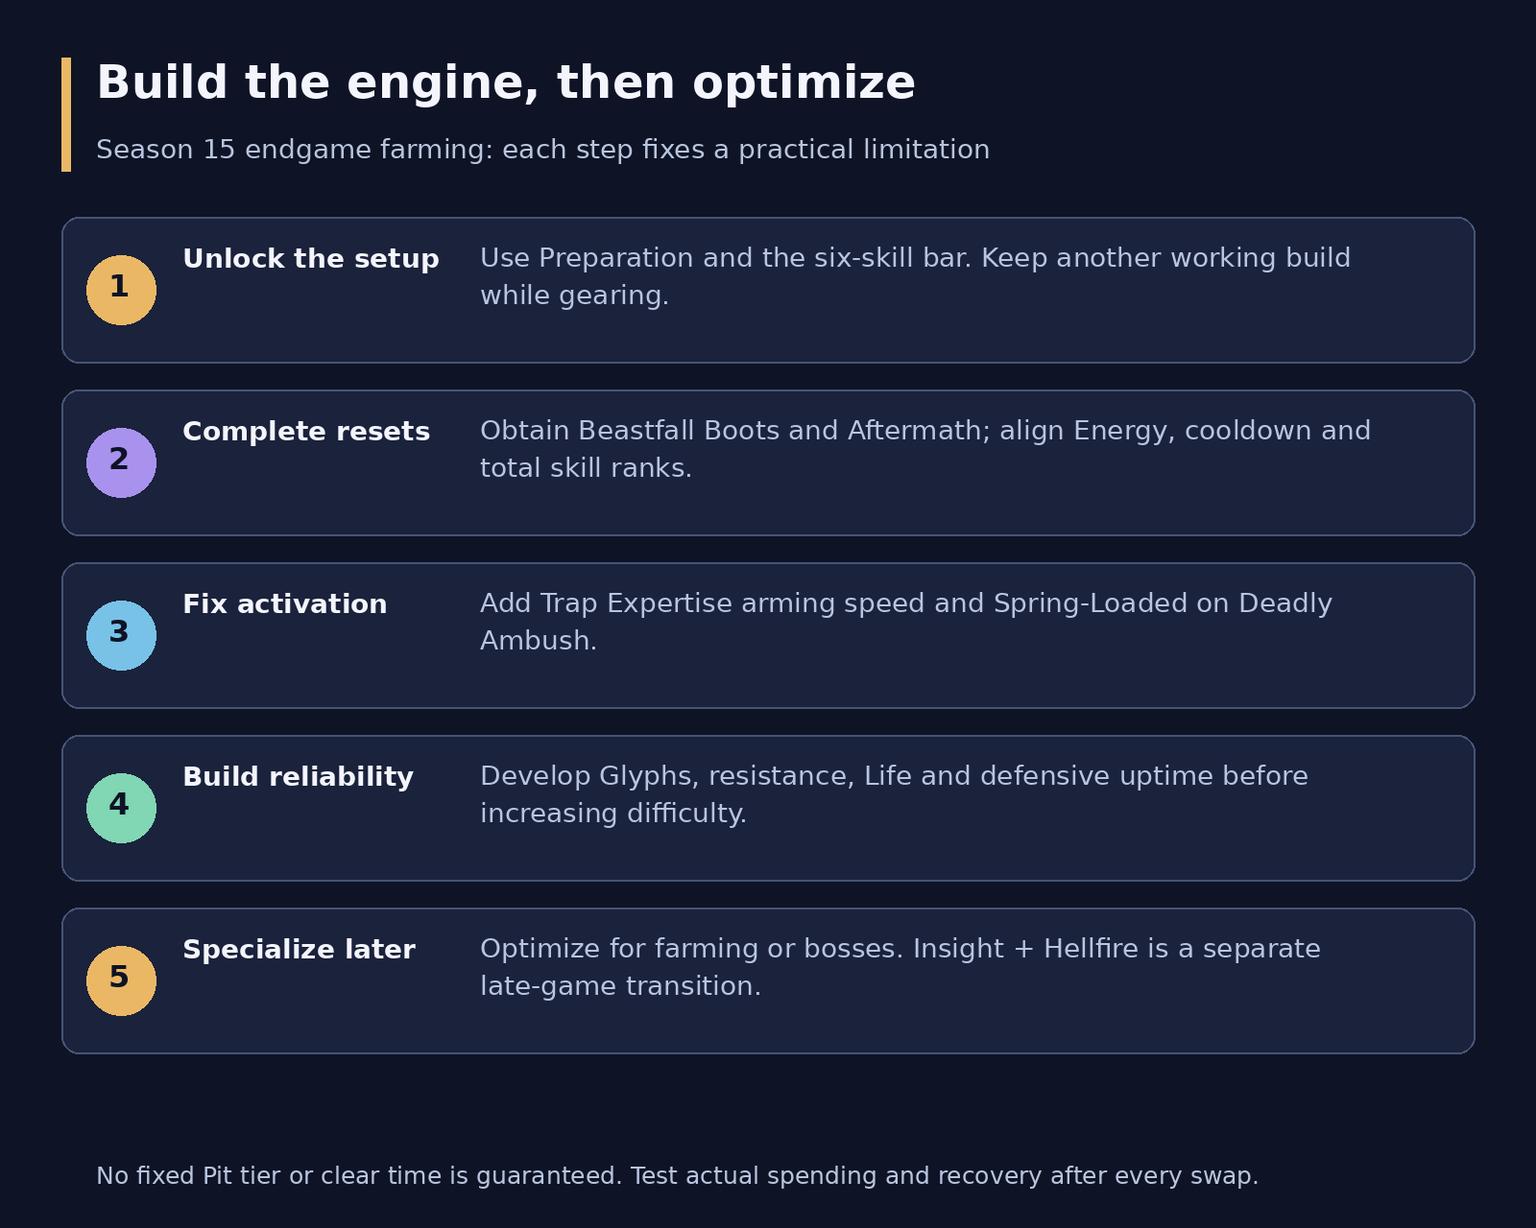
Progress from a stable reset to reliable defenses and then to content-specific optimization.
Season 15 choices and suitable content
Baal's Splinter of Destruction is a practical seasonal choice for Undercity and Lair Boss routes. Mephisto better matches a session concentrated on the Pit and Nightmare Dungeons; Diablo matches Helltide and Infernal Hordes. These are activity pairings, not proof that one alignment wins every encounter.
Choose socketed Soul Splinters by their drawback as well as benefit. Pain can support defense at a movement cost; Anguish can help offensive speed but changes resource demands. Leave Hellfire out of the main setup. Its critical-chance penalty requires a specifically prepared Insight variant and a fresh stat check with the gem equipped. It is not a free damage upgrade.
This build is suited to repeated dungeon clears, Hordes, Undercity and seasonal Waking Nightmares once the engine and defenses work. Lair Boss farming adds a useful single-target test. The Pit is useful for Glyphs and controlled progression, but speed farming success does not guarantee top-tier pushing. No fixed maximum or clear time follows from the item list alone.
FAQ
Is Beastfall Boots required for Death Trap Rogue?
Yes, for the Energy-spending reset engine covered here. Other Uniques improve range, damage or defense, but a Legendary pair of boots does not duplicate this interaction. Keep another working build until the engine is ready.
How do you reset Death Trap's cooldown?
Preparation removes five seconds per 75 Energy spent. Spending 225 removes 15 seconds; reduce the effective cooldown to that target, restore the spent Energy through Aftermath and the boots, and make traps arm fast enough to activate.
Can this setup handle bosses?
Yes, with sufficient gear and a stable no-kill reset loop. Maintain debuffs and defenses, respect boss mechanics and use stagger opportunities. A boss fight exposes refill problems that fast trash clears can conceal.
Is the build suitable for high-tier endgame?
It can progress into demanding content after its requirements are met, but the main emphasis is fast repeatable farming. Gear quality, defenses, Glyphs, patch and execution determine the practical ceiling; the guide does not guarantee a particular tier.