Diablo 4 Echoing Hatred Guide: Access, Waves and Rewards
Echoing Hatred is a permanent Lord of Hatred endgame survival arena in Diablo IV. It supports Seasonal and Eternal characters with expansion access. You fight randomized enemy waves, including bosses, while managing the pressure of surviving enemies. It is a separate activity from the Echo of Mephisto boss encounter, Infernal Hordes and seasonal Challenge Dungeons.
This guide is checked for October 21, 2026, Season 15 and live patch 3.2.3. The current wave cap is 150, introduced in patch 3.1. Earlier announcements described an infinite challenge; that description no longer gives the full rule. There is also a newer access opportunity through Whisper Keys Caches. The practical aim is to spend a scarce entry on a stable build, control the arena and collect the rewards before leaving.
Unlock the arena and prepare the entry
You need the base game and Lord of Hatred access. Reach the expansion's endgame in Temis through campaign progression or an available campaign skip. Obtain a rare Trace of Echoes, then follow The Resounding Scream to Seer Nevma and the Sightless Eye. The access point is in Temis, not a Lair Boss altar or the Horadric Cube.
One Trace supplies one attempt. Commit it when opening the activity, before combat rewards are earned; it is not a material that you pay only after a successful clear. Another attempt requires another Trace. Do not confuse this with the separate key used for Mephisto's rewards. Before confirming entry, finish equipment changes and arrange the party that will participate.
The first Trace can activate the access quest rather than appearing like an ordinary equippable item. If you have the quest but cannot find a matching item in your bags, check its objective and the Sightless Eye before assuming the drop was lost. Do not plan around an unverified ability to stockpile unlimited entries.
Community access instructions place the activity in Torment endgame. Arriving with Torment I unlocked is a sensible starting preparation, but the sources checked do not establish a separate universal character-level or gear-score requirement for this arena. A database item's displayed level is not sufficient evidence of a live entry requirement. Use the actual quest and entrance eligibility for your character.
Where to find a Trace of Echoes
Trace acquisition is random. Blizzard increased its drop chance from Elite and Champion enemies in patch 3.1. In the final season-15 update, Whisper Keys Caches also gained a small chance to contain a Trace. These are concrete opportunities, not guaranteed rewards per enemy or cache.
Work these sources into activities that already improve your character. Clearing Elite-rich content while completing Whispers gives useful progress even when no Trace appears. Choosing a Keys Cache can add a chance at access; it does not convert every Whisper turn-in into an arena ticket. No official numerical drop rate or guaranteed number of runs is established here.
Do not raise overworld difficulty solely on a promise of a dramatically higher Trace rate. If tougher enemies sharply reduce your kills and cache completions, the route may become less useful. That efficiency judgment is a practical recommendation, not a published drop formula.
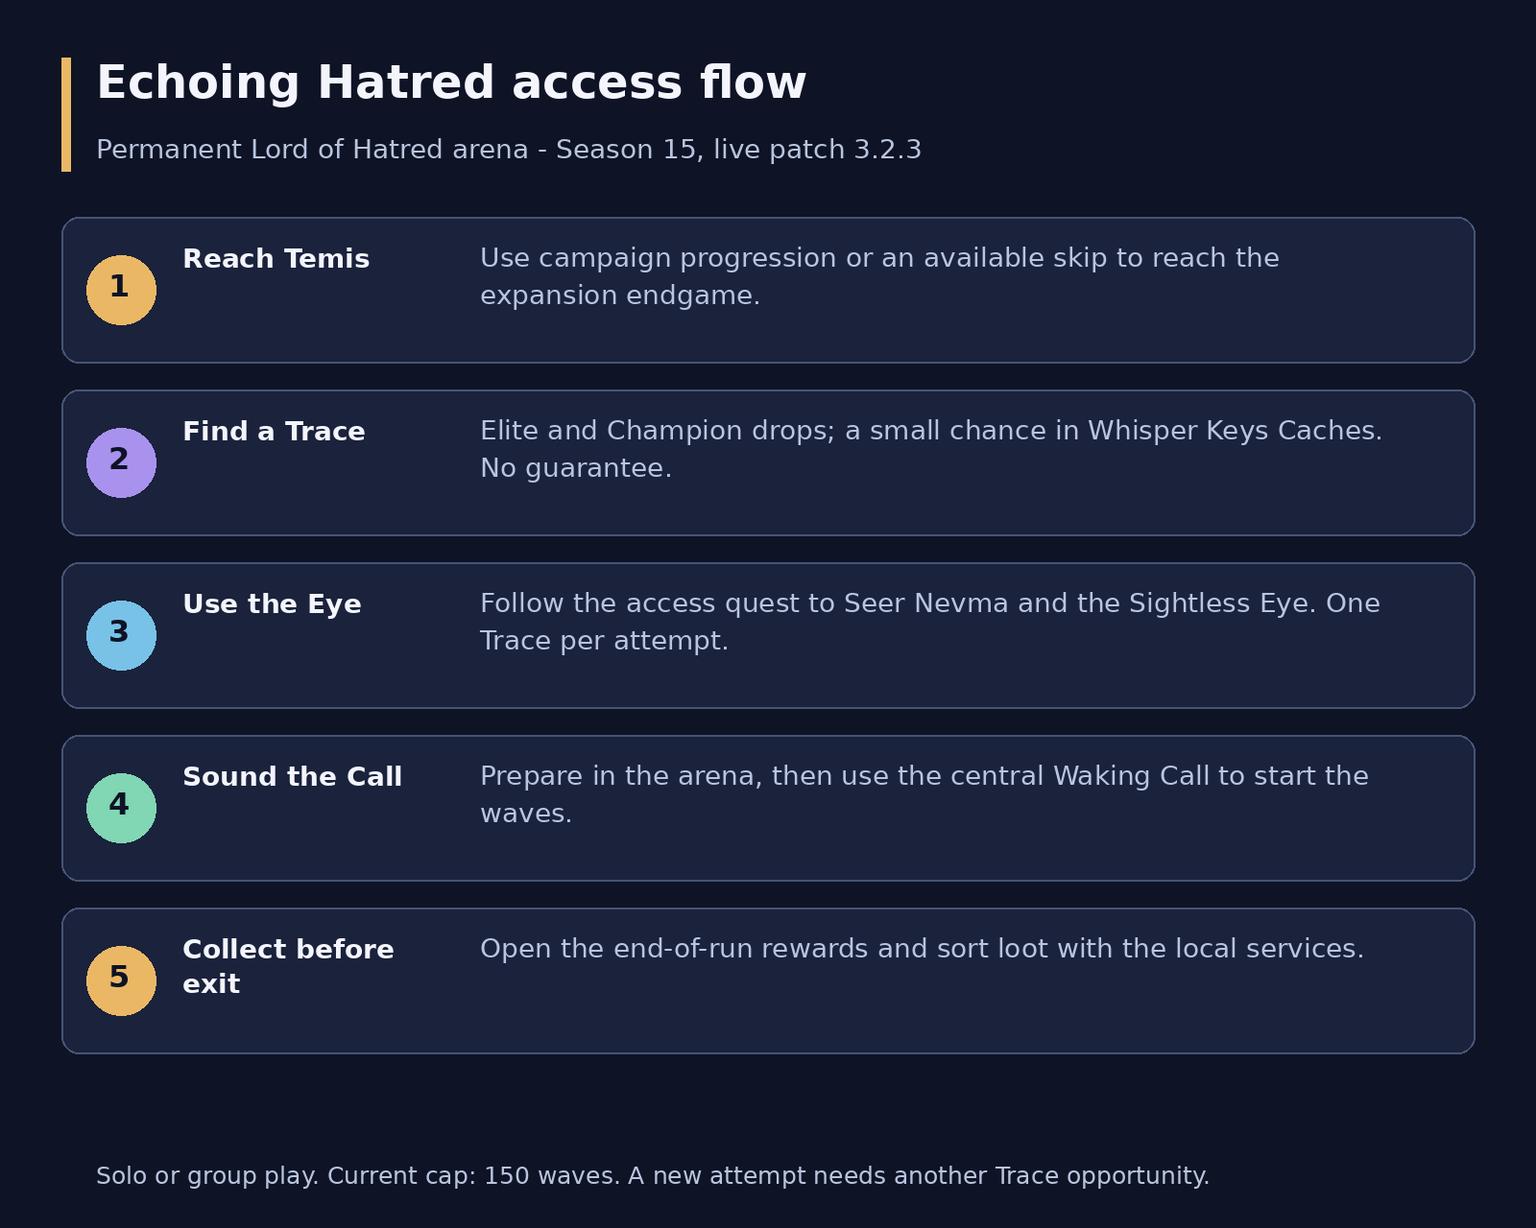
Access flow: reach Temis, find a Trace, use the Sightless Eye, start the waves and collect rewards.
How one attempt works
Entering places you in the arena before the wave challenge starts. Locate its shrines and examine your position, then interact with the Waking Call in the center when ready. Waves do not need to begin the instant you arrive. Finish preparations before sounding it rather than treating the early combat as a shopping break.
The central pressure system is the Overwhelm meter. Enemies accumulate while you fight; killing them controls that pressure. Allowing too many to remain alive eventually fills the meter and ends the attempt. Simply running in circles with excellent defenses cannot sustain progress indefinitely.
Difficulty increases through the run's internal tiers, up to the current cap of 150. Your selected overworld Torment is not a ceiling on what the arena will throw at you. There is no ordinary dungeon countdown to extend with side objectives, and no fixed three-phase final boss script. Changing overworld difficulty is not a way to select a starting wave or resume your previous best tier.
Treat a solo death as the end of that push. Reviving afterward lets you handle the completed attempt's rewards; it does not restart the waves at a checkpoint. Being Overwhelmed also ends the attempt even if you are still alive. Do not budget for a set number of free deaths or a refunded Trace after failure. Hardcore players must keep actual death separate from meter-based completion; the latter is not proof that lethal damage is safe.
Control dangerous overlaps
The enemy sequence changes between attempts, and multiple bosses can appear together. Read the threats currently present instead of expecting the same boss at a specific wave. There is no universal interrupt requirement that switches off the arena. Crowd control helps contain eligible monsters; it does not make every boss freely stunnable on demand.
Pressure | Immediate response | Mistake to avoid |
Growing enemy backlog | Clear a dense group while keeping an exit | Kiting without killing |
Boss plus ranged enemies | Move out of marked attacks and remove exposed threats | Tunneling the boss through ground effects |
Resource or defense gap | Use the planned recovery tool and reposition | Spending every cooldown together |
Treasure Goblin appears | Kill it if the arena remains controlled | Chasing it into lethal overlap |
Maintain a route through open ground. Short movements that keep enemies inside your damage area usually help more than repeatedly crossing the whole room. Move out of visible attack lines and explosions before committing a long cast. When the floor becomes difficult to read, preserve a movement charge for escape rather than using it only to increase damage uptime.
A boss is a priority when its attacks deny safe space or it survives long enough to anchor the backlog. Otherwise, clearing nearby ordinary enemies can restore control faster than attacking a single large health bar. Keep enough single-target damage to remove dangerous durable enemies; an area-clearing build still needs to finish what it has gathered.
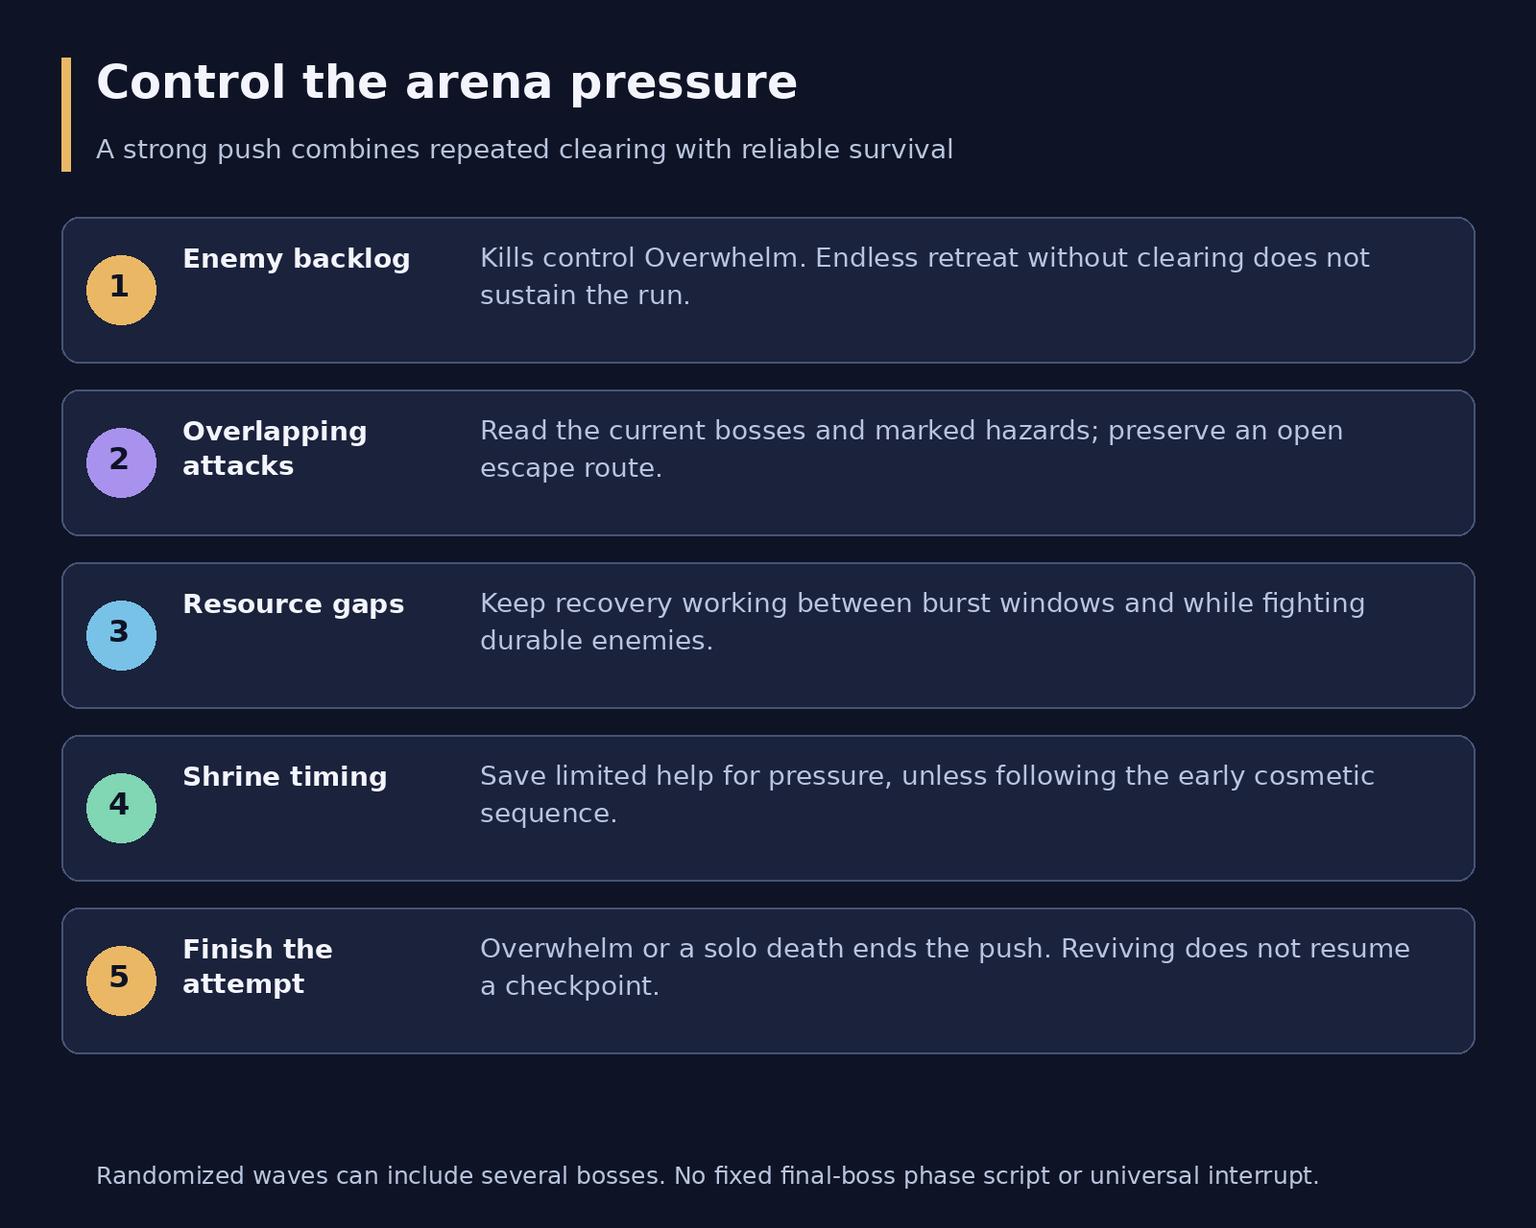
Combat priorities: clear the backlog, read overlapping attacks, preserve resources, time shrines and finish safely.
Prepare for sustained combat
Choose damage that works repeatedly across a pack and can also finish an Elite or boss. No special damage element is required for every class. Reliable targeting, resource recovery and useful uptime matter more than copying a spectacular burst number from a different activity.
Check Armor, relevant Resistances, Maximum Life and recovery in the difficulty you normally play. Add the Barrier or damage-reduction layers your build actually supplies, with a plan for their gaps. Unstoppable or a control break can rescue a dangerous lock, but neither should be treated as general immunity to all damage. Avoid numerical defense caps copied from an older itemization system.
Practice the complete loop in repeatable content first. Can you recover resource without fresh kills? Can you keep attacking after your Ultimate ends? Does your escape remain available when defense drops? A build that fails these checks should repair the missing link before spending a rare entry, even if it clears easy packs quickly.
Use an appropriate Elixir and compatible Incense if available, according to their current tooltips and stacking rules. They supplement a working setup; there is no mandatory special Echoing Hatred consumable. Repair equipment, empty bag space and review the loot filter so valuable drops will remain visible afterward.
The four arena shrines provide limited temporary help. For a normal push, saving them until your usual tools struggle is often sensible. However, the cosmetic challenge below needs specific early activation windows. Decide which goal you are pursuing before spending a shrine, because these two plans use them differently.
Solo or a group
Solo play gives you full control over positioning, shrine timing and the pace of your own rotation. A normal party can have up to four players, and Echoing Hatred is listed in Party Finder. Community play reports describe one opener supplying access for the group; that is useful coordination information, not a promise of extra keys or guaranteed loot for each member.
A group benefits from compatible damage coverage and coordinated movement. Agree on shrine use and the cosmetic goal before starting. Avoid scattering enemies into opposite corners or all abandoning wave clearing to chase one boss. Do not base the plan on unlimited revives: lost damage and uncontrolled enemy accumulation remain dangerous even when teammates are present.
Rewards and what is actually guaranteed
After the attempt, collect the Remnants of Legend container and any earned bonus rewards. The loot can include Legendary and Unique equipment, Talisman Seals and Charms, materials and Gold. Mythic Unique outcomes are possible, not a guaranteed payment for entering or reaching a tier stated in this guide.
Treasure Goblins encountered during the run can contribute bonus loot. Their value does not justify sacrificing an otherwise stable attempt. Progress through harder waves improves the reward opportunity, but Blizzard has not supplied a complete public per-tier loot table used here. A good run may still produce no upgrade for your particular build.
Use the Merchant, Blacksmith and Stash available after combat to sort the haul inside. Leaving first can abandon rewards or close your route back. Check the filter and ground before exiting, especially if your bags filled. There is no promised weekly cache, fixed Resplendent Spark, pet or mount attached to every ordinary completion.
The optional portal cosmetic
Howling Mouth of Madness is a separate hidden cosmetic goal associated with Only the Mad Run Free. The community-solved sequence uses these shrine windows in one attempt:
Tier window | Shrine | Purpose |
1-9 | Protection | First step |
10-14 | Artillery | Second step |
15-19 | Lethal | Third step |
20-24 | Channeling | Fourth step |
Complete the sequence, then defeat the special shadowy Treasure Goblins that appear. Activating four shrines in any order is insufficient. Plan this from the opening waves; a late decision after passing the first window cannot repair the sequence. The portal is not a random Mythic drop, and this puzzle does not require reaching wave 150.
When repeating is worth it
There is no advertised weekly reward lockout for the ordinary activity in the sources checked. Access, rather than a weekly schedule, limits repeat attempts: every new run needs a fresh Trace opportunity. Do not assume an arena reset creates a free replacement entry or that a party rotation generates keys.
Use the next attempt after a meaningful improvement to the weakness that ended the previous one. If enemies accumulated while you remained healthy, improve clear speed or targeting. If damage remained strong but one overlap killed you, improve defensive uptime and movement. If your goal is a particular Unique, a targetable source may be more dependable than waiting for this rare arena.
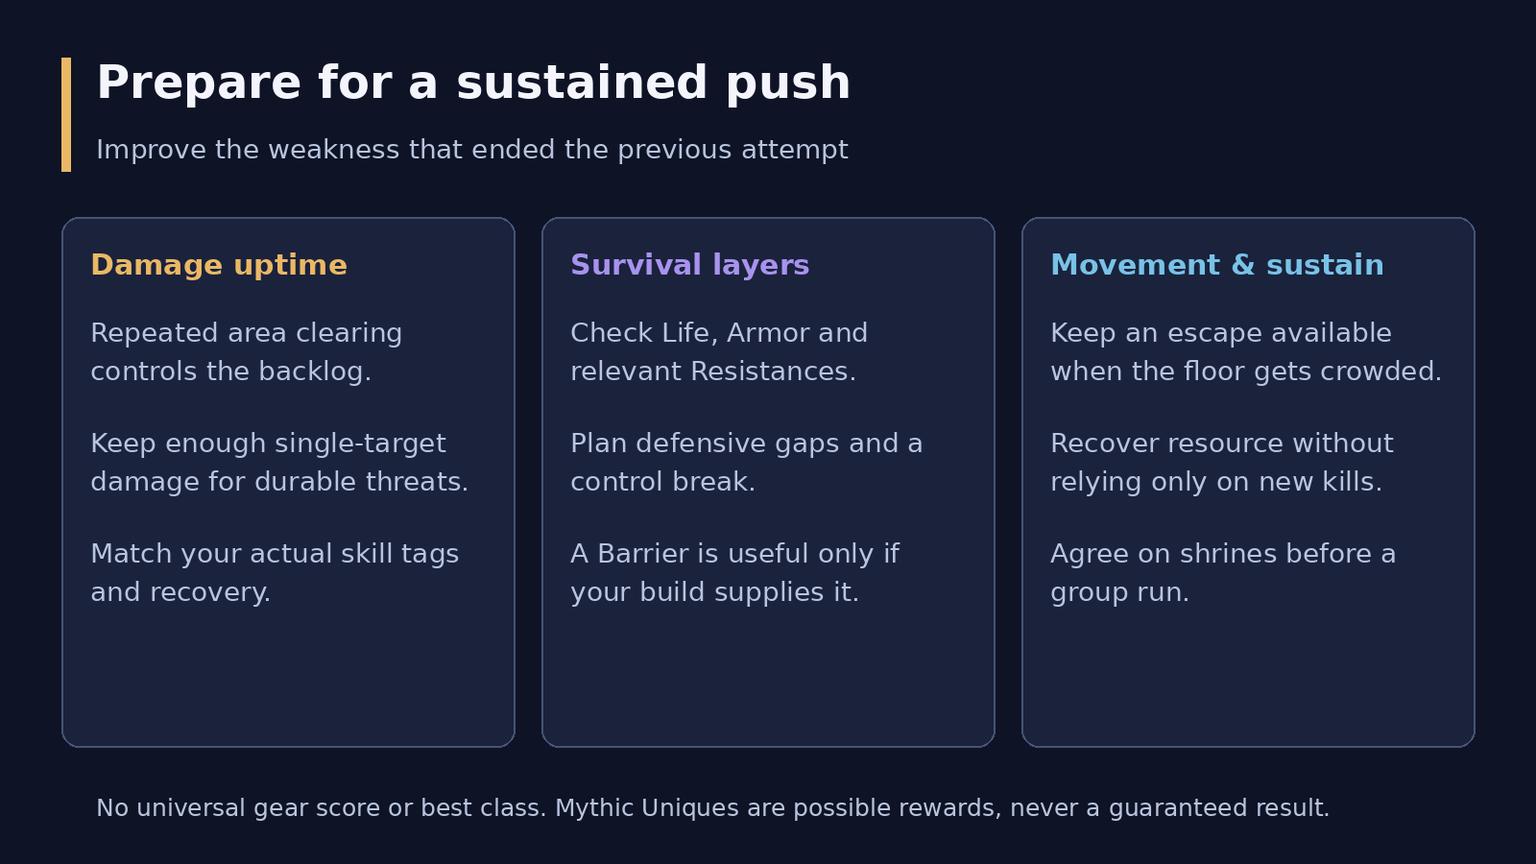
Preparation priorities: sustained damage, maintainable defenses and movement with resource recovery.
FAQ
How do I unlock Echoing Hatred?
With Lord of Hatred access, reach Temis, obtain a Trace of Echoes and follow the access quest to Seer Nevma and the Sightless Eye. Inside, use the Waking Call when ready.
Does every attempt need a new material?
Yes. One Trace supplies one attempt; completing the introduction does not unlock unlimited free runs. Elites, Champions and Whisper Keys Caches offer random opportunities for another Trace.
Can I play solo, and is it still endless?
Solo and group play are supported. The current maximum is 150 waves, so early descriptions of an uncapped mode are outdated. Overwhelm or a solo death can end the push earlier.
Are Mythic Uniques guaranteed?
No. They are possible loot outcomes. The shrine puzzle instead provides a specific portal-cosmetic objective when its sequence and enemy kills are completed correctly.