Diablo 4 The Tower Guide to Runs Rankings and Rewards
The Tower is a recurring competitive endgame activity on the Seasonal Realm. A run combines randomized floors, a progress bar and a final boss under one ten-minute limit. Your completed difficulty tier and clear time determine your result. It is a separate activity from the Pit, even though both use the Artificer's Obelisk.
Checked October 22, 2026: Season 15, Season of Hell's Legacy, live patch 3.2.3. The Tower is live and left beta in Season 14. It is not a Season 15-only mechanic, but it is also not an always-open Eternal Realm dungeon. Competition follows seasonal rounds and availability windows. The activity belongs to the base game; expansion classes, systems and access to Skovos retain their own ownership requirements.
Unlock the Tower and choose the correct entrance
Complete Season Rank II, including its required challenge, on a seasonal character. Then visit the Artificer's Obelisk in Cerrigar and select the Tower rather than the Pit. If it remains locked, read the requirement displayed by the current client and finish the outstanding rank or campaign condition. Reaching a suggested character level alone does not replace the unlock.
Older walkthroughs name Hellish Descent and its Season 11 level-50 recommendation. Do not treat that old quest and level as an additional universal Season 15 requirement: seasonal objectives have changed. Follow the current Season Rank panel rather than a January checklist.
Expansion owners can also use the Obelisk in Temis where available. For claiming rewards in Season 15, however, go to the Artificer's Stash next to the Obelisk in Cerrigar: the Stash was removed from Temis. An older screenshot of the Temis reward location is no longer a reliable direction.
You can enter solo or in a party of two, three or four. Solo Self Found characters have their own Normal and Hardcore boards and cannot join parties. A normal solo attempt does not make a non-SSF character eligible for the SSF ladder.
Floors and difficulty tiers are different things
A Tower attempt is a five-floor randomized dungeon, not a persistent climb through 150 physical floors. Floor layouts and monster families vary. Follow the route onward while building the shared progress bar; the objective is not to kill every isolated enemy or complete an independently timed challenge on each floor.
A tier is the difficulty selected for the whole attempt. The current ceiling is Tier 150; that number does not describe the floor count. Higher tiers demand more damage and stronger defenses. Do not assume the same numerical tier in the Tower and the Pit produces the same encounter or clear time.
Pit difficulty tiers you have already unlocked can make Tower tiers available, and the Tower can also unlock higher tiers through its own successful runs. You do not have to repeat every lower tier before another attempt at an already available difficulty. Check the tier selector after a clear rather than applying an old Pit time-to-unlock formula to the Tower.
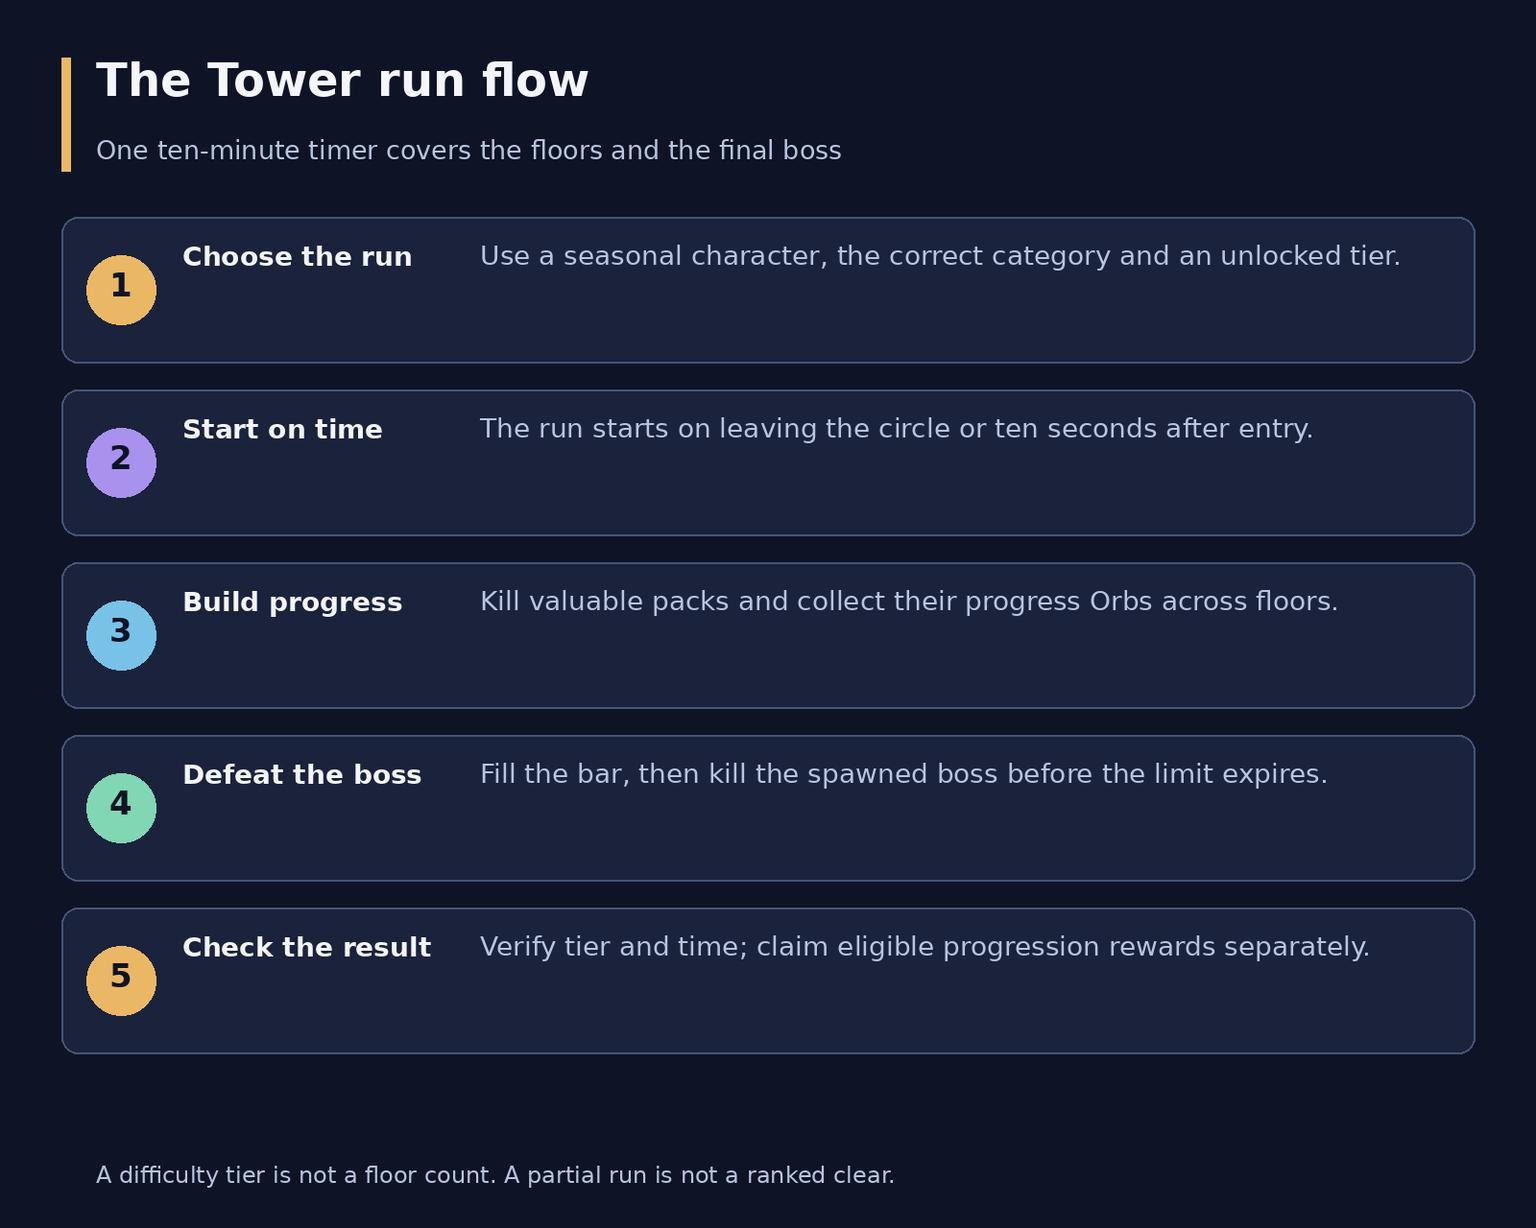
One shared timer covers the climb and the final boss.
Unlocked difficulty and a completed record are distinct from progress inside the current run. A revival checkpoint is not a saved stage you can use to resume a timed attempt tomorrow. New attempts generate a new run; leaderboard resets also start a new competition. Do not assume personal reward claims or rankings transfer unchanged into the next season.
Timer progress and successful completion
You have ten minutes for the entire run, including the boss. The timer starts when you leave the initial circle or ten seconds after entering, whichever occurs first. Set skills, consumables and party responsibilities before entry; standing in the circle does not provide unlimited preparation time.
Kill enemies and collect progress Orbs from Elites, Champions and Goblins. These Orbs advance the progress bar; they are not a promise of extra seconds. Enemy score was retuned with the 3.0 changes, so avoid estimating current progress from an old universal XP-to-score formula. Prioritize valuable packs that your build can kill efficiently, then collect their Orbs before moving on.
Once enough progress is earned, a random Tower boss appears. Defeat it before the limit to finish and submit a result. Filling the bar without killing the boss is not a ranked clear. Neither a high partial score nor reaching a later floor substitutes for successful completion.
The route is combat through randomized floors, not a fixed Infernal Hordes wave schedule. There is no confirmed universal bonus-objective system that adds time after each elite, nor a separate ten-minute allowance per floor. Plan a margin for the boss instead of exhausting the clock on low-value stragglers.
Death checkpoints and the boss
In Normal mode, a death can be followed by revival, but recovery and returning to combat consume valuable time. The live launch rules prevent revival on a previous floor. A death does not turn the run into a fresh ten-minute attempt, and repeated failures can leave too little time for a valid clear.
Player reports describe additional time penalties, but a verified current Season 15 penalty schedule was not established. Do not import the Pit's old 30/60/90-second rule or promise a penalty-free Tower. Read any displayed penalty and judge the attempt by the remaining time. Hardcore retains permanent character death, so an experimental push carries a much greater consequence.
The final encounter is selected from the current boss pool. Environments and bosses were expanded after launch; old beta exclusions are not a complete current pool. There is no reason to prepare for only one named guardian or expect a separate boss on every floor.
Keep a mobility or control-break option available for dangerous telegraphs. Move out of lethal ground effects, separate adds when they obstruct your damage, and concentrate cooldowns during a safe damage or stagger window. These are practical tactics, not a claim that every boss has the same adds, immunity phase or stagger pattern. If packs die quickly but the boss survives the timer, fix sustained single-target damage and resource recovery before raising the tier.
Use Pylons without wasting their duration
Destroy the protective structure to access a Pylon. A run offers four: the first three cover Power, Channeling and Speed in randomized order, while the fourth repeats one of those options. They are temporary combat tools, not extra floor checkpoints.
Power supports a damage window. Channeling supports rapid casting through reduced costs and cooldowns, including resource support for draining builds. Speed supports movement and aggressive repositioning. Do not copy pre-release numerical bonuses: Pylons were adjusted for live, including lower Power scaling and changes to Speed and Channeling.
Activate a Pylon when you can immediately use the buff on a meaningful fight. Running through empty corridors while an important bonus expires wastes the opportunity. In a group, agree on activation and route direction so teammates can benefit from the same push rather than fighting scattered packs.
Prepare a build that can finish both halves
A farming setup usually emphasizes movement, broad area damage and short preparation. A Tower push setup must also defeat the boss and survive stronger incoming attacks. A build that clears packs impressively but stalls without kills or resource-return triggers may fail at the final encounter.
Priority | What to test | Useful adjustment |
Area damage | Progress gain in dense packs | Improve coverage and target selection |
Single target | Boss time after a clean route | Restore sustained damage and debuff uptime |
Mobility | Time spent traveling or escaping | Keep movement available for the next hazard |
Defense | Deaths and forced retreats | Review Armor, resistances, Life and damage reduction |
Sustain | Resource or cooldown gaps | Test recovery without relying on pack kills |
Crowd control can make dangerous groups easier to handle, while Unstoppable or another supported control-break tool helps you recover from disabling effects. Healing and barriers provide recovery but do not justify standing in lethal attacks. Check your actual defenses at the selected tier instead of applying obsolete Armor or resistance thresholds from another patch.
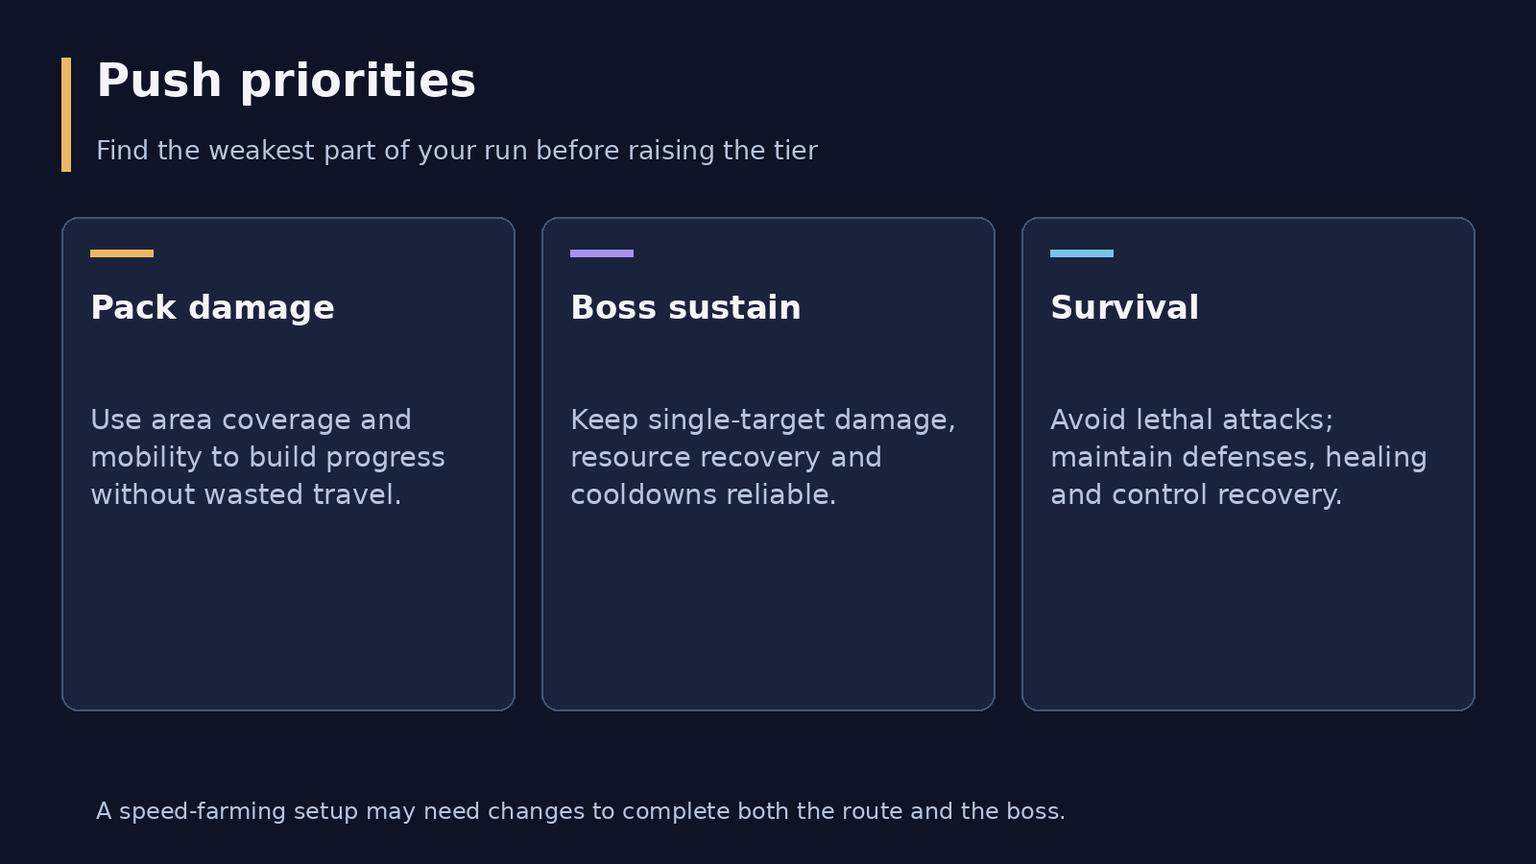
Balance pack damage, boss sustain and survival before chasing a higher difficulty.
Bring suitable consumables if your build uses them and verify their current effect and duration. No fixed DPS number, gear score or universal Mythic requirement qualifies every class for the Tower. Use the build viewer on a recent result from your own class and category to inspect the recorded equipment and skills; do not assume you can reproduce a record without its gear, progression and execution.
How leaderboard placement works
Rankings prioritize the highest completed Tower tier. Clear time separates results at the same tier. A fast lower-tier clear does not outrank a successful higher-tier clear simply because it was quicker. Once you reach the ceiling, time becomes the main practical improvement target among equal-tier results.
Solo ladders are separated by class; party ladders use two-, three- and four-player categories. Normal and Hardcore are separate, and SSF has dedicated categories. Compare the same class, mode, party size and current round. The displayed date is useful context, but no additional tie-break rule for exactly identical times is asserted here.
View the official standings through the Obelisk or Collections. Cross-platform settings can limit the ranking view. External trackers are convenient references, but their coverage and update interval can differ from the in-game table. The build snapshot records the setup used for that result, not necessarily the player's current equipment.
Rounds reset during the season, and a new season starts a new competition. Two-week rounds were the original schedule, while later updates changed opening timing after patches. Use the current in-game countdown for the deadline and availability; January dates are not a Season 15 calendar.
Current rewards and where to claim them
The Tower has rewards now. The launch-era statement that it provides only prestige is outdated. Separate personal progression rewards from rewards tied to a final leaderboard position.
Reward track | How it is earned | What to expect |
Artificer's progression | First completion of higher Tower tiers earns Favor | Claim eligible Treasures through the Artificer's Stash |
Progression milestones | Participation and Tier 100-or-higher thresholds | Check the current milestone panel for the attached reward |
Cycle placement | Finish within a qualifying leaderboard band | Seasonal Halo cosmetic and Prestige Title |
Season result | Highest qualifying rank from the previous season | Emblem on first login in the following season |
Treasures of the Artificer include Lore Books and items with guaranteed Greater Affixes. Current Stash rewards also include gear, runes, materials and Talisman items. A guaranteed Greater Affix does not guarantee a particular Unique, Mythic Unique, slot or build-defining power. Check the preview for the reward you are claiming.
Favor for first-time higher-tier completion is not an endlessly repeatable payout for clearing the same easy tier. The available material rewards also do not establish the Tower as an Obducite farm or a guaranteed source of Season 15 currency. For predictable farming, choose the activity actually associated with the material or item you need.
The placement bands are rank 1, ranks 2-10, 11-100, 101-500 and 501-1000. Season 15 Prestige Titles for those bands are Doom of the Primes, Nemesis of the Primes, Scourge of the Primes, Enemy of the Primes and Menace of the Primes respectively. Halos become more elaborate in the higher bands. These are positions on a leaderboard, not difficulty tiers.
Placement rewards are granted after a reset at the next login, based on the applicable best rank. Titles and Halos last through the season and reset for the next one; the following season's Emblem records the previous season's achievement. Confirm the actual claim state in game rather than treating the momentary position during an unfinished cycle as an awarded prize.
Farming progression and record attempts
For learning, choose a tier you can finish consistently with a boss margin. Repeat it to improve routing and learn what kills you. For personal progression, raise the tier when several clean runs show spare time and stable defenses. If improvement depends on an unusually favorable Pylon or a perfect boss roll, the next tier may be premature.
For a leaderboard attempt, select the intended category and a push setup before entry. Track progress time, boss time, deaths and resource stalls separately. Change the weakest part first. This is a practical evaluation method, not an official score formula.
A coordinated party can combine damage, control and support, but it creates a separate result and needs shared routing. Solo gives a clearer test of your own build. Neither is automatically better for rewards or easier at every tier, and SSF cannot use the party option.
Activity | Main purpose | Important distinction |
Tower | Seasonal competition and personal milestones | Ten-minute clear; tier and time determine ranking |
Pit | Glyph development and scaling endgame runs | Its progression and rewards are separate from Tower placement |
Nightmare Dungeons | Dungeon objectives and their reward systems | Do not apply their affixes or completion rules to the Tower |
Infernal Hordes | Wave-based combat and its reward choices | Its resource and reward structure is not a Tower score |
Kurast Undercity | Timed runs with its own targeting systems | Its time extensions do not define Tower timer rules |
Waking Nightmares, older Challenge Dungeon previews and Season 14 Pandemonium Ruptures are also separate systems. Choose the Tower when you want a milestone or competitive result; choose your farming activity by its actual current rewards.
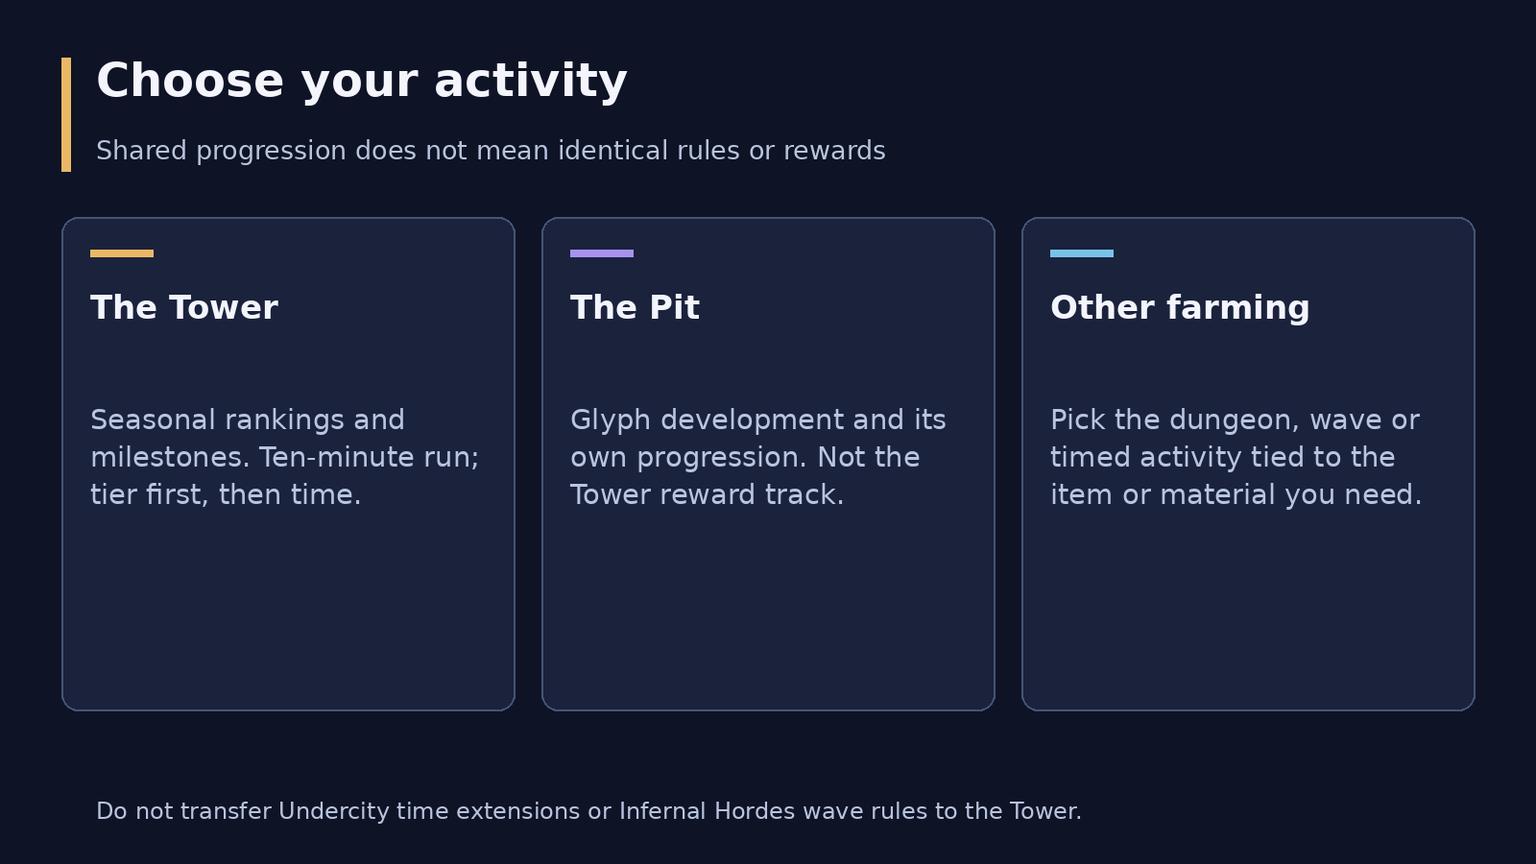
Shared endgame progression does not make the activities' timers or rewards interchangeable.
Frequently asked questions
How do I unlock the Tower
Complete Season Rank II and its required challenge on a seasonal character, then select the Tower at the Artificer's Obelisk in Cerrigar. Follow any remaining condition shown by the live client instead of an old season's level or quest checklist.
Can I play the Tower solo
Yes. Solo records are class-based, while parties of two, three and four have separate categories. Normal, Hardcore and SSF distinctions matter; SSF characters cannot join parties.
How do floors and the timer work
The run uses five randomized floors and one ten-minute limit including the boss. It starts when you leave the opening circle or ten seconds after entry. Fill progress, then kill the spawned boss before time expires.
How is the Tower different from the Pit
The Tower focuses on seasonal rankings and personal milestone rewards. The Pit has its own progression and Glyph upgrades. Sharing an Obelisk does not make their reward pools, timing or completion rules identical.