MoP Classic Siege of Orgrimmar Raid Guide: All 14 Bosses
Siege of Orgrimmar rewards a raid that assigns jobs before pulling. The early encounters test target control and dispels; the later fights demand balanced split groups, reliable conveyor teams and clean Garrosh transitions. Treat those assignments as part of preparation, alongside equipment and consumables.
This guide covers MoP Classic Normal and Heroic. The boss sections give a Normal progression plan and identify important Heroic additions. Numbers of assigned players and cooldown choices must fit your 10- or 25-player roster; a strategy designed for one size is not automatically suitable for the other.
Opening date and entrance
Siege of Orgrimmar opened globally on June 4, 2026, during Phase 5. The phase update and the raid opening are separate events. All fourteen encounters belong to the raid; there is no Classic LFR wing-release calendar.
The level 90 entrance is inside the shattered pillar in front of Mogu'shan Palace in the Vale of Eternal Blossoms, on the pillar's southwest side. Both factions start here, even though much of the raid takes place in Durotar. Going to Orgrimmar's city gates does not put you at the instance entrance.
Difficulties and weekly saves
Normal and Heroic each support fixed groups of 10 or 25. MoP Classic has no Flex, LFR or Retail Mythic version of this raid, and no scaling to an arbitrary roster size.
Plan one weekly progression path. Normal/Heroic and 10/25 share boss progress; killing a boss on Normal does not leave a second Heroic kill of that boss available that week. Different bosses can be killed on different difficulties within the compatible save. Heroic commits the group to a particular raid ID, so do not assume you can freely join another Heroic group's instance afterward.
Check Raid Info and the instance warning before accepting an advanced save. A later checkpoint is not a fresh chance at earlier bosses. Agree on loot distribution before the first kill, and keep bonus rolls separate from ordinary raid loot. This is not Retail's repeatable loot-based run system. PTR daily resets and its teleport-to-any-boss NPC were testing conveniences, not a live skip route.
Prepare a roster that can perform the jobs
Blizzard does not set a universal item-level gate for a manually formed Normal raid. As an editorial starting point, a mostly 522-528 equipped group with appropriate weapons, gems, enchants and working set bonuses is a more sensible learning roster than a collection of fresh 496 characters. It is a recommendation, not a guaranteed clear or an official requirement. Heroic preparation depends on demonstrated Normal performance and the chosen encounter.
Timeless Isle 496 tokens and selected 535 Burden items fix weak slots. Current Celestial Dungeon Season 3 offers targeted 528 rewards; strong Throne of Thunder pieces remain useful. Do not break a valuable set bonus merely to raise the average number on the character sheet.
Two tanks are the usual foundation, with flexible healing coverage and a balanced melee/ranged roster. A separated Dark Shaman strategy can use a third tank. Have enough healers on both Spoils sides and enough mobile burst DPS for alternating Blackfuse belt teams. Assign combat resurrection, raid cooldowns, personal defensives, interrupts, dispels and backups before they are needed.
Bring role-appropriate flasks, food, potions and repaired gear. Confirm that everyone can see encounter debuffs, friendly NPCs during Norushen tests and the extra-action button. Clear nearby trash under control, especially before crowded arena pulls; a saved cooldown is worth little if an accidental extra pack kills the group.
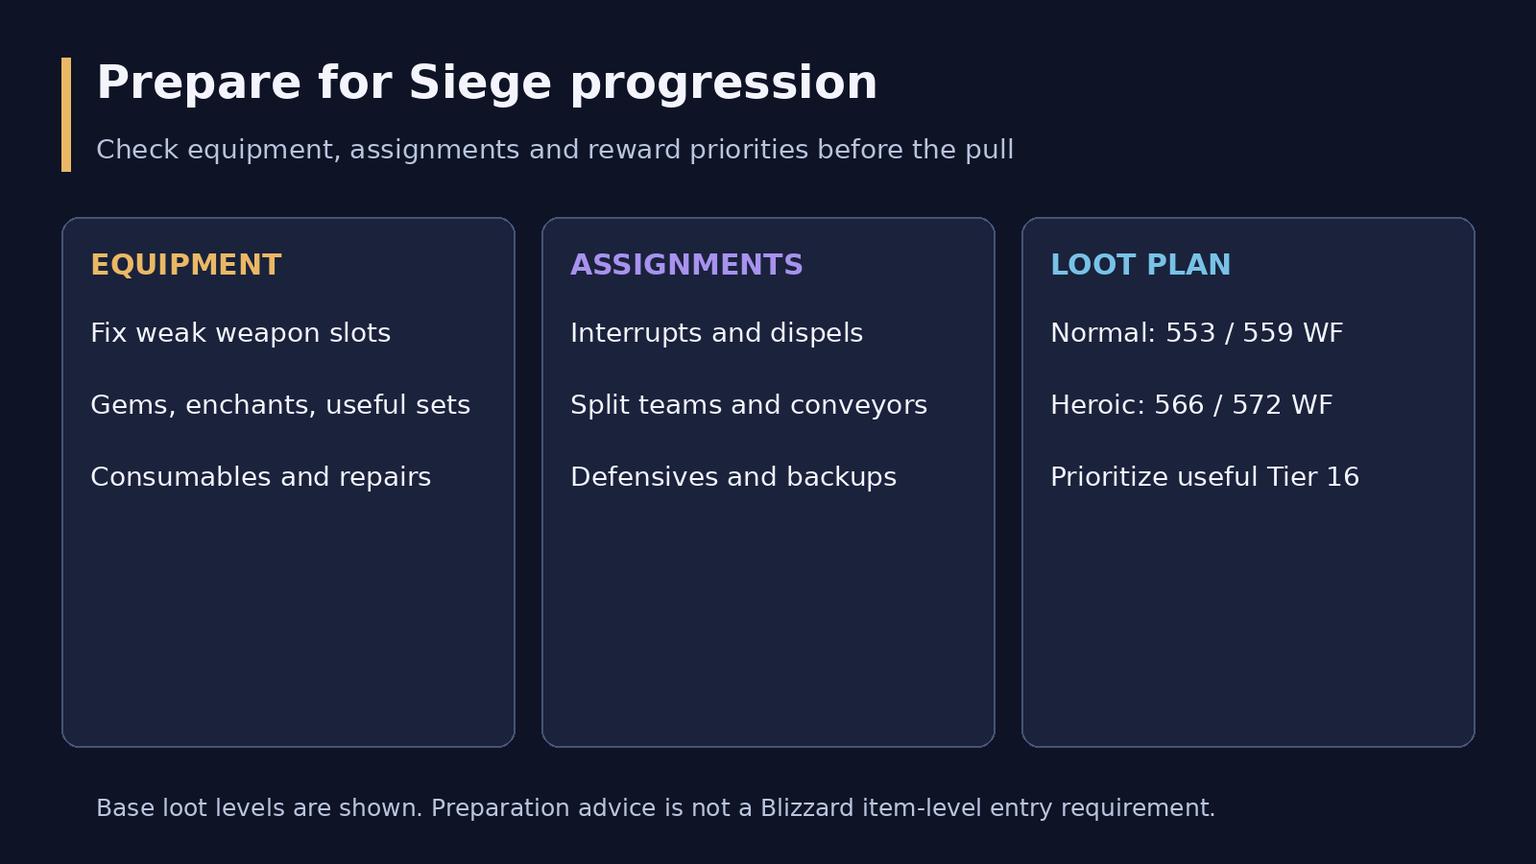
Three preparation priorities: useful equipment, named assignments and a deliberate loot plan.
Boss order and progression
The usual route is Immerseus, The Fallen Protectors, Norushen, Sha of Pride, Galakras, Iron Juggernaut, Kor'kron Dark Shaman, General Nazgrim, Malkorok, Spoils of Pandaria, Thok the Bloodthirsty, Siegecrafter Blackfuse, Paragons of the Klaxxi and Garrosh Hellscream.
There is one important route choice: after Malkorok, you can head to Spoils or Blackfuse; Thok requires Spoils first. The list below uses the common Spoils-then-Thok route. The named sections of the raid describe its geography, rather than separate queued wings with independent saves.
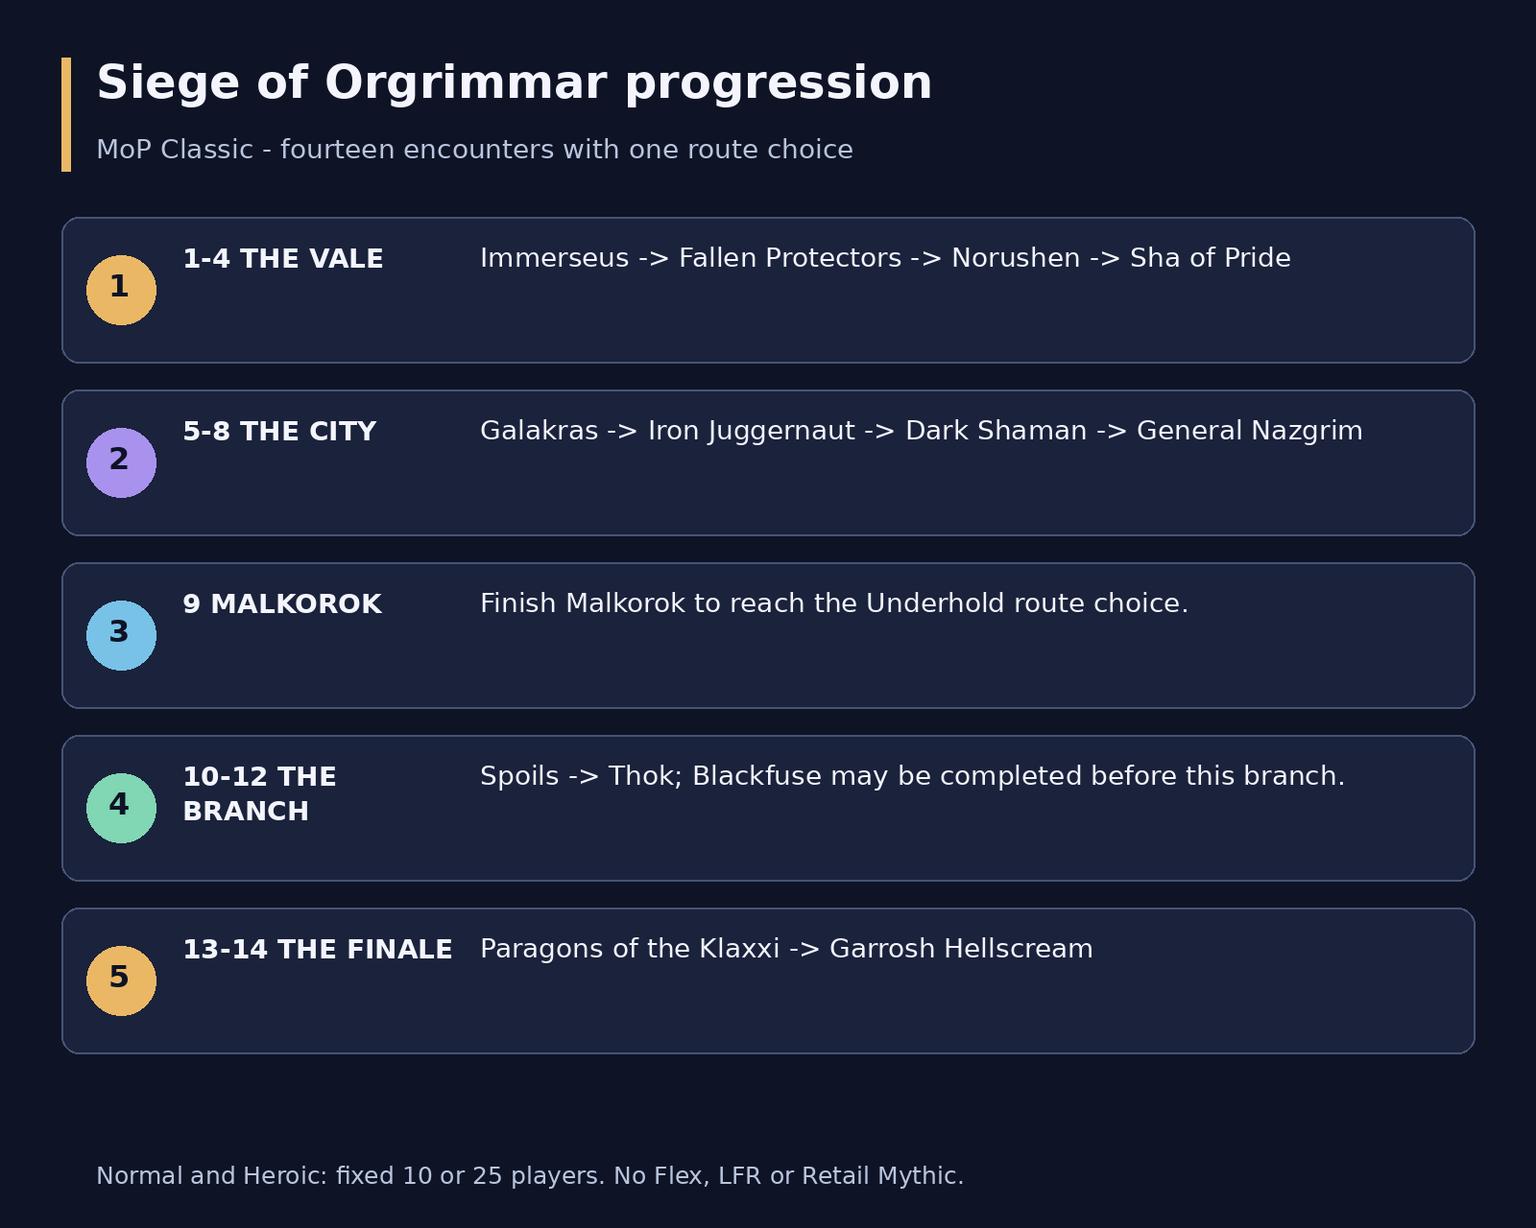
The fourteen-boss route, including the choice after Malkorok and the Spoils prerequisite for Thok.
The Vale and the gates
1 Immerseus
The win condition is removing Corruption through repeated split phases. Tanks alternate Corrosive Blast and keep its frontal away from the raid. DPS cover assigned sectors and kill dark Sha Puddles; healers restore friendly Contaminated Puddles before they reach the center.
Leave ground pools and dodge Swirl. Reserve healing defensives for leaking puddles. There is no central interrupt or dispel assignment; reaching zero boss health once is not victory. On Heroic, the spare tank collects Congealed Sha from Swelling Corruption. Uncovered puddles and uncontrolled adds are the usual failures.
2 The Fallen Protectors
Push Rook, He and Sun through their 66% and 33% Desperate Measures one at a time, then finish them together. Tanks control Rook's frontal and turn away from He during Gouge. DPS interrupt Sun's Sha Sear, kill the active manifestations and transfer Mark of Anguish to the assigned durable player.
Healers dispel Shadow Word: Bane and plan cooldowns for the intermissions. Use Sun's protective field during Dark Meditation. Avoid overlapping multiple Desperate Measures or finishing one protector far ahead of the others. Heroic makes repeated intermissions and their damage less forgiving.
3 Norushen
You fight the Amalgam of Corruption while Norushen provides purification tests. Starting Corruption reduces damage against the Amalgam. Assign an orb order that purifies damage dealers while leaving tanks and healers outside; completing a test also releases enemies into the main room.
Tanks swap for Self Doubt; inside their test, interrupt Hurl Corruption, avoid Titanic Smash and rotate defensives. Healers sustain the raid and, in their test, heal allies and dispel Lingering Corruption. DPS attack test Essences from behind, then immediately handle outside adds. Assigned players with spare Corruption capacity absorb Residual Corruption. Dodge Blind Hatred. Sending too many essential players inside or ignoring the released adds causes wipes on either difficulty.
4 Sha of Pride
Avoid unnecessary Pride before Swelling Pride. Tanks swap when Wounded Pride is applied. Assign prison-release positions and kill Manifestations, interrupting Mocking Blast. Gift of the Titans lets healers remove Mark of Arrogance without the normal Pride penalty; communicate dispels instead of blindly cleansing everything.
At higher Pride, move away from explosions, reach your Projection and keep an Aura of Pride away from allies. At 30%, Pride resets and the damage race begins: use healing and offensive cooldowns deliberately. Heroic adds rift-closing and Banishment rescue duties. Failed prison releases, uncontrolled Pride and late fragment kills cost more than lost boss damage.
5 Galakras
Split a tower team from the ground force, keeping a tank and healing coverage with each. Interrupt Tidal Shaman healing, kill Healing Tide Totems and stop Bonecrushers attacking friendly leaders. Clear both towers and coordinate their anti-air guns to bring Galakras down; sending everyone upstairs leaves the ground event unprotected.
After landing, tanks swap and the targeted player positions Flames of Galakrond through the assigned interception line. Healers rotate cooldowns as raid damage rises; DPS finish the boss before it overwhelms them. Heroic also requires defending the tower-opening demolition NPCs. Ordinary dispels do not replace add control or correct flame positioning.
6 Iron Juggernaut
During Assault, tanks swap the increasing fire vulnerability and keep the frontal away. The spare tank or assigned protected players stomp Crawler Mines before they explode across the raid; use a defensive and expect the launch into the air.
During Siege, position against suitable terrain for Shock Pulse and rotate healing cooldowns. DPS and healers avoid the laser and keep it out of tar, which explodes on contact. This is a movement and survival check, without a priority interrupt or dispel rotation. Heroic's extra hazards make careless mine handling and overlapping fire especially costly.
7 Kor'kron Dark Shaman
Kill the wolves, then manage two bosses with shared health. Tanks plan swaps for Froststorm Strike, kite Kardris's slimes and place Haromm's Ashen Wall where it does not seal the raid's escape route. Ranged DPS handle slimes from a safe distance.
Healers maintain Toxic Mist targets and reserve raid protection for Falling Ash. Move out of storms, tornadoes and the marked impact area; do not treat Toxic Mist as a routine dispel. Heroic adds Iron Tomb and Iron Prison: spread for tombs and arrange an absorb or defensive for Prison's expiry. Separating the bosses can simplify overlaps, but needs the matching tank/healer assignment. Lost space is the common wipe trigger.
8 General Nazgrim
Control Rage rather than tunneling the boss. Tanks swap Sundering Blow and pick up adds. DPS stop feeding Defensive Stance, remove banners and healing totems, interrupt Warshaman heals and Arcweaver casts, and remove Earth Shield from enemies where possible. Fixated players face Assassins rather than exposing their backs.
Healers watch Bonecracker targets and plan for War Song; tanks need a defensive or external for Heroic Execute. Avoid Shockwave's marked ground effects. Heroic Sniper targets point its shots away from allies. Ignoring one healer add can undo far more progress than an early boss burn gains.
The Underhold and the final stretch
9 Malkorok
Ancient Miasma converts healing into Ancient Barrier, so healers must track shields, not just health. Tanks swap Fatal Strike; the raid spreads to cover Imploding Energy, with one healthy, shielded soaker per assigned impact.
Remember the last three Arcing Smash sectors and leave them before Breath of Y'Shaarj repeats those attacks. For Normal Blood Rage, use the planned group soak and healing cooldowns; Displaced Energy targets leave allies before a coordinated dispel. A tank-only soak is a separate defensive plan, not a default shortcut. Heroic adds dangerous orbs and Living Corruption. Empty soaks, weak barriers and forgotten smash sectors wipe raids.
10 Spoils of Pandaria
Create two genuinely balanced teams, each with a tank, healers, interrupts and enough damage. Each completes a mogu and a mantid room. Open a planned mixture of crates, earn 50 energy per room, then operate the lever before the timer expires. One overloaded side cannot be rescued by the other team's unused damage.
Tanks control crate openings and face enemies safely. DPS kill dangerous casters, interrupt heals and handle Matter Scramble locations. Set to Blow carriers move away to drop bombs; healers keep each local team stable. Pandaren spirit crates provide role buffs, not energy. Heroic's Unstable Sparks require coordinated cross-room attention. Opening too much at once is the classic failure.
11 Thok the Bloodthirsty
During the stationary phase, stand at Thok's side, away from mouth and tail. Tanks swap the relevant frontal debuff. Deafening Screech interrupts casting: healers use instant spells and planned cooldowns rather than repeatedly losing long casts. The raid's low-health clustering triggers the chase, so agree when to transition.
During Frenzy, fixated players kite along the cleared route; tanks collect the Jailer, DPS kill it, and the key opens the chosen prison to restart the stationary phase. Dispel Corrosive Blood during the poison cycle. Heroic adds bats and a yeti to the plan. A fixated player crossing the group or a late prisoner release often ends the attempt.
12 Siegecrafter Blackfuse
Assign alternating conveyor teams and a weapon target for each wave. They enter through the pipe, dodge purification beams and destroy one deactivated weapon; the remaining weapons become arena mechanics. Pattern Recognition prevents simply sending the same ordinary team every wave. Missing a belt assignment is a raid problem, not just that team's lost damage.
Tanks coordinate Electrostatic Charge and kill Automated Shredders away from Blackfuse's repair range, using their damage window and available environmental damage. Healers cover tank spikes, Overload and magnets. DPS kill mines; everyone places sawblades deliberately and kites lasers away from allies. Heroic overcharged weapons demand a separate wave plan. Interrupts and dispels cannot rescue failed weapon selection.
13 Paragons of the Klaxxi
Nine paragons are defeated with three initially active: Skeer, Rik'kal and Hisek. Surviving active paragons heal when one dies, so focus the called target instead of padding with cleave. Watch Ready to Fight for the next arrival; assign the kill priority before the pull rather than improvising a supposed weekly random rotation.
Tanks separate dangerous pairings, especially Skeer/Rik'kal and Xaril/Kil'ruk, and use active mitigation against Injection and Caustic Blood. DPS stop Skeer's healing bloods, break Korven's amber and damage the kunchong channeling Mesmerize to rescue its victim. Assigned players share Hisek's Aim; obey Xaril's toxin color rather than dispelling at random. Healers cover Aim and reaction bursts. Heroic needs a stricter target/cooldown plan. Unfocused damage and incompatible tank debuffs are frequent failures.
14 Garrosh Hellscream
Normal has three main phases with realm intermissions; Heroic adds the Stormwind finale. In phase one, use one tank on Garrosh and one on adds. Assign a DPS player to kill the chosen Siege Engineer so only the planned Iron Star is released. Interrupt Farseer healing, position adds for the star and move out of its path. Healers prepare for the explosion. Place Desecrated Weapons near agreed edges, preserving later movement space.
At 10%, Garrosh heals and the realm sequence begins. Kill the intermission enemies quickly to stop his energy gain, then avoid Annihilate's cone while using healing protection for its raid damage. Extra energy empowers later mechanics, making slow intermissions a future wipe rather than merely a longer fight.
In phase two, tanks swap Gripping Despair. Group appropriately for Touch of Y'Shaarj, interrupt controlled players and damage them enough to free them without killing them. Move away for Empowered Whirling Corruption and kill its Minions separately: nearby deaths strengthen other Minions. Reserve raid defensives for Whirling damage and return promptly to mind-control assignments.
The next 10% transition starts phase three at 25% health with fully empowered abilities. Empowered Touch needs direct interrupts because ordinary crowd control is ineffective; empowered weapons cannot simply be destroyed. Continue planned placement and add control while burning the boss.
Heroic's realm adds require stricter interrupts, and the fight continues into a fourth phase in Stormwind. Assign rotating Malice soakers, avoid Bombardment and have a designated player guide the Unstable Iron Star into Garrosh during Manifest Rage. Malice is not dispellable. Unplanned clustering, missed interrupts and a star reaching the wrong place defeat otherwise strong damage output.
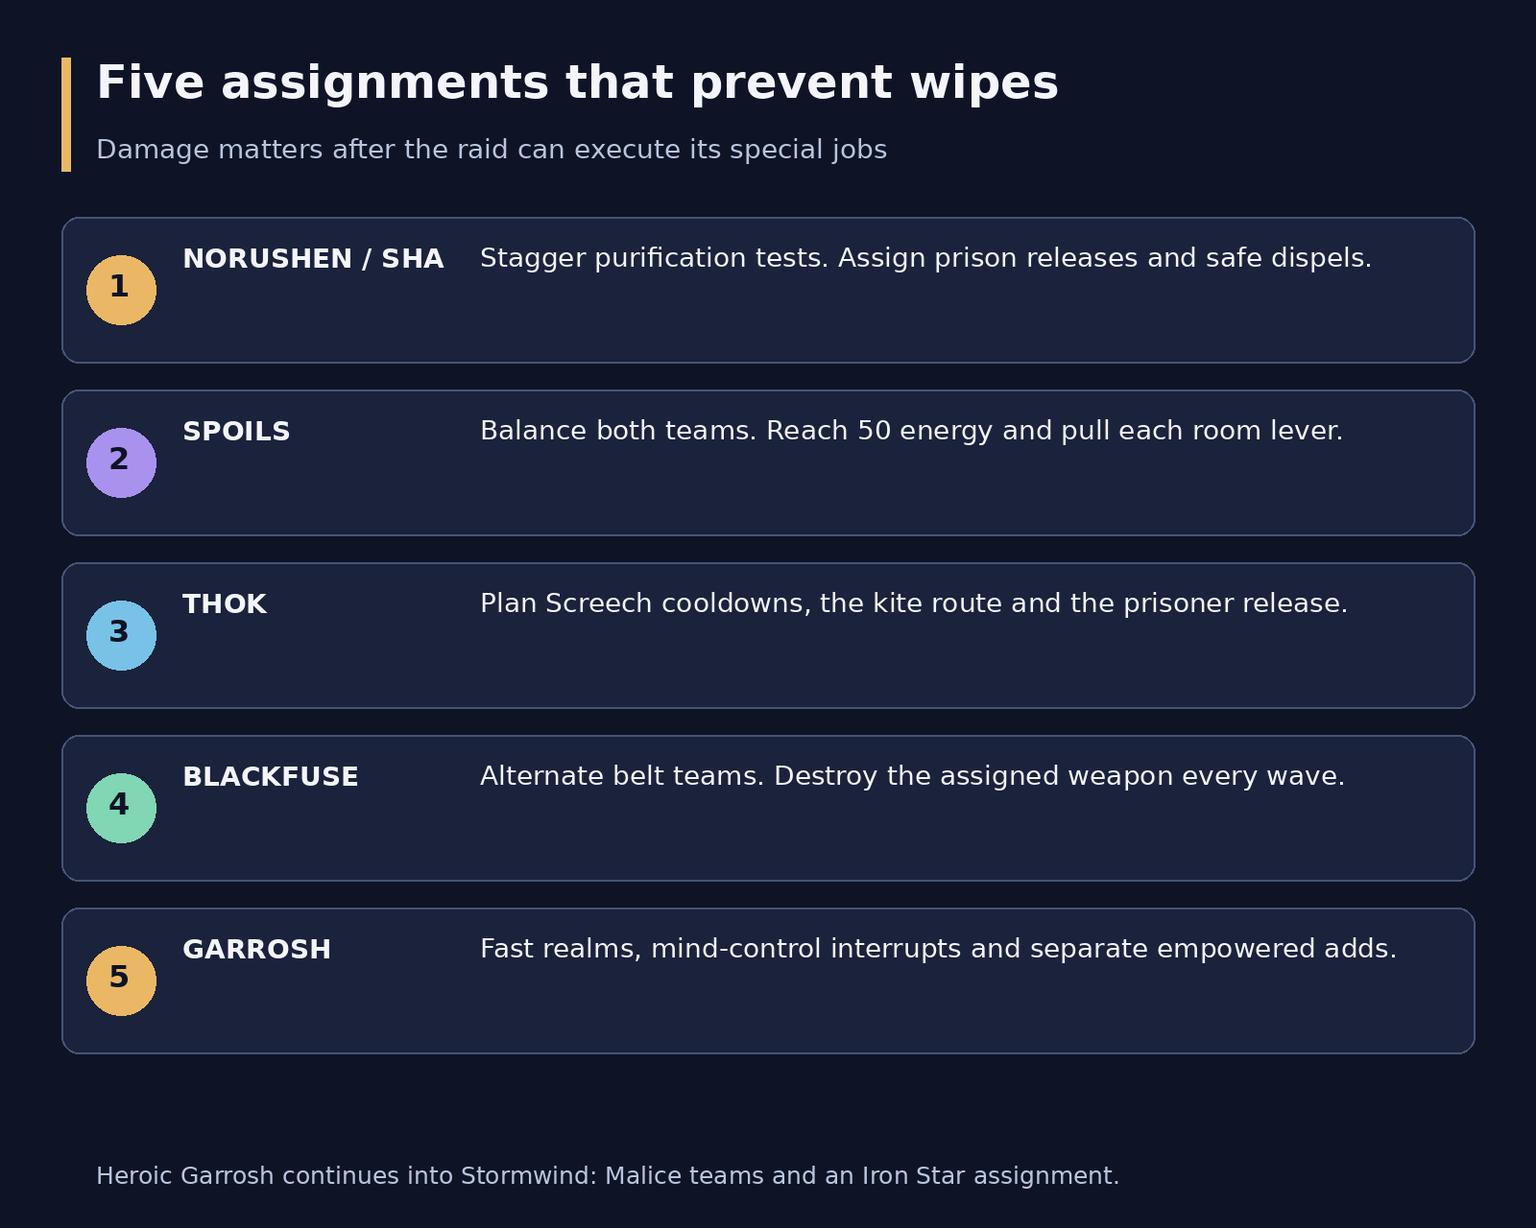
Five assignment checks that prevent wipes: purification, split rooms, chase phases, conveyors and Garrosh control.
Loot and Tier 16 priorities
Difficulty | Standard base loot | Warforged base loot |
Normal 10 or 25 | 553 | 559 |
Heroic 10 or 25 | 566 | 572 |
Warforged is a random stronger version, not another difficulty. Classic's upgrade paths allow ordinary non-heirloom Siege gear to gain 14 levels and Warforged gear to gain 8, bringing comparable pieces to the same final item level. Keep base drops separate from upgraded results. Garrosh's account-bound heirloom weapons are listed at 569 on Normal and 582 on Heroic at level 90; they are excluded from that ordinary upgrade comparison.
Tier 16 slot | Token source | Planning value |
Chest | Sha of Pride | Early route to a useful set bonus |
Gloves | General Nazgrim | Another accessible token checkpoint |
Helm | Thok | Requires the Spoils branch |
Shoulders | Blackfuse | Belt execution becomes a gearing priority |
Legs | Paragons | Late-progression token |
Any slot essence | Garrosh | Choose the needed piece within the token family |
Vanquisher serves death knights, druids, mages and rogues; Conqueror serves paladins, priests and warlocks; Protector serves hunters, monks, shamans and warriors. Exchange tokens on the upper balconies of your faction shrine in the Vale, using the vendor for the correct difficulty. Evaluate the two- and four-piece effect for your specialization before replacing an older set.
Caster damage dealers may target Purified Bindings of Immerseus, while many agility specializations care about Assurance of Consequence from Sha of Pride. Thok's Tail Tip matters particularly to strength damage dealers, and Prismatic Prison of Pride is a healer consideration. Effects, cooldown interactions and your spec determine value; none is a universal BiS instruction for every wearer.
Garrosh also offers weapons such as Xal'atoh and rare Tusks of Mannoroth plate shoulders. Heroic Garrosh is the Kor'kron Juggernaut mount target. Reins of Galakras instead comes from Glory of the Orgrimmar Raider's fourteen encounter achievements; it is not a mount drop from Galakras. Collection targets include Droplet of Y'Shaarj from Sha of Pride, Blackfuse Bombling and Kovok from Paragons. Do not schedule achievement conditions during progression without telling the raid.
Siege also contributes items to earlier Wrathion chapters. The legendary cloak itself comes through the personal questline and Timeless Isle tasks before the final Judgment of the Black Prince quest to defeat Garrosh; killing Garrosh does not directly drop the cloak. Profession discoveries for Balanced Trillium Ingot, Celestial Cloth and Hardened Magnificent Hide support crafted 553 belts and legs. These require the relevant profession and materials, and do not create Tier 16 set pieces.
For progression planning, Norushen and Sha expose assignment weaknesses early; Spoils checks balanced teams, Thok checks healing execution, and Blackfuse, Paragons and Garrosh demand sustained coordination. Review the actual cause of each wipe before adding gear requirements. Correcting a missed belt or an uncontrolled mind control often improves the next attempt more than replacing one filler item.
Frequently asked questions
How many bosses are in Siege of Orgrimmar?
There are fourteen, ending with Garrosh Hellscream. After Malkorok, the route allows a choice between Blackfuse and Spoils, but Thok requires Spoils first.
Which difficulties and sizes are available in MoP Classic?
Normal and Heroic support fixed 10- and 25-player groups. Flex, LFR and Retail Mythic are not available for this Classic raid.
Can I kill the same boss on Normal and Heroic in one week?
No. Shared weekly progress prevents treating them as two independent kills. Check your save before joining an advanced group, especially once a Heroic raid ID is involved.
What should a new raid prepare first?
Fix weak equipment slots, gem and enchant useful gear, then assign interrupts, dispels, defensives and special teams. There is no universal Blizzard item-level gate for a manually formed Normal raid.