WoW Forever Restoration Shaman: How to Heal Your Group
Restoration Shaman healing is a series of decisions rather than a fixed button sequence. Identify who will fail to survive the next hit, then choose a heal that can land in time. When nobody is in immediate danger, preserve Mana, check your totems and help prevent the next damage event.
Checked October 19, 2026. The current beta caps characters at level 30. Healing Wave anchors the playable healing plan; Chain Heal is learned at level 40, and Riptide requires a deep Restoration investment. Their combination below describes later play rather than a rotation available to an ordinary level 30 character.
Check your spellbook and selected talents before applying advice. Two groups at the same level can need different pacing. An experienced tank creates room for resource management; repeated avoidable damage demands more caution. The recommendations do not assume identical gear, composition or incoming damage.
Prepare before the first pull
Place party frames where you can see health, harmful effects and unavailable targets. Keep your ordinary heal, quick heal, selected emergency ability, cleansing and interrupt easy to reach. Your setup should let you change targets without searching the action bar.
Bring water and appropriate consumables. Tell the tank when you need Mana before the next fight. The party needs a clear ready signal: a brief pause generally costs less than dying and assembling again.
Check your intended totem set before combat, not during an emergency. Call of the Elements prepares a set, but deploying it takes time and pays for the totems themselves. Treat it as preparation rather than a free replacement for dropping one urgent totem.
Stand where the tank and likely healing targets remain visible without bringing extra enemies into combat. Identify your next safe position in advance. When a mechanic forces movement, a short prepared adjustment is better than a long run across the room.
Healing priority: judge the next hit
Heal whoever is likely to die before your next safe cast can finish. This is often the tank, but a player under focused damage or the healer can be more urgent. Health percentage alone is insufficient: two characters at 40% may face very different risks.
Look at the damage source first. A tank still taking attacks needs a buffer for the coming seconds. A player who has left a hazard and faces no follow-up can wait. You do not need to fill every health bar immediately.
Reassess after each heal. Another target may become more urgent, another healer may have helped, or the tank may have used a defensive. If an in-progress cast is no longer needed and cancellation is safe, do not complete it simply because it is nearly finished.
When several players drop together, avoid dividing attention mechanically. Identify the nearest actual death risk, ask teammates to stop taking avoidable damage and restore a manageable situation. If you must choose between two targets, consider their continuing role and whether the party can recover after losing either one.
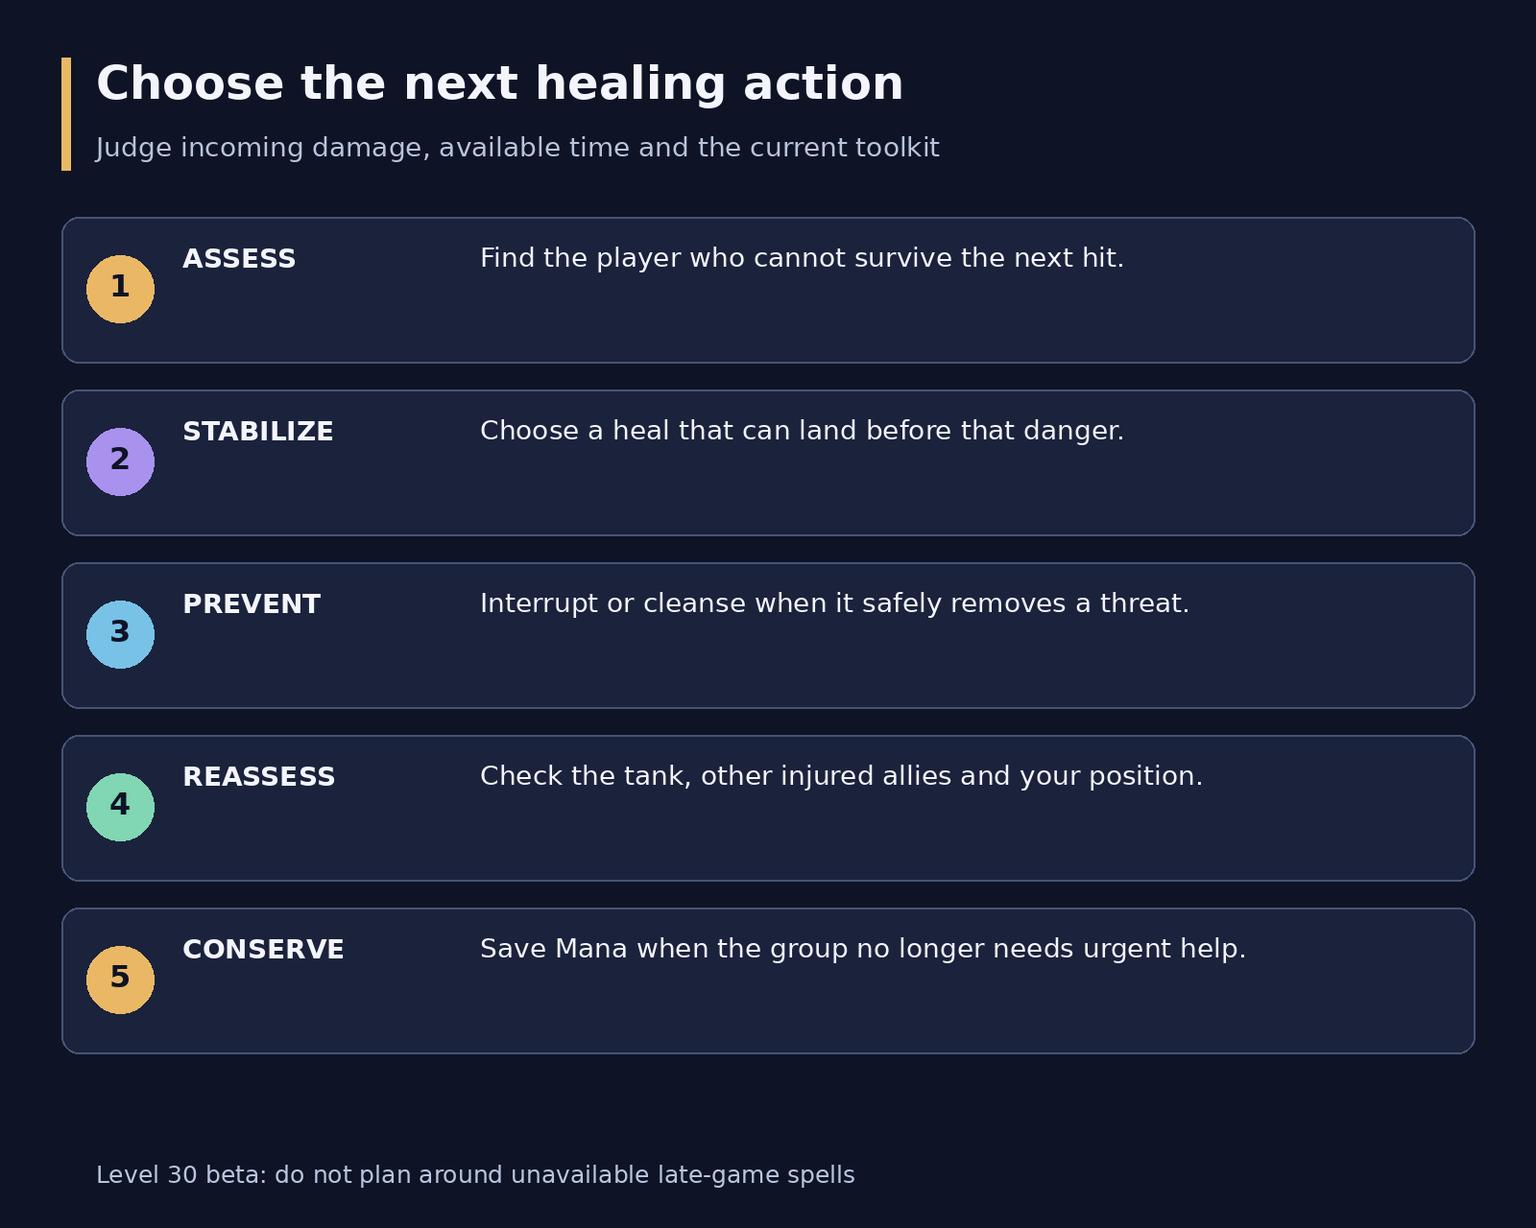
Decision order for keeping the group alive
One target: when to wait and when to accelerate
Healing Wave is a longer direct heal; Lesser Healing Wave offers a quicker response. Choose around the time remaining before a dangerous hit. If the longer cast will land safely, do not switch to the quick spell automatically. If the target will die first, economy should not prevent a rescue.
Watch the tank before health becomes critically low. Beginning an appropriate heal ahead of expected damage is more useful than repeatedly reacting late. That does not mean continuously finishing casts into a full target: account for whether damage arrived and whether another healer already covered it.
During a quiet stretch, choose a sufficient spell rank by actual healing and cost. A lower rank may help with a small deficit, but do not treat rank one as universal. Low-rank spells in Forever can interact differently with scaling and triggered effects. First establish that the chosen heal maintains a safe buffer.
For example, the tank is steadily losing health while everyone else is nearly full. Keep attention on the tank and prepare a timely Healing Wave. If a damage dealer suddenly faces a dangerous targeted attack, provide an appropriate quick response and reassess the tank. A small incidental health loss does not require changing the entire plan.
When the whole group takes damage
At level 30, do not compensate for missing Chain Heal by switching endlessly between the most expensive actions. Stabilize the vulnerable targets in order, ask for personal defensives and reduce the number of active threats. A small periodic healing totem can contribute in the background without replacing urgent direct help.
Later, Chain Heal can cover several nearby allies. Choose an initial target who needs healing and is close to other injured players. When the party spreads out, check whether the jumps are accomplishing useful work. A direct Healing Wave may solve the immediate problem more effectively.
Once available, Riptide adds an instant heal and healing over time, including an option during a short movement. Your Chain Heal is stronger when cast on its target. Use that interaction when it matches the damage pattern instead of maintaining an effect on a healthy player merely to prepare a combination.
Never delay a rescue to complete an ideal setup. If a teammate cannot survive the next hit, help now. If damage is several seconds away, prepare positioning and the first target. Useful jumps depend on the group layout rather than the spell merely being available.
Mana: plan for the entire fight
Estimate the reserve you will have for the next dangerous stretch. If you run dry much earlier, investigate unnecessary overhealing, repeated totem replacement, expensive damage casts or persistent party mistakes. One new item will not repair an unsustainable spending pattern.
Water Shield supports your resource economy; it is not a tank damage absorb. Track its presence and charges. Since the October 15 update, any critical spell you cast can trigger it, rather than only critical heals. Do not expose yourself to danger or spend Mana on unnecessary attacks simply to chase a random activation.
Mindfulness helps Mana regeneration during casting. Safe pauses still matter. When pressure is low, stop unnecessary actions and let recovery work; when an ally becomes threatened, the resource-saving pause must end.
Plan Mana Tide Totem around the remaining encounter and the needs of allies within its area. Do not wait for complete exhaustion if recovery can already be gained without waste. Equally, using it near full Mana before a long break will not provide the expected value. Coordinate the timing when several teammates need resources.
Use Mana consumables according to their current restrictions and the expected fight length. Recover a comfortable reserve between pulls. Living permanently on the last few percent leaves little room for an unexpected attack.
Emergency tools and cooldown planning
If you selected Nature's Swiftness, prepare it with an appropriate heal for a situation in which a normal cast cannot finish in time. Do not hold it until the target dies because you fear an imperfect use. After the rescue, check whether the danger has actually ended: an instant heal does not stop another attack.
Plan emergency resources around known pressure points. With multiple healers, agree who follows the tank, who handles group damage and who covers a sudden health loss. Avoid spending every strong tool together when one is enough, while remaining willing to revise the assignment during a real emergency.
Keep the jobs distinct. Nature's Swiftness buys time, whereas Mana Tide Totem sustains resources. The latter does not replace an immediate rescue. Reincarnation is recovery after your own death rather than a scheduled defensive. Before returning, assess the location and whether the group can still recover.
Totems and useful actions between heals
Choose a totem for a specific job and check that allies remain in its area. Within one element, a new choice can replace an effect that was already helping. Before changing a Water Totem for cleansing, consider what the party temporarily loses.
Totemic Recall removes unwanted totems and recovers part of their cost. Totemic Projection moves active totems but also costs resources. Compare the expense, remaining duration and party route. Do not relocate an almost-expired set merely out of habit.
Earth Shock interrupts important casts; Purge removes eligible beneficial Magic effects from enemies. These solve different problems. An interrupt may prevent more damage than another heal, but it should not displace help for an ally already about to die.
Remove eligible poisons and diseases according to the effect's danger. Do not assume the Shaman can cleanse every harmful effect. A cleansing totem may help several allies, but consider whether it can act soon enough. A targeted cleanse can matter more when waiting is dangerous.
Tremor Totem helps against eligible control effects, Earthbind Totem slows pursuers, and Grounding Totem can redirect an eligible enemy spell. Do not assume every creature or boss mechanic responds to these tools. Watch the actual encounter effects and agree on the important assignment beforehand.
Since October 15, Grace of Air Totem no longer follows its earlier exclusivity rule with Windfury Totem and Flametongue Totem. The latter two remain mutually exclusive. Buff compatibility does not remove the restriction on placing totems of the same element. Coordinate the set with your group.
Movement and personal survival
Moving early reduces the time you spend unable to heal. Reach the next safe position before the next damage wave. Do not finish a cast in a lethal hazard solely to preserve one heal.
Ghost Wolf helps travel; instant use and indoor access depend on Improved Ghost Wolf. It does not allow ordinary healing while running. Later, an available Riptide may cover a short reposition, but the current beta plan should primarily rely on positioning and safe movement windows.
Monitor your own health alongside the party. When pursued, call for help, use available slows and move toward allies. Trying to offset endless damage with expensive self-heals is rarely a sustainable plan. Personal defensives and racials depend on the character; know which threat your own tools can address.
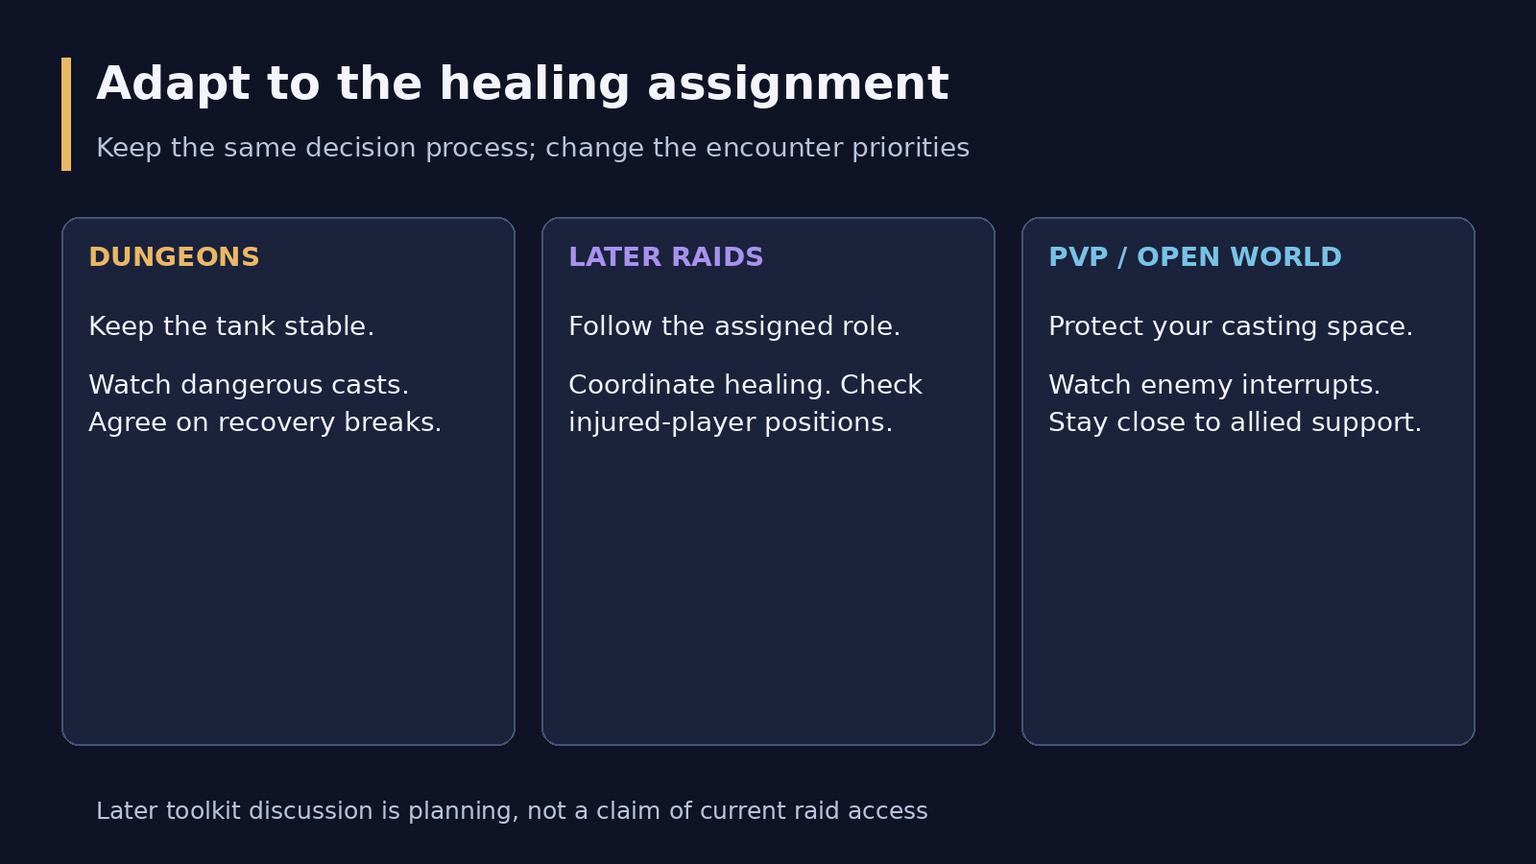
Different healing jobs in dungeons, raids and PvP
Adapt the plan to the content
Setting | Main concern | Common mistake |
Dungeon | Tank stability, sudden damage, dangerous enemy casts and Mana before the next pull | Spending on damage while the tank loses its safe buffer |
Raid after the required levels open | Assigned healing job, injured-player positions and coordination | Several healers covering the same target without checking incoming help |
PvP and open world | Survival, line of sight, access to heals and enemy control | Repeating predictable long casts in an exposed position |
In a dungeon, agree on the next pull's size around your remaining resources. In a raid, request an explicit assignment and check whether it changes with the phase. The raid discussion describes later toolkit planning rather than claiming full raid availability in the current beta.
In PvP, do not leave teammates behind to chase. Alternate safe positions with short healing opportunities and watch enemy interrupts. Under pressure, establish a way to continue healing before beginning an extended sequence of offensive actions.
When healing is unnecessary, add damage only while reserving enough for the next dangerous moment. Fire Nova needs an active Fire Totem and suitable positioning; its damage and cost were revised in October. Do not carry an old “use on cooldown” recommendation into every fight. A useful interrupt or saved Mana can be worth more.
Let talents and gear solve your actual problem
Check the current tree connections rather than copying an old screenshot by node position: Tidal Focus and Totemic Focus have swapped places. Dedicated healing benefits from improving the core cast, sustaining resources and selecting an emergency tool. If you mostly play alone, consider whether you need a fully healing-focused setup right now.
Legacy can advance talent access, but not every character has the same extra allocation. Verify any plan with deep talents against your own tree. Modern WoW's separate Hero Talent choices are not the foundation of this guide; it uses Forever's talent structure.
Judge gear against the practical shortage. If a suitable heal lands too weakly, healing power can help; if a long fight exhausts resources, compare Mana and regeneration. Critical spells may support Water Shield, but an unpredictable crit does not replace a reliable rescue. This guide assigns no universal stat order independent of the encounter.
Review one failure before the next attempt
Choose one death and ask what caused it and which action still had time to help. Improve awareness if the heal started late. Change positioning if range or line of sight blocked it. If Mana ran out, examine unnecessary actions and the agreement about recovery breaks.
Do not judge performance only by total healing. Prevented damage, timely cleansing and a preserved reserve may not stand out in the final number. Select one concrete adjustment for the next attempt and check whether it removed the cause of failure.