WoW Midnight Arms Warrior Guide: Talents, Combat and Gear
Arms turns time in melee range into Rage, then spends that resource on heavy weapon attacks. The specialization rewards a steady rhythm: stay connected to the target, prepare frequent Colossus Smash windows and react to useful procs without emptying the resource bar on low-priority attacks.
This PvE guide covers Midnight 12.1.5 and Season 2, checked on October 18, 2026. It provides a practical starting point for raids, Mythic+ and solo content. Arms uses one two-handed weapon. Its main limitations are lost melee uptime, resource shortages and defensive tools that work best before damage arrives.
The current mechanics to learn first
The important Season 2 changes affect decisions rather than simply damage numbers. Rend is now exclusive to Arms and costs 10 Rage. If you know Rend, Cleave applies it to every target hit. Thunder Clap no longer applies Rend automatically. An old guide that asks Arms to maintain the bleed through Thunder Clap will therefore teach the wrong habit.
Colossus now has a fixed 30-second Demolish cooldown; the old variable cooldown reduction is gone. Tactical Edge grants a Sudden Death use when you cast Colossus Smash. Ravager, when selected, increases the damage enemies take from your bleeds, making its placement before the main window relevant.
Patch 12.1.5 did not introduce a new Arms rotation redesign. Its gearing options still matter, so a setup copied from the start of Season 2 should be checked again before investing upgrade resources.
Track this | Use it to make this decision |
Rage and melee contact | Can you afford the next important attack, and are auto-attacks continuing? |
Sudden Death | Avoid wasting a new proc while already holding two charges |
Heroic Strike | Recognize the temporary replacement for Slam from Master of Warfare |
Rend and Colossus Smash | Prepare the bleed before a meaningful damage window |
Master of Warfare is the Apex talent. Its Heroic Strike proc has higher value than ordinary Slam. You do not need to turn its continually changing armor-penetration stacks into a separate maintenance routine. In an area build with Fervor of Battle, Cleave can trigger the Slam or Heroic Strike effect automatically against three or more targets.
Hero Talents and build selection
Slayer is the current recommended starting point for both raiding and Mythic+. It emphasizes Execute, Sudden Death and Bladestorm. Colossus remains an alternative for concentrated multi-target burst through Demolish, with a larger single-target tradeoff. These are current recommendations, not permanent promises about either tree.
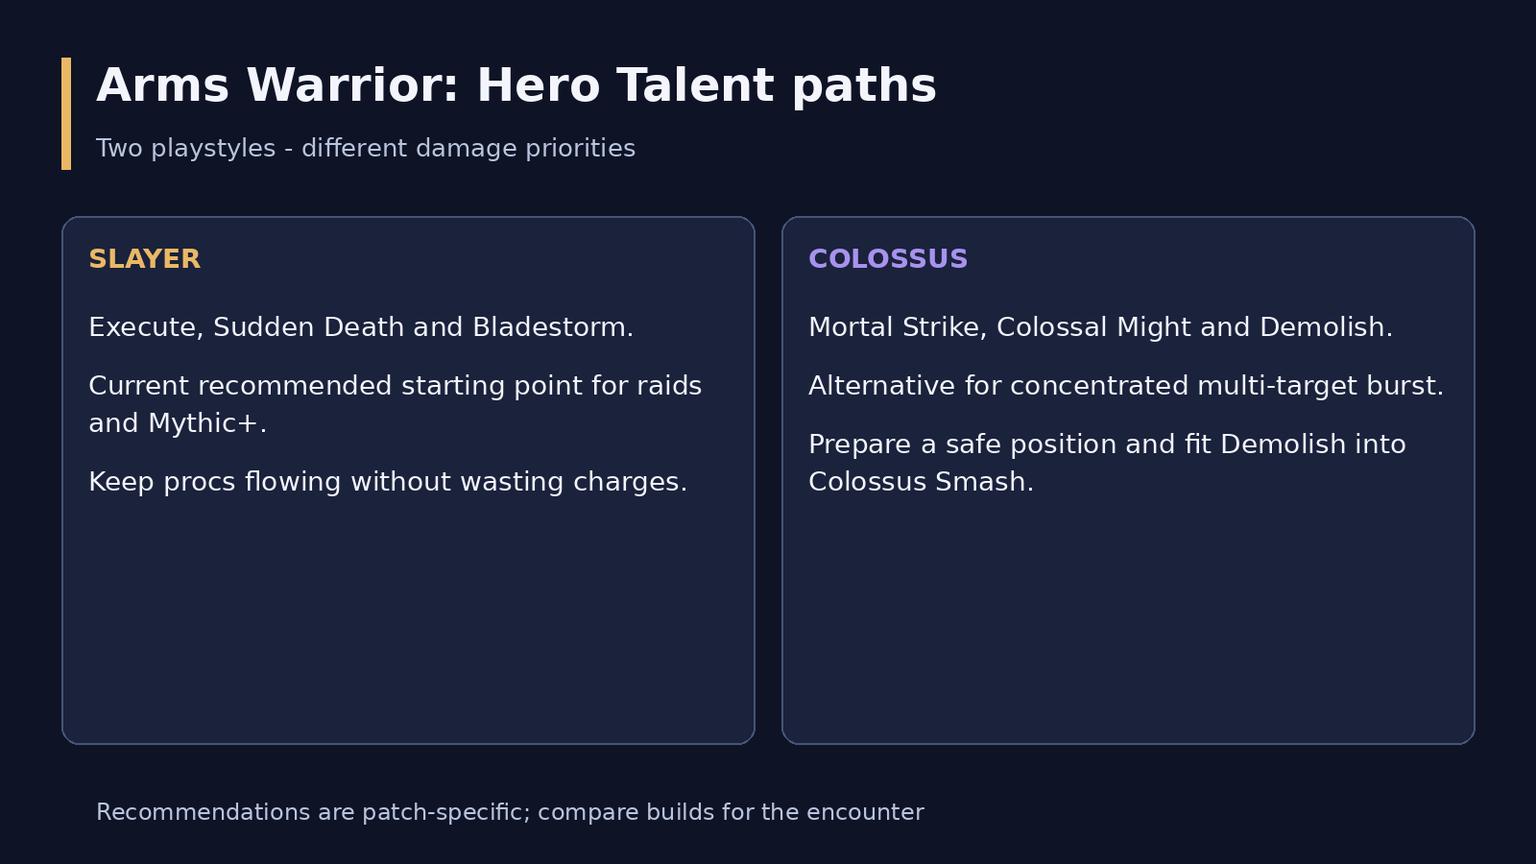
Compare the two Arms Hero Talent paths
Build for the fight you are entering:
Content | Starting approach |
Mostly one raid boss | Slayer single-target setup |
Raid with a persistent second enemy or waves | Cleave-oriented raid setup; evaluate the actual target pattern |
Mythic+ | Slayer dungeon setup with the required interrupts, stuns and defensives |
Delves and outdoor play | Retain the damage engine while adding practical healing, control and mobility |
Check the Hero tree and optional active abilities after importing a loadout. A Colossus label attached to a Slayer setup is not a usable alternative build. Save separately named raid and dungeon loadouts, then inspect the active spell bar after switching. Do not assume that the same talent code remains valid after a tree revision.
While leveling, add mechanics as they unlock. Practice returning to melee range and saving enough Rage for Mortal Strike before worrying about an endgame opener. Use cooldowns on worthwhile enemies instead of carrying them unused through a whole questing session.
Open a fight with a plan
Keep Battle Shout active and normally fight in Battle Stance. Decide whether the first enemy will live long enough to justify your major abilities. In a dungeon, let the tank gather the pull before committing an area window into enemies that are still moving apart.
A practical single-target Slayer opening is Charge, Mortal Strike, Cleave to establish Rend, then Avatar and Colossus Smash into Bladestorm. Continue with the available Heroic Strike and normal attacks. This is a learning sequence, not a rule that overrides a proc or an encounter mechanic. If your setup lacks Cleave, apply Rend directly; if it includes Ravager, place it before Colossus Smash.
For Colossus, prepare Colossal Might with Mortal Strike and place Demolish inside Colossus Smash. Choose a safe position before channeling. Demolish sharply slows normal movement, so starting it just before a required relocation makes the window harder to use.
Do not put every offensive button into one rigid macro. Optional spells, movement and the timing of a dangerous enemy can require different decisions. A short deliberate hold for an imminent priority wave is useful only if its gain outweighs a lost use later.
Single-target decisions for Slayer
Treat the following as a compact learning framework. Recheck the conditions after every action rather than repeating the list mechanically. Exact priorities depend on the selected talents and tier set.
1. Prepare Rend before Colossus Smash if it is close to expiring; use Avatar with the window when available.
2. Spend a Sudden Death charge before a further proc would be wasted. With two stored charges, Execute becomes urgent.
3. Use Bladestorm in the damage window when practical. With Imminent Demise selected, an Execute beforehand helps build its benefit if you have fewer than three stacks.
4. Use the valuable Heroic Strike proc and keep Mortal Strike contributing regularly.
5. Use remaining Sudden Death opportunities and Overpower; do not leave two Overpower charges unused while waiting for another reset.
6. Refresh Rend when needed. Use ordinary Slam as the low-priority filler when the more valuable conditions do not apply.
The goal is not to press a button at any cost. If a filler leaves you unable to use the next Mortal Strike, the filled global cooldown can still be a poor trade. Conversely, sitting at the Rage cap wastes incoming generation. Judge spending against the next available attack.
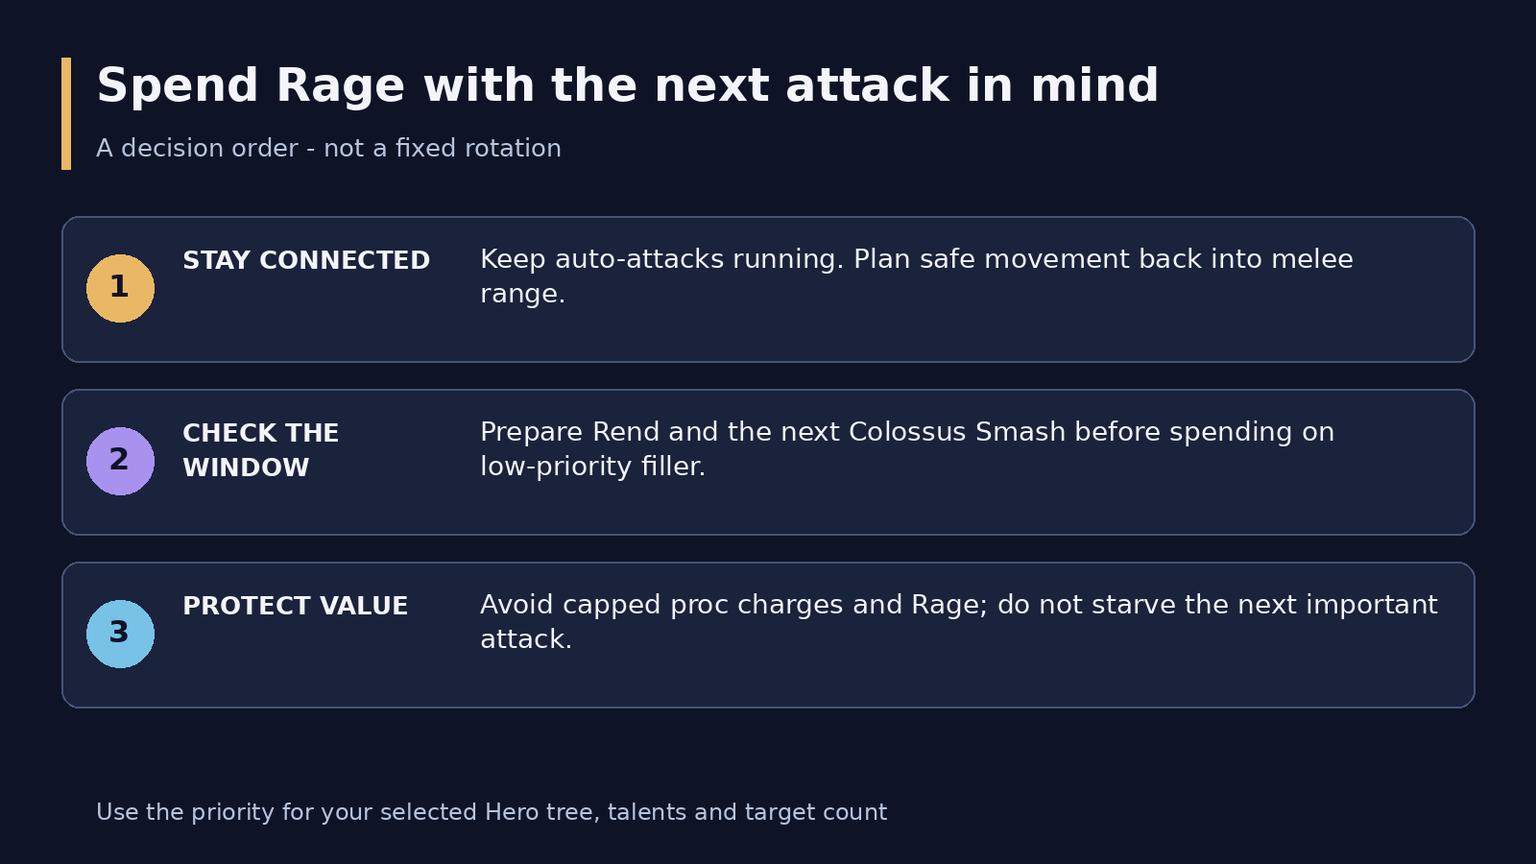
Check Rage decisions before spending
The finishing phase
The current raid priority enters its Execute phase below 35% health with the relevant talents. Sudden Death also enables Execute outside that health window. Neither condition means that every other ability disappears from the rotation.
Preserve your major damage windows, use Heroic Strike opportunities and continue the Mortal Strike interactions required by the build. Avoid copying the raid finishing priority into an area-focused dungeon loadout: those talents can make a normal Execute less efficient than the alternatives outside Sudden Death.
Two targets and larger groups
Sweeping Strikes supports damage to a second enemy while you attack the main target. Against three or more grouped enemies, Cleave becomes central. Target count alone is not enough: a scattered pack cannot reliably receive the same hits as a compact one.
For a typical Slayer area setup, establish Rend with Cleave, use Sweeping Strikes and prepare Avatar plus Colossus Smash. A Cleave empowered by three Collateral Damage stacks takes high priority, alongside the major Bladestorm window. Spend capped Sudden Death opportunities, keep using Cleave and avoid wasting Overpower charges. Fervor of Battle supplies the automatic filler effects in this situation.
Keep a dangerous enemy selected when its death matters more than the total damage meter. Ask whether that enemy will survive the setup time before holding a cooldown for it. In a short-lived pack, finishing the priority cast or moving cleanly into the next pull may help the run more than preparing a window that never lands.
Colossus changes this pattern by building Colossal Might through Mortal Strike and delivering Demolish inside the damage window. Do not add Demolish to a Slayer rotation or apply Slayer's Bladestorm rules to a Colossus loadout.
Survival and group responsibility
Tool | Practical purpose and limit |
Pummel | Interrupt an interruptible dangerous cast; agree on the target with your group |
Storm Bolt or Shockwave | Control eligible enemies; a stun is not a universal substitute for an interrupt |
Spell Reflection | Plan around reflectable spells and magic damage; many boss abilities cannot be reflected |
Die by the Sword | Strong protection, especially against parryable melee attacks; not universal immunity |
Defensive Stance and Ignore Pain | Prepare for damage; Ignore Pain spends Rage and competes with attacks |
Rallying Cry | Coordinate a temporary group health buffer before a dangerous event |
Charge and Heroic Leap reduce lost contact, but movement should have a destination. Leap to a safe location, then reconnect when the mechanic permits it. Intervene can provide another route through an ally; it also has a protective function and should not be used blindly into danger.
Before a pull, identify your interrupt target and one event that needs a personal defensive. This simple assignment prevents the common situation in which every cooldown is still ready when the character dies.
Stats, weapons and tier pieces
For initial gearing, value weapon quality and Strength, with Critical Strike and Haste generally ahead of Mastery and Versatility. This is a starting order, not a requirement to replace a substantially stronger item because its secondary stats look less attractive. There is no single mandatory Haste percentage for every Arms character.
The following are useful Season 2 targets, not a complete list that invalidates your existing equipment:
Item | Source | Why check it |
Maze-roa, Warlord's Fury | Coiled Altar | Two-handed weapon target |
Zul'jin's Guillotine Technique | Coiled Altar | Strong trinket candidate |
Voracious Heart of Ula'tek | Ula'tek | Strong trinket candidate |
Band of the Amani Warlord | Altar of Fangs | Dungeon ring option |
Spellbreaker's Bracers or Spellbreaker's March | Crafting | Slots to evaluate before spending crafting resources |
Complete the tier bonuses before chasing an ideal secondary-stat combination. Season 2's two- and four-piece effects improve several core attacks and Slam-related effects. They do not require manually forcing Slam at exactly five stacks. Catalyzed pieces retain the original item's stats, so evaluate the piece you will actually convert.
Compare complete equipment sets in a current simulation using the encounter type you intend to play. For example, an upgrade that wins against a stationary boss may lose value if it sacrifices the utility or target pattern needed in a dungeon. Keep a usable weapon while pursuing the ideal one; an unavailable item contributes no damage.
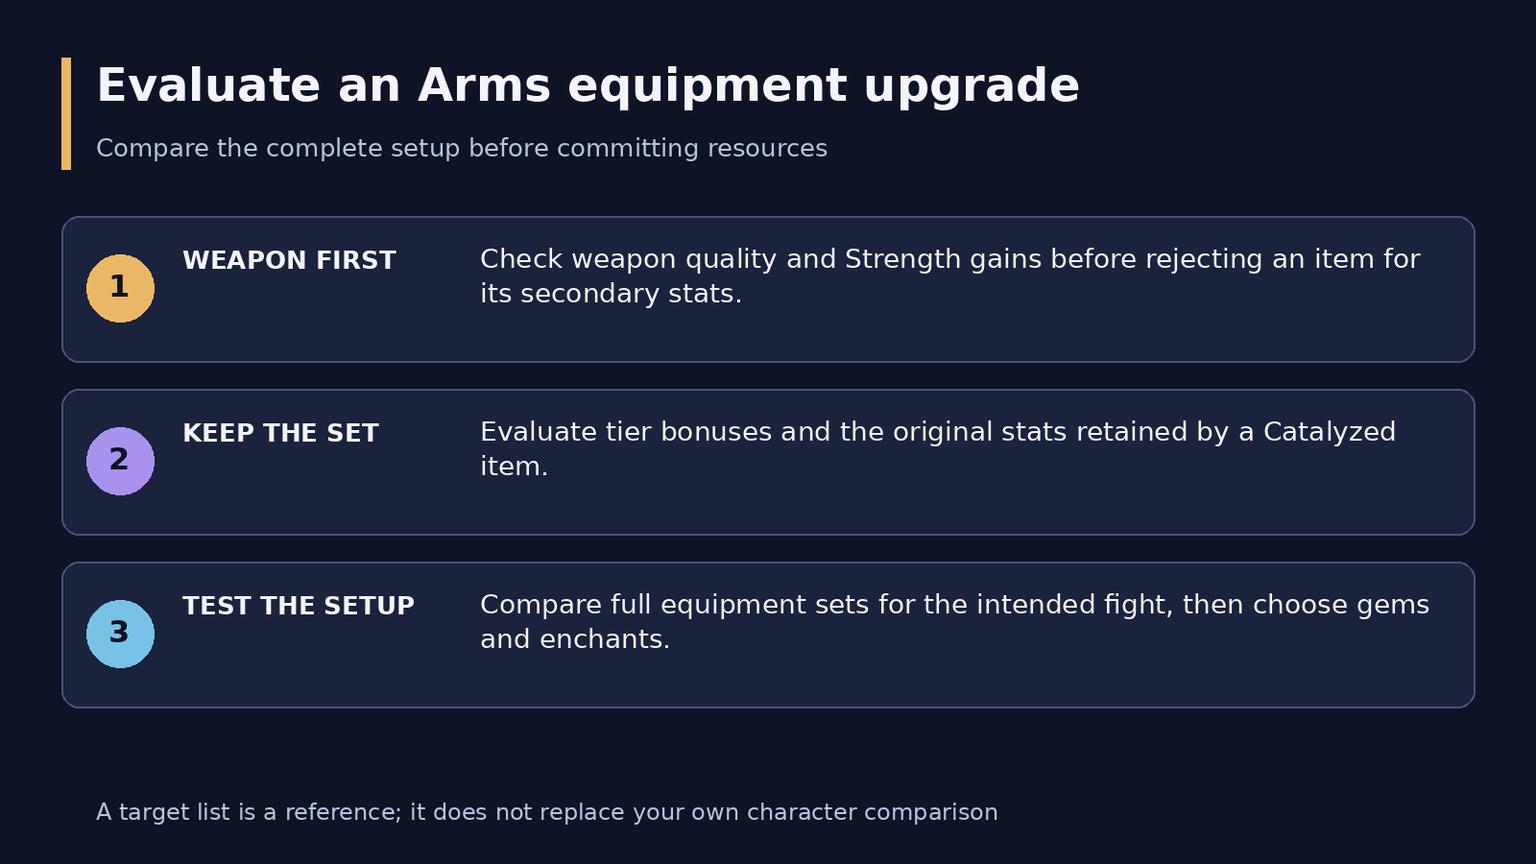
Evaluate an equipment upgrade in order
Enchants and consumables
Rite of the Hash'ey is the current weapon-enchant recommendation. Mark of the Worldsoul for the chest, Blood Knight's Armor Kit for legs and Eyes of the Eagle for rings are practical reference choices. Ring enchants and gems should still reflect your current stat balance.
Powerful Eversong Diamond rewards managing multiple gem colors; Indecipherable Eversong Diamond is the simpler alternative. Flawless Quick Garnet and Flawless Deadly Peridot are starting options for other sockets. Simulate a complete arrangement rather than buying gems solely from an isolated stat ranking.
Prepare a Flask of the Blood Knights or Flask of the Shattered Sun, Thalassian Phoenix Oil and a Concentrated Silvermoon Health Potion. Potion of Recklessness requires careful secondary-stat allocation; Light's Potential or Liquid Luster is easier to use when that condition is not controlled. Harandar Celebration is a current feast option, while Royal Roast provides an individual alternative.
Match offensive potions to useful windows and the expected fight length. Saving for the finishing phase makes little sense if it unnecessarily costs an additional use. Upgrade permanent equipment first, then choose the consumable quality appropriate to the content and your budget.
A short practice routine
Begin with one target and watch whether auto-attacks continue, important abilities remain unused or filler spending causes shortages. Then practice a grouped multi-target pull with a separate dungeon loadout. Finally add movement and a planned defensive event.
When reviewing a run, compare similar encounters and pull sizes. Look first for avoidable deaths, missed interrupts, lost melee contact and unused cooldowns. Only then judge small differences in gems or secondary stats. A repeatable, safe sequence gives you a useful baseline for later optimization.
Is Colossus required for dungeon damage?
No. Slayer is the current recommended default. Choose Colossus deliberately for its burst pattern and learn its different setup rather than assuming that an area encounter automatically requires it.
Should every Execute proc be used immediately?
Avoid wasting charges, but one available charge does not automatically override every window-preparation action. Two stored charges are more urgent. Use the priority for your actual loadout.
What should be improved first?
Check survival and time in melee range, then resource spending and cooldown use. Evaluate equipment after those basics are visible; otherwise a new item can conceal the same recurring mistake for only a short time.