WoW Midnight Sporefall Guide: Rotmire Strategy and Rewards
Sporefall is a one-boss Midnight raid introduced with Revelations, patch 12.0.7. Rotmire fills the arena with fungal minions, then turns their corpses into a new damage check. Success depends on preparing the next wave while dealing with the current one: kill the adds, preserve usable space and switch targets promptly when Fungal Bloom arrives.
This guide covers access, the repeating encounter, Mythic positioning and the original reward structure. The item levels below describe the raid's patch 12.0.7 rewards; they are not a claim that this older encounter provides the best equipment in a later season. Details were checked on October 17, 2026.
Detail | What to expect |
Location and boss | Harandar; Rotmire |
Character level | 90 |
Difficulties | Raid Finder, Normal, Heroic and Mythic Flex |
Raid Finder entry | Minimum item level 240 |
Mythic group size | 15-25 players |
Finding the entrance
Travel to southeastern Harandar, near the Grudge Pit delve. The entrance is at /way #2413 73.7 66.5; Har'athir is the nearby flight point to the north. Use the raid marker rather than entering the neighboring delve. Raid Finder uses its queue instead of requiring you to assemble at the portal.
Before an organized attempt, agree on interrupt assignments, places for dropped vines and who calls the target switch at Bloom. Two tanks are needed for the tank swap; healer and damage-dealer numbers should suit the chosen group size and difficulty. A published 20-player setup is an example, not a compulsory roster for every Mythic Flex group.
The repeating encounter cycle
Rotmire has one repeating phase, with Fungal Bloom at 100 energy. Treat that energy bar as advance warning. If the raid reaches Bloom with living minions or spends too long damaging Rotmire instead of the new mushrooms, the previous wave has not been resolved.
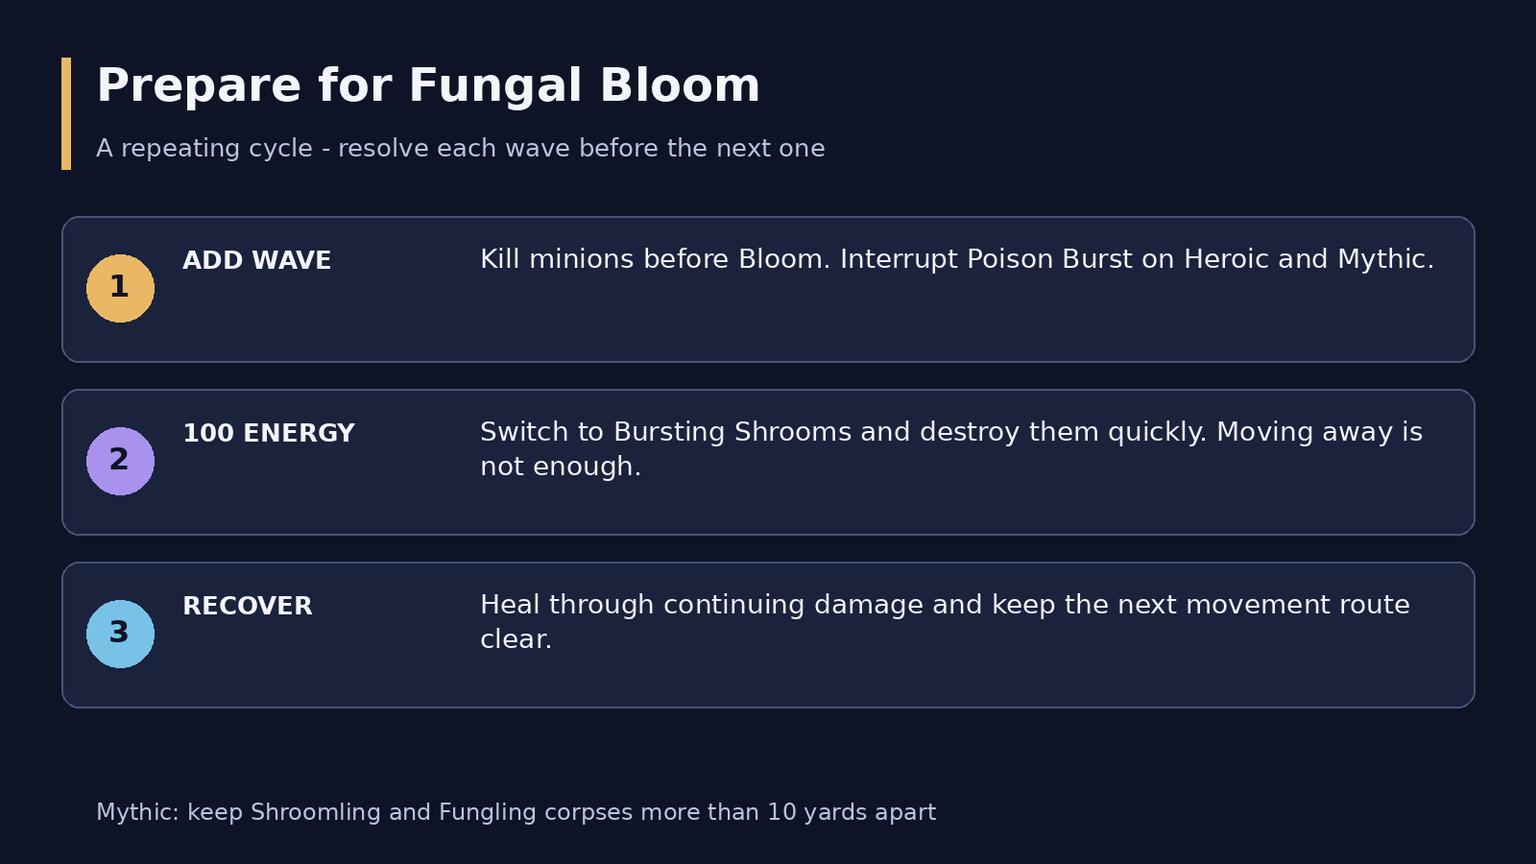
The add wave, Fungal Bloom and recovery sequence
Handle the wave before it becomes the next problem
Awaken Fungi creates minions and dangerous spawn locations. Step clear of the ground warnings. Shroomlings fixate players, so those players help determine where the adds can be killed. Bring them to the assigned damage area instead of running unpredictably through the raid.
On Heroic and Mythic, Sporecaps add an interrupt priority. Stop Poison Burst and focus the Sporecap while handling the pursuing minions nearby as the strategy allows. Assign a backup interrupter: a missed cast is a group problem, not just extra pressure on the targeted player.
Avoid spreading damage so thinly that several adds remain almost dead when the energy bar fills. Finishing the current wave creates a controlled transition. On Mythic, target location matters as much as target health because the two pursuing add types must leave separate corpses.
Resolve Fungal Bloom actively
Fungal Bloom hits the raid, applies continuing damage and knocks players back. Living fungal minions are healed and gain Fungal Frenzy, becoming harder to control. Corpses produce Bursting Shrooms.
Those mushrooms must be killed quickly. Their explosions damage the raid, so running away is not a substitute for switching targets. Reserve useful area damage for the mushroom window and maintain healing through the continuing raid damage. Before the knockback, stand where the movement will not carry you into existing vines.
After the mushrooms are dead, return to the next add wave with a usable movement route. When reviewing a failed attempt, ask which part failed first: unfinished minions, delayed mushroom damage or avoidable ground damage. That distinction gives the group a more useful adjustment than simply requesting higher overall damage.
Other mechanics and role responsibilities
Mechanic | Response |
Putrid Fist | Tanks swap after each application; prepare protection for the heavy physical hit |
Festering Vines | Affected players leave the group before expiration and avoid placing Writhing Vines on working areas |
Bursting Pustules / Rotting Pustules | Expect increasing background raid damage; plan healing for later cycles |
Poison Burst | Interrupt the Sporecap on Heroic and Mythic |
Bursting Shrooms | Switch damage to the mushrooms during Bloom; destroy them before explosions |
Tanks should make each swap clear before the next Fist rather than improvising after a dangerous stack. Damage dealers should know both the current priority and the next required switch. Healers need coverage for Bloom and the recovery afterward; overlapping every major cooldown on an early clean cycle can leave the next one exposed.
Vine placement is a shared positioning job. Move out promptly, but do not occupy a designated mushroom damage area just because it is temporarily empty. Leave a route back so that handling your own debuff does not make you late to the next target switch.
What changes on Mythic Flex
The flexible roster does not remove Mythic mechanics. Funglings join the pursuing adds, and Cross Fertilization punishes mixed corpse placement: a Shroomling corpse within 10 yards of a Fungling corpse creates a Doom Shroom. Preventing that interaction is safer than planning to recover from its damage.
Use two clearly separated death locations, one for each pursuing add type. Players with fixates should identify what follows them before choosing a destination. Damage dealers must avoid accidentally killing a Fungling among Shroomlings with uncontrolled area damage. Keep the separation greater than the trigger distance, allowing room for movement and imperfect placement.
The exact markers can change with Sporecap spawns. What must stay consistent is the rule separating the corpse types. At Bloom, divide damage coverage between the prepared areas so one group of Bursting Shrooms is not left untouched. Choose a plan your raid can repeat; copying coordinates without matching the actual spawns is not enough.
Equipment and loot eligibility
Sporefused equipment arrives at the top item level of its listed upgrade track, including the associated bonus levels. The raid's original table is:
Difficulty | Item level | Sporefused track |
Raid Finder | 259 | Veteran |
Normal | 272 | Champion |
Heroic | 285 | Hero |
Mythic | 298 | Myth |
Rotmire drops two armor pieces for each armor type, a necklace, a ring and a trinket. There are no weapon or tier-set armor drops. Check whether the available slots help your character before organizing a run around a missing weapon or set piece.
The distinctive accessories are Rotmire's Sporeheart, Sporecaller's Blooming Loop and Sporelord's Mycelial Insignia. Their extra effects are part of the comparison; item level alone does not establish a universal best choice. If replacing set armor would break a useful bonus, compare the complete equipment setup rather than the single item's number.
Repeated kills are possible during the same week, including Mythic, but repeat kills do not provide another ordinary loot roll. Voidforge bonus rolls are a separate opportunity governed by their own requirements. Helping another group therefore does not mean another unrestricted chance at the boss's normal drops.
Collectibles and the mount plan
The Luminous Sporeglider uses four Delicious Sporesnacks. A qualifying Rotmire kill on any difficulty awards one per week per account. Starting with none, plan for four weekly reward opportunities. Changing characters or clearing every difficulty in one week does not bypass the account limit.
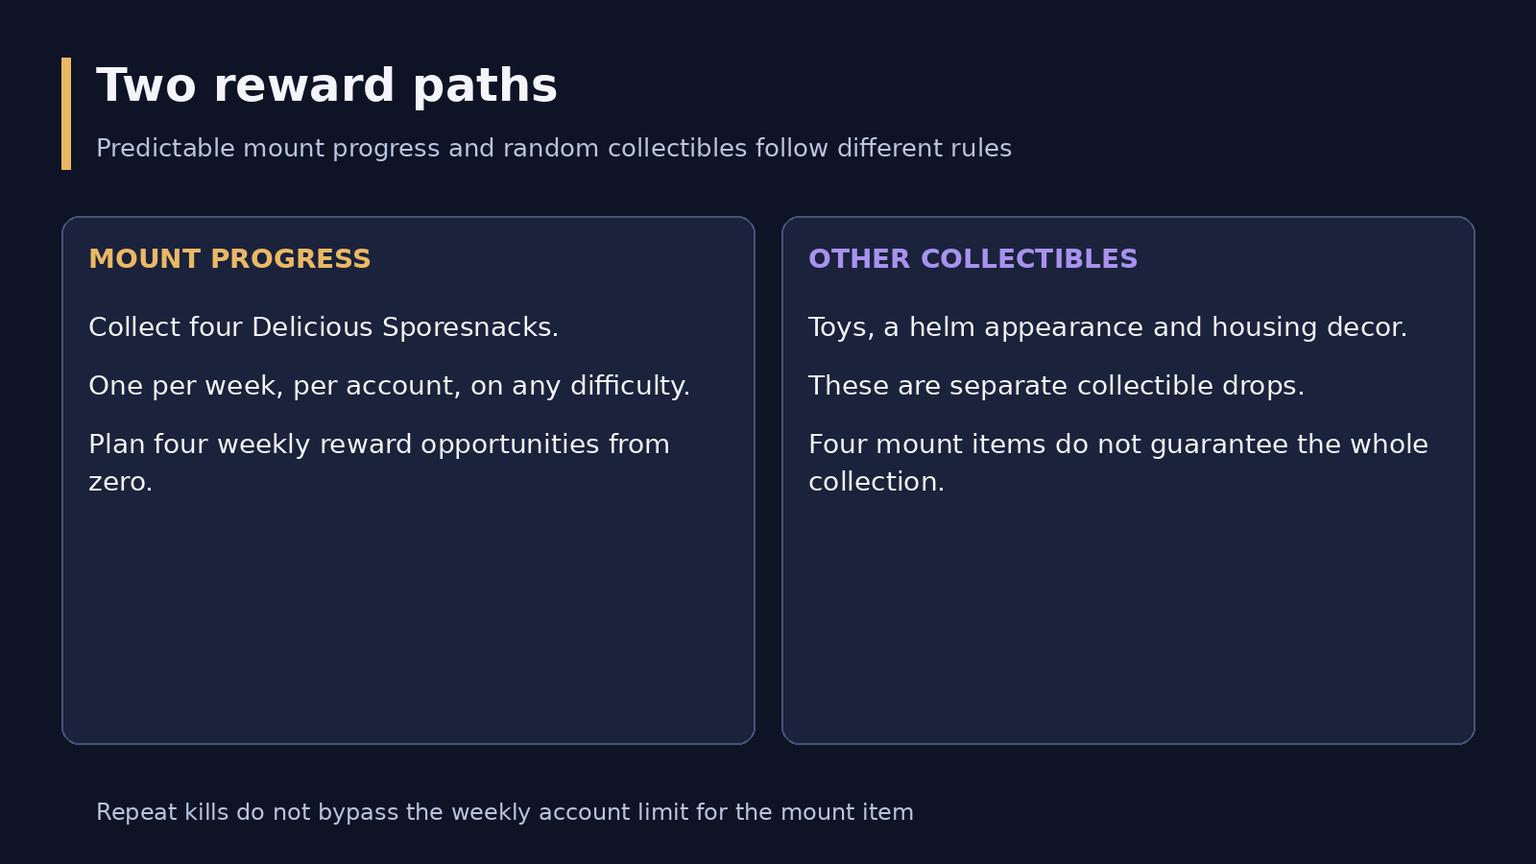
How mount progress differs from random collectibles
Other rewards include the Madcap Redcap and Mycomancer's Hearthspore toys, Sporelord's Shroom Cap appearance and Luminous Rotshroom housing decor. These belong to the collectible reward pool; the mount's four-item route does not guarantee all of them after four visits.
Normal, Heroic and Mythic kill achievements and guild variants are documented for the encounter. Do not plan a seasonal Ahead of the Curve or Cutting Edge reward solely because the raid has those difficulties: confirm the exact achievement and its current availability separately.
Before your next attempt
· Check the chosen difficulty and loot eligibility, then confirm the group's objective: equipment, practice or the weekly mount item.
· Agree on vine areas, interrupt coverage and the Bloom call before pulling.
· On Mythic, identify the two pursuing add types and keep their death areas apart.
· Finish living minions before Bloom and destroy the resulting mushrooms quickly.
· After a failure, correct the earliest broken assignment before changing the whole strategy.
Can Raid Finder advance the mount?
Yes. Any difficulty qualifies for the weekly account reward. Choose the difficulty that fits your objective rather than increasing difficulty just for mount progress.
Can I farm ordinary loot by repeating Mythic?
No. You can repeat the encounter, but standard loot eligibility is limited. A separately available Voidforge bonus roll is not the same as resetting ordinary boss loot.
Should I spread every add across the room?
No. Use deliberate kill areas. On Mythic, separate the two corpse types while keeping each prepared mushroom group reachable for damage during Bloom.