WoW Midnight Tidebound Grotto Guide: Nymrissa and Rewards
Tidebound Grotto is a level-90 Lair on the Coiled Isle, introduced with Midnight's Curse of Ula'tek update. Its single boss, Nymrissa Wavecaller, combines incoming murlocs, frost orbs and shrinking safe space. The encounter rewards planned movement and target changes rather than uninterrupted damage on the boss.
A Lair is an instanced boss activity. World difficulty offers automatic group formation; Normal, Heroic and Mythic are organized-group options. This guide covers entry, difficulty selection, the encounter's main decisions and rewards. Information was checked on October 17, 2026. For numerical damage values and your selected difficulty, use the current encounter journal.
Entrance and group setup
The entrance is underwater on the Coiled Isle, around /way #2512 59.9 66.3. Dive at the marker and look for the instance entrance. These are Coiled Isle coordinates, not coordinates inside the Vaults of Atal'Utek. A summoning stone is available outside.
For World difficulty, use the entrance's Enter option to join a group. The scenario starts with clearing elite enemies before the boss appears. On organized difficulties, the group leader selects the intended difficulty and enters first; the remaining players follow into that instance. Check the setting before gathering everyone inside.
Difficulty | Group size | Recommended item level | Direct gear drop |
World | 5-40 | 273 | 279, Veteran 1/6 |
Normal | 10-30 | 286 | 292, Champion 1/6 |
Heroic | 10-30 | 299 | 305, Hero 1/6 |
Mythic | 15-25 | 312 | 318, Myth 1/6 |
The item levels in the recommendation column are Blizzard's preparation guidance, not universal entry gates or a guarantee that a group leader will invite you. Normal and Heroic have a different group-size range from Mythic. Do not apply the 15-25 Mythic range to every organized mode.
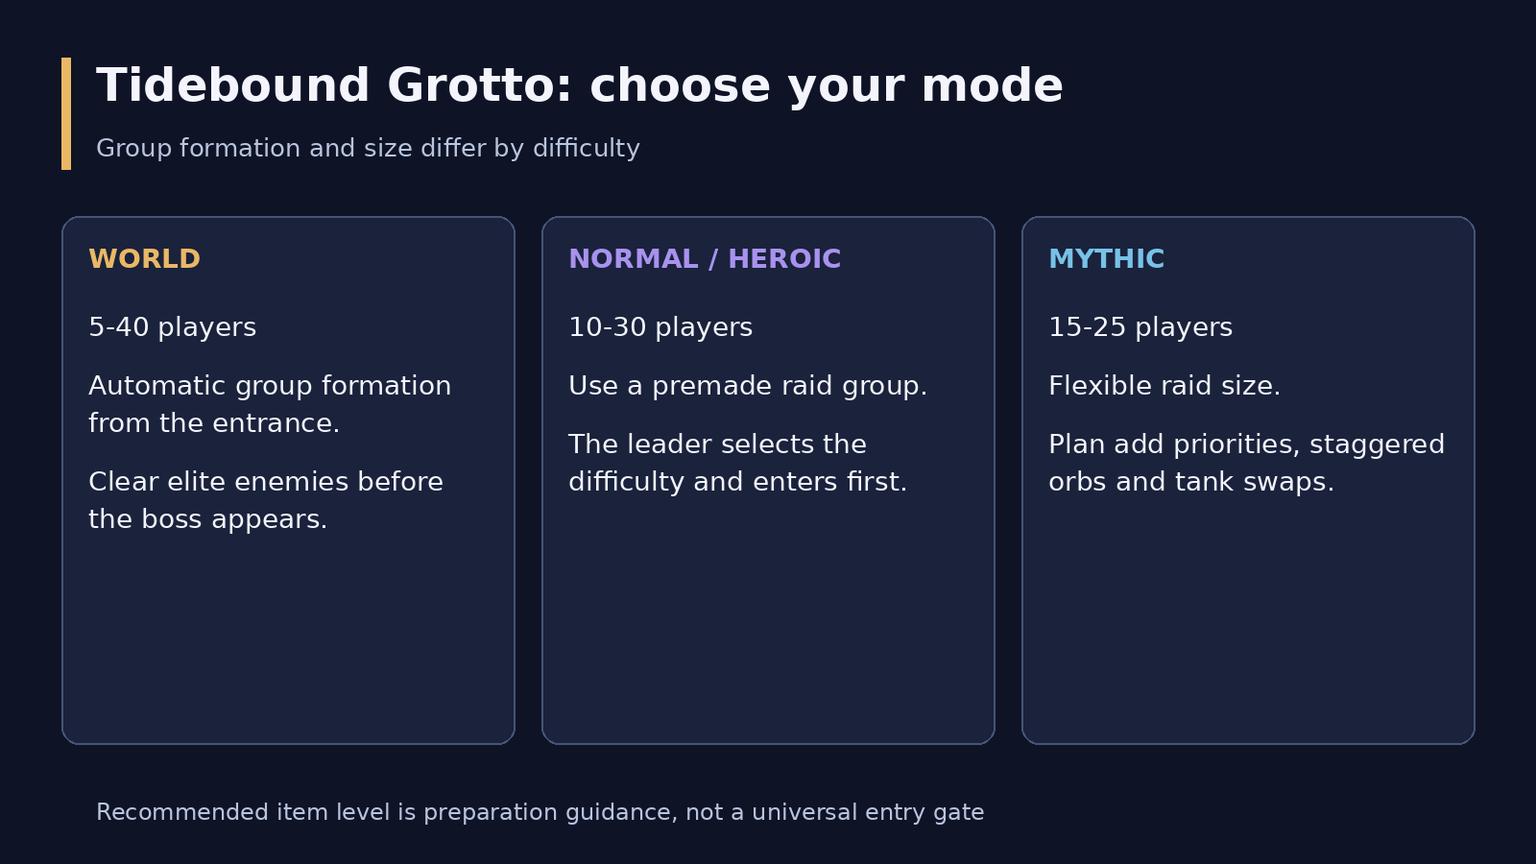
World, Normal and Heroic, and Mythic compared
Before the first pull
Choose a difficulty the group can execute consistently, then agree on three assignments: who controls incoming murlocs, who collects orbs and who calls movement. In organized groups, arrange tank swaps and healing coverage before combat. A ready check should establish the plan, not only confirm that everyone is present.
Keep routes between the boss, the adds and the next safe area open. A player handling an orb needs somewhere to leave its ice without cutting off the rest of the group. Similarly, crowd control is most useful when it stops an add from reaching its destination; saving every ability for an emergency can allow that emergency to develop.
Murlocs: prevent the transformation
Alluring Bubble draws murlocs toward the central bubble. Kill or control them before they reach it. Murlocs that arrive become Bubblefin Berserkers and add raid-wide pressure through Pulsing Tides. If one transforms, finish it promptly rather than leaving it alive while everyone resumes boss damage.
Swirling Whirlpools travel toward the bubble during this sequence. Keep a usable path through the moving hazards instead of clustering wherever the first player stops. Before Pop knocks players back, move into a position with room behind you. Being knocked into existing ice or another hazard can turn a survivable event into a death.
A useful damage priority is to handle the immediate mechanic threat first, then return to Nymrissa. The aim is not to abandon the boss for every minor movement; it is to prevent an avoidable add from extending the dangerous part of the encounter.
Mythic: remove the protection first
Bubblefin Frostscales protect nearby murlocs with Waterfog Shield. Prioritize these support enemies so the protected wave can be killed effectively. Spending the whole add window attacking shielded targets wastes damage and allows more enemies to reach the bubble.
Assign target calls clearly. One player identifying a Frostscale is more useful than several conflicting calls after the wave has already arrived. Keep control available for the enemies that remain closest to the bubble.
Frost orbs: manage both collection and placement
Chilling Frost creates Frost Orbs around affected players. Collecting an orb deals damage, applies a harmful effect and leaves Lingering Frost on the floor. That ice limits comfortable movement. Place it in a planned, compact area while preserving routes needed for adds and knockbacks.
Do not treat orb collection as a race. Check health, nearby hazards and the other mechanics in progress. A player who collects an orb and immediately runs through the group can create a positioning problem even if the orb itself was handled.
On Heroic and Mythic, neglected orbs eventually Shatter and punish the raid. Designate collectors and a backup rather than assuming the nearest player will notice. Current hotfixes changed orb timing and damage; do not build the strategy around an old launch-week countdown.
Mythic: stagger Frost Burst
On Mythic, picking up an orb also triggers Frost Burst against the raid. Several simultaneous pickups can overwhelm healing. Agree on a collection order, let the healer stabilize the group and then take the next orb while remaining within the mechanic's time limit.
The exact spacing between pickups should follow the group's recovery and overlapping mechanics, not a made-up fixed interval. If multiple players collect together, review the call order before asking healers simply to produce more healing.
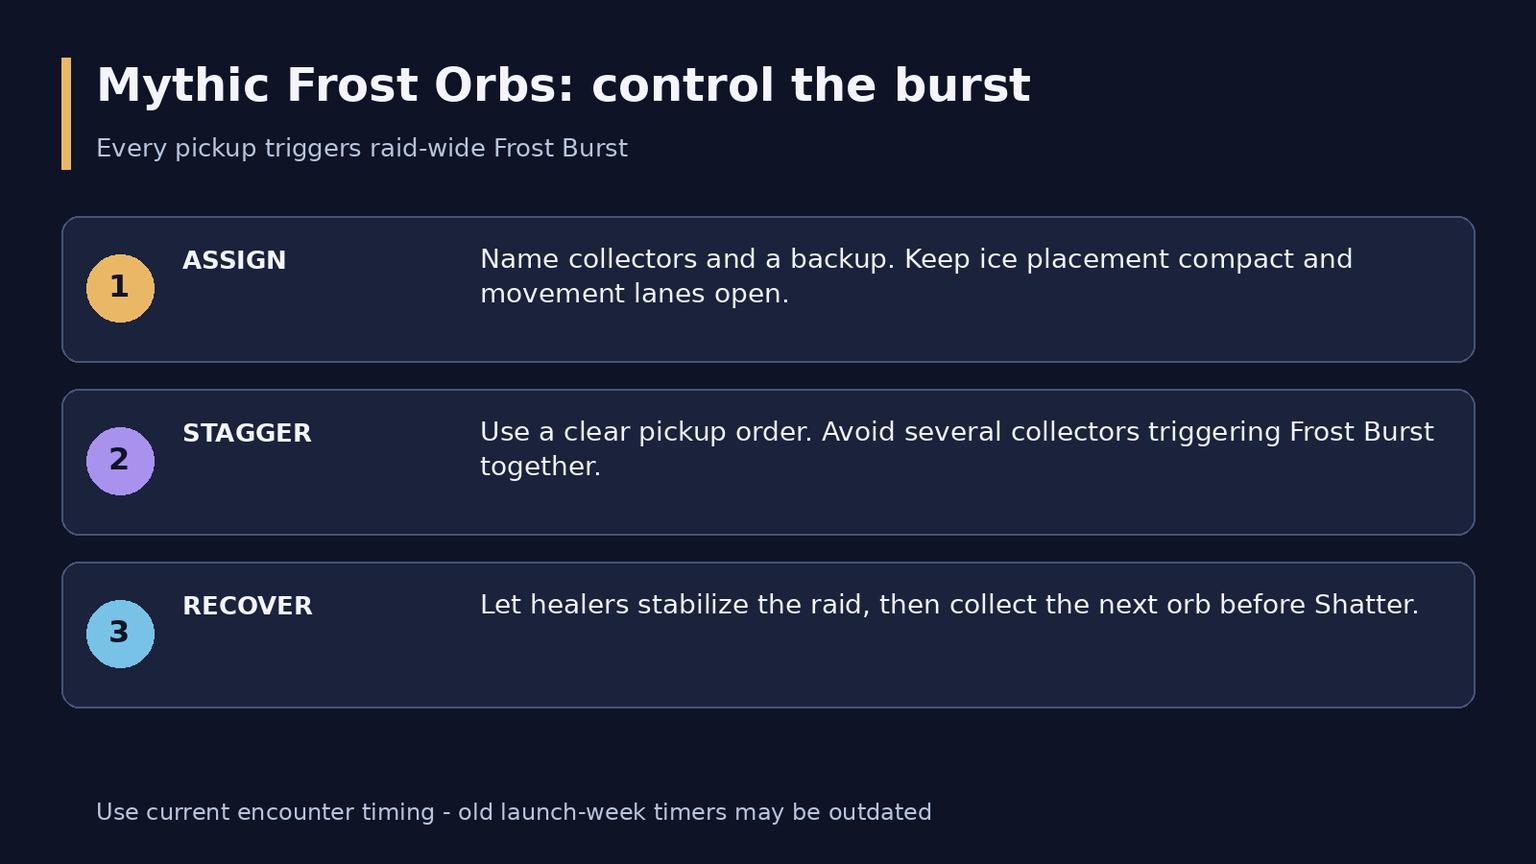
Assign collectors, stagger pickups and recover before the next orb
Tank attacks and raid damage
On Normal and Heroic, tanks prepare for Iceblade Flurry and manage the resulting pressure with the other tank. Healers should know when the active tank will need support instead of discovering the problem during an add wave.
Mythic introduces Water Jet, which pushes its target and increases subsequent vulnerability. Swap tanks after the cast and make the direction predictable. The jet can clear Lingering Frost: use that interaction to reopen space without aiming dangerous movement through the raid. Plan the path before the cast rather than improvising after the push begins.
Abyssal Rain is a raid-wide healing window. Cover it with planned healing and defensive abilities, especially when it overlaps orb collection or surviving adds. On Heroic and above, Wavecaller's Might increases the boss's Frost pressure as the fight continues. Unending Tides ends the attempt if the group takes too long; controlling mechanics efficiently must still leave enough damage to finish the boss.
A practical attempt plan
1. Establish a safe working area and keep movement lanes open.
2. On each murloc wave, control incoming enemies; on Mythic, remove Frostscales first.
3. Collect assigned orbs without blocking the next movement route; on Mythic, stagger pickups.
4. Prepare for knockbacks and tank attacks before they happen, with the next safe position already chosen.
5. Cover Abyssal Rain and overlapping damage, then return attention to the next add or orb assignment.
This is a repeating priority cycle, not a script that assumes the boss uses every ability in the same order on every difficulty. When two events overlap, call the immediate survival responsibility and avoid leaving the other mechanic without an owner.
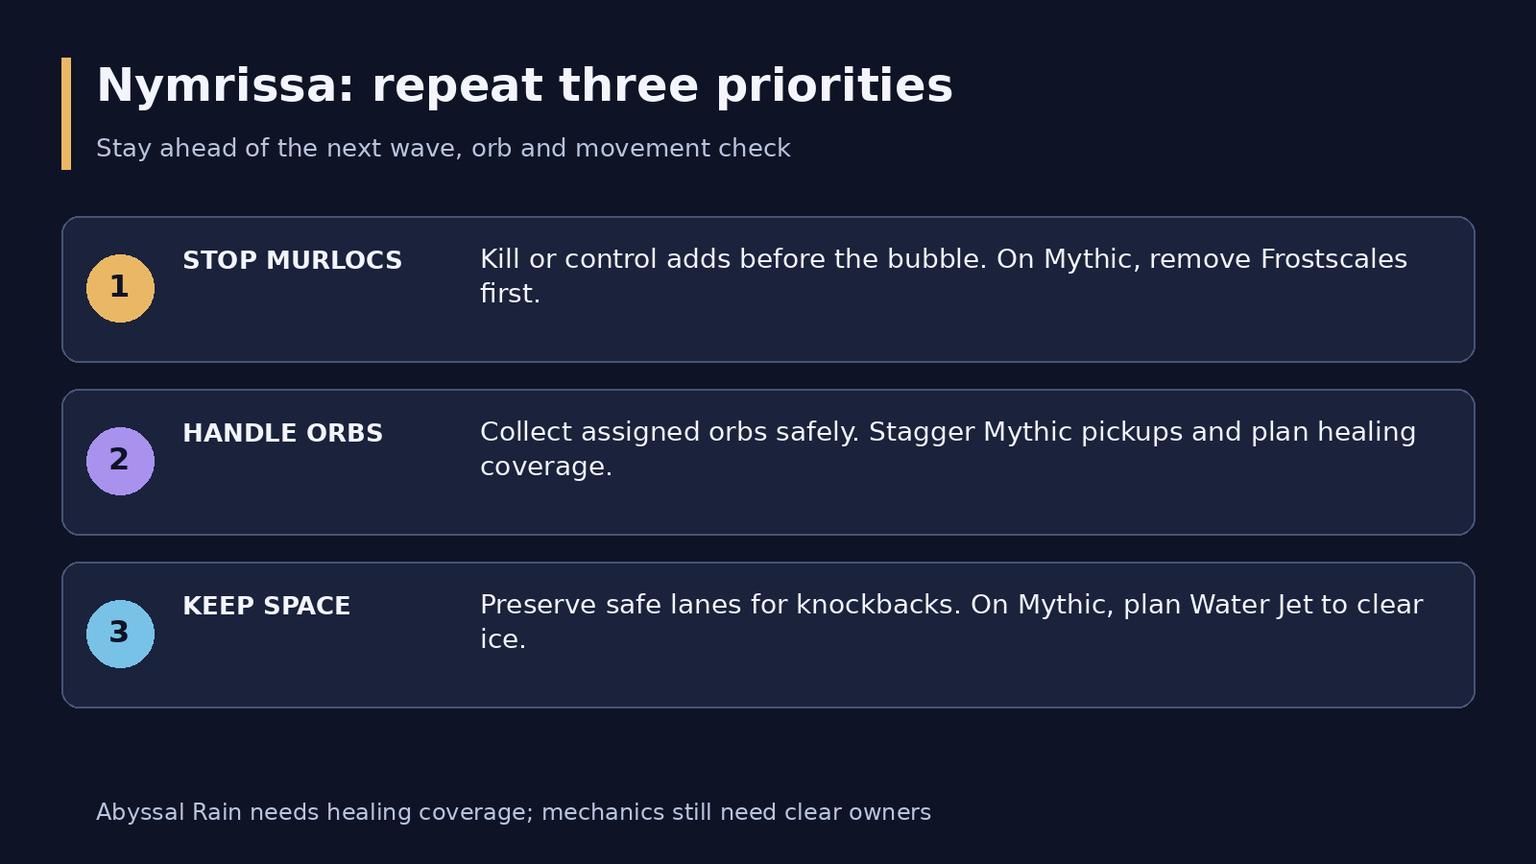
Three priorities during the repeating encounter cycle
Diagnosing a failed attempt
First failure | What to check before the next pull |
Berserkers remain alive | Add target calls, control coverage and Frostscale priority |
Raid collapses during collection | Simultaneous Mythic pickups, low health or an overlap with Abyssal Rain |
Players run out of room | Ice placement, movement lanes and planned Mythic Water Jet clearing |
Deaths after a knockback | Starting position and the hazards behind each player |
Boss survives until the lethal ending | Excess add uptime, lost players and time spent attacking protected targets |
Review the first failed responsibility rather than only the final damage spike. A late healing crisis may have started with an uncontrolled murloc, while poor boss damage may be the result of repeated recovery movement. Correct the cause before changing the whole composition.
Loot and weekly planning
Nymrissa's direct equipment rewards scale with difficulty as shown above. The loot table includes armor, weapons, a shield, an off-hand, a ring and a trinket. Check a specific item's suitability for your character rather than assuming the highest listed item level makes every drop an upgrade.
Example reward | Slot or use |
Tidebound Sorcereress's Robes | Cloth chest |
Breakwater Boots | Leather feet |
Grips of Swirling Fury | Mail hands |
Swelling Sea Spaulders | Plate shoulders |
Bubblefin Splash Guard | Shield |
Wavecaller's Seastone | Intellect trinket |
Loot eligibility is weekly, separately by difficulty. Repeated World kills are not a way to collect fresh boss loot each time. Check your character's lockout before joining another group for the same reward goal, and distinguish the boss's direct drop from any weekly Great Vault progress shown in your interface. A kill should not be described as a guaranteed unlocked Vault choice.
Collectors can also seek the Clumped Asteroidea housing decoration, listed across difficulties, and the encounter's completion achievements, including Heroic and Mythic versions. These are separate goals from a particular equipment drop. Neither the decoration nor a named item should be presented as guaranteed from one kill.
Frequently asked questions
Is Tidebound Grotto a Mythic+ dungeon?
No. It is a Lair built around one boss and four difficulty options. Its Mythic mode uses a flexible 15-25-player group, not a five-player keystone party.
Can I join without a premade group?
World difficulty offers automatic group formation from the entrance. Normal, Heroic and Mythic require an organized group and the leader's difficulty selection.
Should everyone collect orbs at once?
No. Collection must respect health and positioning, and Mythic pickups trigger raid-wide Frost Burst. Assign an order and a backup while ensuring that orbs are handled before Shatter.
What is the fastest improvement for a struggling group?
Identify the first recurring failure: murlocs reaching the bubble, overlapping orb pickups or lost safe space. Give that responsibility a clear owner and a recovery plan, then keep the rest of the strategy stable long enough to see whether the correction works.