Battlefield 6 Best Vehicle Loadouts – Meta Builds for Tanks, IFVs, AA, Helicopters, and Jets
Battlefield 6 Best Vehicle Loadouts
Mastering vehicles in Battlefield 6 isn’t just about pulling the trigger faster — it’s about building the perfect machine for every role. This complete guide explains how to customize tanks, IFVs, helicopters, jets, and transports to dominate in any mode. Learn which loadouts deliver the best balance between power, defense, and versatility, and discover how quick adaptation mid-match can turn your vehicle from a target into a frontline hero.

Battlefield 6 Best Vehicle Loadouts – Full Guide
Overview
Vehicle customization in Battlefield 6 is deeper and more tactical than ever. Each vehicle class has a unique set of weapon systems, upgrades, and support tools that can be swapped between spawns to meet battlefield conditions. The best builds aren’t about raw damage — they combine survivability, awareness, and flexibility so you can counter anything from enemy jets to entrenched armor lines.
Across this guide, you’ll find tuned configurations tested across Conquest, Breakthrough, and Portal modes. Each setup blends offense and defense, while emphasizing the single most important principle in Battlefield 6 vehicle warfare: positioning always beats power. Even the most destructive loadout fails if you’re sitting exposed.
Best Tank Loadout
Heavy armor defines the frontline in Battlefield 6. Main Battle Tanks (MBTs) remain the kings of ground warfare — built for direct confrontation and objective control. However, their sheer size makes them easy targets for airstrikes and flanking AT teams. The right setup balances firepower with protection and recovery so you can keep pushing instead of waiting for a respawn.
Below is a recommended Battlefield 6 tank loadout designed for maximum durability and sustained offensive pressure.
Slot | Pick | Why It Works |
|---|---|---|
Primary Weapon | HE Shell | Delivers large splash damage for clearing infantry and soft targets while still retaining solid anti-vehicle impact. |
Secondary Ammo | AP Shell | Punches through armor and demolishes enemy tanks when direct confrontation is unavoidable. |
Coaxial Weapon | LMG | Allows suppression and cleanup kills without wasting your heavy shells. |
Gadget 1 | Active Protection System | Automatically intercepts incoming rockets and tank rounds, often saving you in even fights. |
Gadget 2 | Smoke Launcher / Emergency Repair | Smoke lets you disengage and break lock-ons; repair gives instant health recovery during combat. |
Upgrade | Reinforced Armor | Increases total health pool, giving more time to retreat or repair under fire. |
Gunner Seat | HMG or Autocannon | Empowers your second seat to handle infantry or light vehicles from angles you can’t cover. |
Gunner Utility | Mine Detection System | Highlights planted explosives on your route — essential for urban or choke-point maps. |
Tank Strategy
Tanks thrive when used as mobile anchors rather than static turrets. Rotate frequently between objectives, staying near infantry for spotting support. Lead with HE shells to clear cover, then swap to AP when enemy armor appears. Keep the Active Protection System charged before pushing and drop smoke whenever you’re double-locked by AA or launchers.
Driving solo? Choose Emergency Repair for independence. Running with a squad? Bring Smoke and coordinate with Support players for ammo and tool repairs. Tanks aren’t invincible, but with this configuration, they become siege engines that can outlast and outsmart.
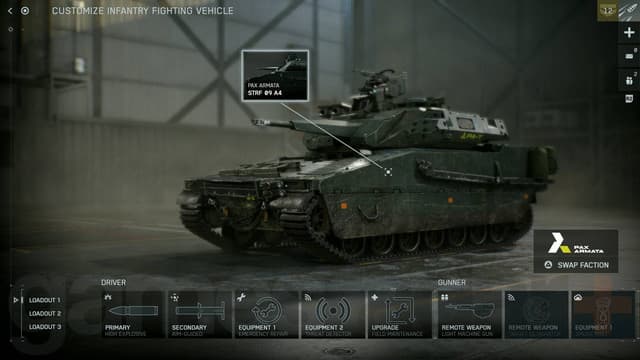
Best Infantry Fighting Vehicle (IFV) Loadout
Infantry Fighting Vehicles are the multitools of Battlefield 6 — faster than tanks, armed enough to hold their own, and able to deliver full squads directly into contested zones. The best IFV builds emphasize flexibility, allowing you to suppress infantry, ambush light armor, and support team pushes.
Slot | Pick | Why It Works |
|---|---|---|
Primary Weapon | HE Shell | Reliable splash radius ideal for flushing out buildings and clustered infantry squads. |
Secondary Weapon | Guided Missile | Provides reach and precision against light armor or slow aircraft. |
Coaxial Weapon | LMG | Keeps infantry suppressed while main cannon reloads. |
Gadget 1 | Emergency Repair | Restores health in critical situations, extending your battlefield uptime. |
Gadget 2 | Threat Detection Radar | Automatically reveals enemies shooting or locking onto you, preventing ambushes. |
Upgrade | Reinforced Armor | Adds durability without crippling mobility. |
Passenger Utility | Ammo Crate / Spotting Sensor | Support allies with resupply or share intel for coordinated assaults. |
IFV Strategy
Play your IFV as a hybrid: a hunter when advancing, a shield when defending. Always fight from cover lines — peek to fire HE shells, use missiles to punish overexposed armor, and retreat with repairs rather than trading blows.
For aggressive players, swap Guided Missiles for Rapid Fire Rockets to decimate infantry groups. Just remember: you’re not a tank. Outmaneuver, don’t out-brawl.
Best Mobile Anti-Air (MAA) Loadout
Enemy air superiority can destroy a match before it even begins. Attack helicopters and jets dominate open skies, wiping squads and armor alike. That’s why a properly configured Mobile Anti-Air (MAA) vehicle is essential for any team that values control. These platforms are fast, resilient, and purpose-built to keep the airspace clear.
The following Battlefield 6 MAA loadout is optimized to counter all airborne threats while retaining enough mobility to reposition quickly.
Slot | Pick | Why It Works |
|---|---|---|
Primary Weapon | Dual AA Autocannons | High fire rate, excellent tracking, and consistent DPS against all aerial targets. |
Secondary Weapon | IR Lock-on Missiles | Fire-and-forget projectiles that pressure jets and finish weakened helicopters. |
Gadget 1 | Smoke Launcher | Breaks line of sight, crucial for dodging counterstrikes or bombing runs. |
Gadget 2 | Threat Detection Radar | Highlights airborne enemies targeting you and alerts to stealth aircraft. |
Upgrade | Targeting Interference | Makes you harder to lock, reducing enemy missile accuracy and giving you vital seconds to escape. |
MAA Strategy
Play your AA like a hunter waiting for prey — not a frontline bruiser. Stay behind friendly armor or on elevated ridges where your radar has wide visibility. Open with autocannon bursts to force evasive maneuvers, then follow up with missiles once the pilot panics.
Always relocate after a few volleys. Stationary AAs are easy targets for long-range rockets. The smoke launcher and interference upgrade are your lifelines — time them together to shake locks from multiple angles. With this loadout, you effectively become the shield that keeps your ground forces alive.
Best Attack Helicopter Loadout
Attack helicopters in Battlefield 6 are devastating tools of destruction — agile enough to strafe objectives, yet powerful enough to wipe out squads and armor alike. However, their fragility means a single AA or sniper jet can bring you down in seconds. The right loadout transforms your heli from a glass cannon into a precision weapon capable of sustained chaos.
Slot | Pick | Why It Works |
|---|---|---|
Primary Weapon | Heavy Rockets | Delivers explosive impact on both vehicles and entrenched infantry. |
Secondary Weapon | TV-Guided Missile | Steerable ordnance ideal for destroying tanks or light armor from a distance. |
Gadget 1 | Flares | Instantly breaks missile locks and redirects homing rockets. |
Gadget 2 | Emergency Repair | Provides mid-flight recovery and resets your escape chance after taking damage. |
Upgrade | Targeting Interference | Reduces lock-on duration, helping you survive against coordinated AA fire. |
Gunner Weapon | Autocannon / Guided Rockets | Grants your copilot consistent firepower against air and ground alike. |
Attack Helicopter Strategy
Attack helis demand rhythm: strike, hide, reposition, repeat. Begin every engagement with a rocket burst to soften armor, then guide your TV missile for precision kills. Communicate with your gunner — synchronized volleys melt vehicles before they can react.
Never hover in the open. Dive behind terrain, use flares before damage spikes, and trigger emergency repairs mid-descent to recover safely. With proper coordination, this loadout makes you a flying artillery platform capable of carrying entire matches.
Best Attack Jet Loadout
When the battlefield stretches wide, nothing delivers faster, deadlier pressure than an attack jet. These aircraft specialize in precision air-to-ground strikes while retaining the agility to escape dogfights. The best Battlefield 6 jet loadouts maximize damage per pass while minimizing exposure to AA systems.
Slot | Pick | Why It Works |
|---|---|---|
Primary Weapon | 30mm Cannon | Ideal for strafing runs against infantry, armor, or clustered vehicles. |
Secondary Weapon | Laser-Guided Bombs | Devastating when used from altitude; pinpoints stationary armor and fortified objectives. |
Gadget 1 | Flares | Breaks enemy missile locks — absolutely essential for survival. |
Gadget 2 | Stealth Coating | Extends lock-on time and reduces radar visibility for safer approaches. |
Upgrade | Afterburner Boost | Grants faster acceleration to disengage or chase targets mid-dogfight. |
Attack Jet Strategy
Fly smart, not fast. Begin your run by marking armor columns, dive in low, spray with the 30mm cannon, and drop laser bombs before pulling out. Afterburners let you retreat before ground AA locks on.
Avoid prolonged duels with fighters — this configuration prioritizes strike missions over dogfights. When air superiority is secure, use jets as mobile artillery, cycling between objectives to soften resistance for your team.
Best Transport Vehicle Loadout
Transport vehicles rarely make highlight reels, but they often decide who wins. Whether it’s delivering a squad under fire or securing fast respawns near objectives, a properly equipped transport turns mobility into map control.
Slot | Pick | Why It Works |
|---|---|---|
Primary Weapon | .50 Cal HMG / Grenade Launcher | Provides steady suppression and lets passengers help control landing zones. |
Gadget 1 | Smoke Launcher | Conceals entry and escape, especially during hot drops. |
Gadget 2 | Spawn Beacon (if available) | Converts your transport into a mobile spawn hub. |
Upgrade | Reinforced Frame / Repair Boost | Either boosts HP for sustained runs or enhances repair speed. |
Passenger Utility | Ammo Crate / Spotting Sensor | Supports friendly squads with resupply or situational intel. |
Transport Strategy
Always plan routes ahead. The key to surviving as a transport operator is timing — never drive straight into captured zones. Deploy smoke before entering sightlines and let passengers disembark under cover. Reinforced frames make your vehicle an armored taxi capable of pushing safely through contested lanes.
Helicopter transports benefit from similar tactics: equip flares, stay low, and coordinate insertions near flanking points. When used correctly, transports extend your team’s frontlines, enabling faster rotations and endless reinforcement waves.
Battlefield 6 Vehicle Loadouts FAQ
Which loadout works best for solo players?
Solo players should prioritize self-sustain: Emergency Repair, APS for tanks, Threat Radar for IFVs, and flares on helis. Builds that rely on teammates for repair or spotting rarely perform well without coordination.
What’s the most versatile overall loadout?
The MBT with HE + AP shells, Active Protection System, and Reinforced Armor remains the most flexible vehicle build in Battlefield 6. It can crush infantry, duel armor, and survive enough punishment to reposition effectively.
Can I change vehicle loadouts mid-match?
Yes. Battlefield 6 allows mid-round vehicle customization during respawn or redeploy screens. Use this freedom to react — counter air swarms with MAA or swap to anti-armor kits when your team lacks heavy firepower.
Which loadout counters aircraft most effectively?
A Mobile AA equipped with dual autocannons and IR missiles is unmatched against helicopters and jets. For players on foot, lock-on launchers and recoil rifles are reliable countermeasures.
Are transport vehicles worth upgrading?
Absolutely. A reinforced transport with smoke and spawn utility can shift entire battles. Even without kills, its ability to provide mobility and safe respawns makes it invaluable for organized squads.
Should I always equip Reinforced Armor?
Not always. It’s crucial for frontliners like tanks, IFVs, or MAA. However, fast units like jets or scout transports benefit more from stealth or maneuverability upgrades. Adapt based on your vehicle’s role.
Conclusion
Vehicles in Battlefield 6 define the rhythm of large-scale warfare. Whether you’re rolling heavy in an MBT, buzzing the frontlines in a jet, or escorting troops to victory, the best loadouts merge power with awareness. Customize for the situation, rotate positions often, and coordinate with your team — mastery lies not just in firepower, but in timing, control, and survival.
When fully optimized, every machine becomes more than transport or weapon — it becomes an extension of your strategy. Adapt, evolve, and dominate.