WoW Midnight Demonology Warlock Guide: Talents and Rotation
Demonology turns Soul Shards into a growing force of summoned demons. You generate resources, spend them on summons and keep the cycle moving through your major damage windows. Performance therefore depends on more than pressing buttons quickly: your demons need the right target, enemies need to live long enough and you need casting opportunities after summoning your Tyrant.
This guide covers PvE in Midnight Season 2 and Patch 12.1.5, including single targets, enemy groups, equipment and party support. These recommendations do not promise the highest damage in every situation. Encounter design, item levels and execution change the result.
Question | Starting point |
Main resource | Up to five Soul Shards; avoid wasting incoming resources at the cap |
Main pet | Felguard |
Pure single target | Consider Soul Harvester |
Multiple targets | Diabolist is the main dungeon starting point |
Main cooldown objective | Continue summoning effectively after Tyrant appears |
Choose the spec if you enjoy summons and planned damage windows. It becomes harder to execute when targets disappear quickly or mechanics repeatedly force movement. Before rebuilding your talents, check whether unnecessary repositioning and idle gaps are costing you useful casts.
The important Midnight interactions
Apex Talents expand your specialization as you develop your character. Demonology's central interaction is Dominion of Argus: summoning Demonic Tyrant opens a portal, and Hand of Gul'dan casts help produce additional summons. What you do during that window matters alongside the preparation before it.
Tyrant damage updates dynamically with active Wild Imps and Dreadstalkers. Do not treat it as an older model where assembling summons once before the cast completes the job. Equally, avoid reducing every demon-duration interaction to a single blanket rule. Check the selected talents and current descriptions.
Keep a few important indicators visible: Soul Shards, Demonic Core stacks, Dreadstalkers, Tyrant and Dominion of Argus. An important buff hidden among dozens of tiny icons is easy to notice too late. Make the central cycle readable before adding less important tracking.
Choose talents for the assignment
Soul Harvester is worth considering for pure single-target damage. Diabolist handles a stronger emphasis on multiple enemies and supplies additional cleave opportunities. The difference is more than the appearance of the summoned demons: interactions and setup comfort also change.
Assignment | Choice and checks |
Boss without meaningful adds | Start by considering Soul Harvester and evaluate your own character |
Raid with important enemy groups | Consider Diabolist and cleave-oriented talents |
Mythic+ dungeons | Start with Diabolist; account for pull size and required boss damage |
Learning the spec | Save two loadouts, bind defensives and establish a dependable core cycle |
Examples of moving from single-target toward cleave include Practiced Rituals to Dreadlash and Mark of Shatug to Mark of F'harg. These illustrate the direction of a change, rather than mandatory swaps for every encounter. Avoid removing useful protection or control purely for a small theoretical gain.
Diabolist uses Diabolic Ritual to cycle through empowered demons. Track the resulting spell upgrades, including Ruination and Infernal Bolt when selected. Soul Harvester places more emphasis on aggressive shard spending and its associated effects. Recheck current allocations after updates: an old import string does not guarantee an appropriate loadout.
Core spells and resource decisions
Ability | Purpose |
Shadow Bolt | Fills available casting time and generates a Soul Shard |
Demonbolt | Fast resource generation with Demonic Core |
Hand of Gul'dan | Spends shards and summons Wild Imps |
Call Dreadstalkers | Important recurring summons to account for before Tyrant |
Summon Demonic Tyrant | Major cooldown followed by continued active summoning |
Implosion | Converts imps into damage, depending on targets and talents |
Do not use resource generators automatically. At five shards, use an appropriate spender first. Leave room for two shards before Demonbolt so part of its result is not lost. Demonic Core has a four-stack limit, making it unhelpful to sit at four for an extended period as well.
Power Siphon helps manage Demonic Core but requires imps and room for the charges. Pressing it merely because it is available is not useful when its result has nowhere to go. Aim for a continuous sequence of productive actions rather than filling every counter at once.
Prepare the Dominion of Argus window
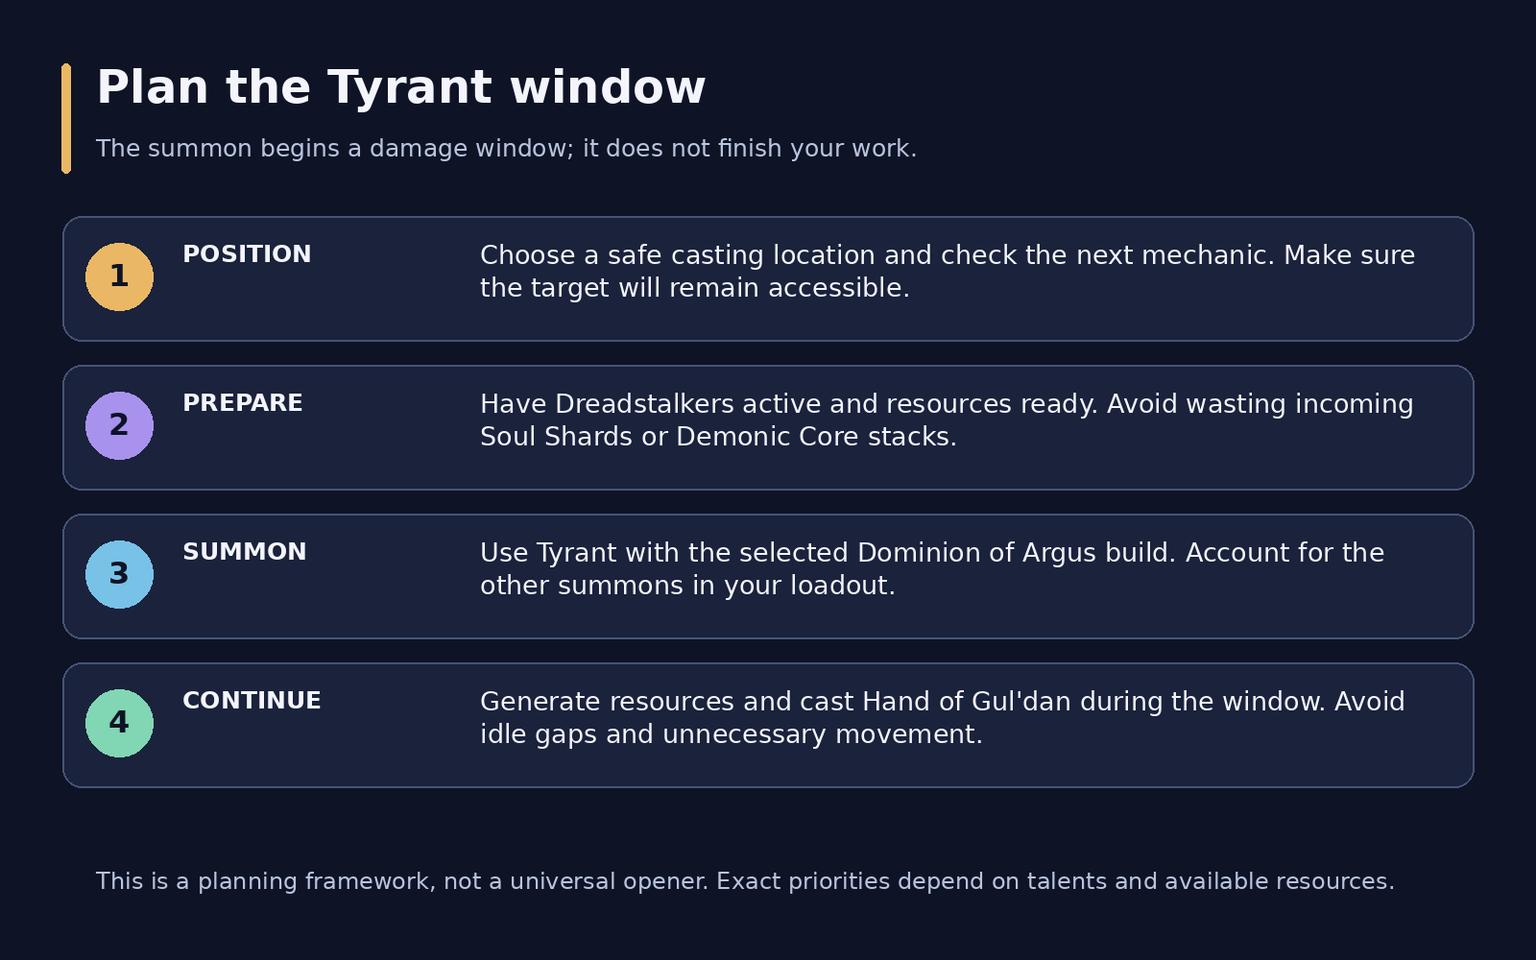
Find a safe casting position before the major cooldown. Bring Dreadstalkers onto the target, prepare resources and have instant Demonbolts available. Summon Tyrant, then continue generating shards and casting Hand of Gul'dan. Avoid stretching preparation so far that it costs an additional cooldown use over the encounter.
If unavoidable movement is approaching, decide whether important casts can finish beforehand or whether a short delay makes more sense. Waiting briefly for an accessible target differs from endlessly holding for perfect conditions. Plan around the actual mechanic rather than a stationary training dummy.
Single-target priorities
During a stable encounter, use the important summons in your selected build and keep Dreadstalkers timely. Spend with Hand of Gul'dan before shards overflow. Demonbolt with Demonic Core accelerates generation, while Shadow Bolt fills the gaps. Account for Diabolist's empowered spell versions when they become available.
Summon Doomguard and your chosen Grimoire belong to particular talent setups. Do not copy a button from another player's opener without checking that your build actually has it. Opening sequences also vary with Hero Talents and available resources, so a long shared list without those conditions is not a practical universal rotation.
For initial practice, follow a sequence of decisions: Dreadstalkers are ready and attacking the correct enemy; resources are not overflowing; Tyrant starts at a useful moment; summoning continues during the window. Then inspect idle gaps and missed opportunities before introducing complicated encounter-specific combinations.
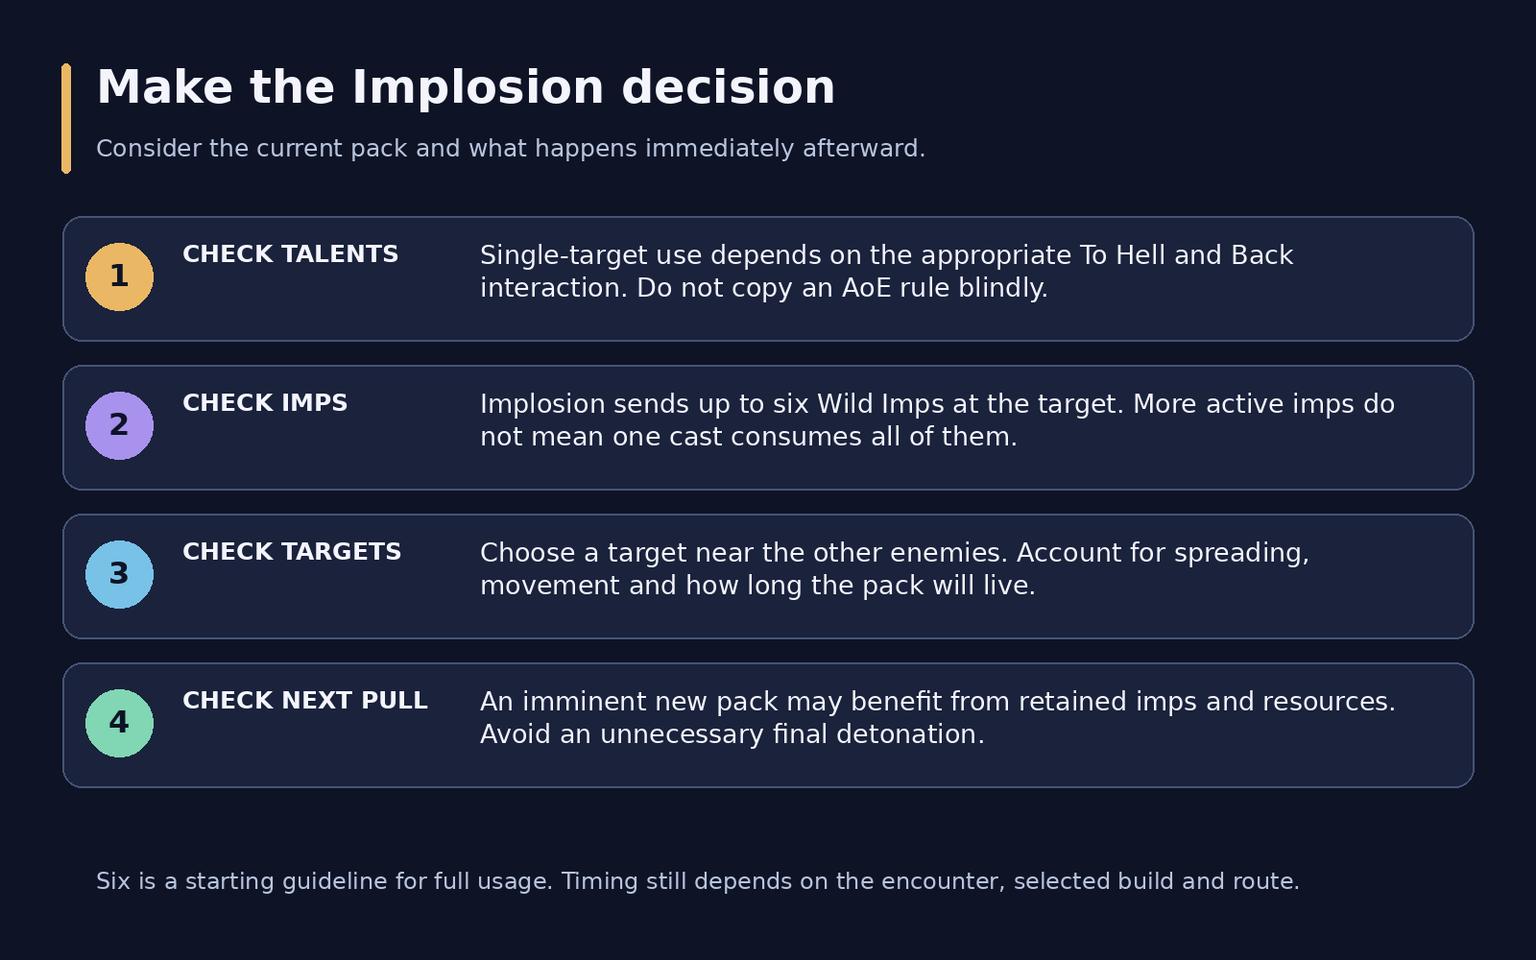
Implosion can belong in single-target play with the appropriate To Hell and Back talent. Without it, do not automatically transfer the button from your AoE rotation. An ability appearing on a general priority page does not mean every talent setup should use it in the same way.
Implosion and multiple targets
Imp count, enemy lifetime and positioning matter more than blindly following one threshold. In Midnight, Implosion sends up to six Wild Imps at the target. A full group of six is the starting usage guideline; having more imps does not mean one activation consumes all of them.
Choose a primary target that lets nearby enemies take damage. If the pack is spread out, consider when the tank will gather it. If enemies are nearly dead, look at the next pull. Keeping some resources and imps for an imminent continuation can be better than ending the current fight with another Implosion.
You can spread Doom with Demonbolt when using the relevant setup. Do not distribute casts randomly while neglecting the priority enemy. A dungeon needs dangerous casters and other important targets to die on time, alongside strong overall damage.
Movement, pets and party support
Your Felguard should attack the selected enemy rather than remain behind after a transition. Check its presence and behavior before the pull, and disable unnecessary threat generation in group content. Put Axe Toss on an accessible binding for interrupts and stuns when the enemy permits the relevant effect.
Place Demonic Circle where you will actually need to return. Agree on Demonic Gateway placement before combat so allies understand where it leads and when to use it. It provides movement access, rather than automatically teleporting the entire raid through one cast. Available instant Demonbolts help maintain productive actions while moving.
Curse of Tongues helps against suitable casters, while Curse of Weakness helps against melee attacks. Foul Mouth makes applying curses to a group easier. Blights are stronger, limited-duration tools best treated as party support for dangerous situations. They do not disable every boss ability or replace assigned interrupts.
Provide Healthstones through a Soulwell before combat. Soulstone can help recover a fallen ally under the applicable combat resurrection rules. Coordinate Shadowfury and other selected control tools so multiple players do not spend everything stopping the same cast.
Prepare Dark Pact and Unending Resolve before dangerous hits. Keep Healthstone and your healing potion accessible. Drain Life can support recovery, but it should not become a permanent substitute for correct defensive use and mechanic execution.
Stats and equipment
Intellect and item level provide a dependable starting point. Critical Strike and Haste are usually attractive secondary stats, followed by Mastery; Versatility also supplies damage and protection. The exact ordering depends on the full set. Some recommendations use roughly 22% Haste as a guideline, but this is not a universal mandatory cap after which Haste stops working.
Compare equipment for your own character with SimulationCraft and Raidbots. Testing combinations of available items is more useful than relying only on fixed stat weights. Choose an appropriate encounter profile: sustained single-target damage does not describe every dungeon decision.
Upgrade direction | Example to compare |
Raid weapon | Jan'thrazet, the Soul Fang |
Off-hand | Aln'hara Lantern when using a one-handed weapon |
Raid trinket | Twisted Horror's Tendril |
Dungeon trinket | Stormbound Emblem of Dazar |
Crafted armor | Martyr's Waistwrap with appropriate stats and an eligible embellishment |
Season 2 set | Compare completing four pieces with your current equipment |
Two Season 2 set pieces strengthen Wild Imps and Implosion. Four pieces give imps a chance to explode automatically after exhausting their energy. This is additional passive damage, rather than an instruction to wait for a proc instead of taking useful actions.
Decide which slot to improve and how long an item is likely to remain equipped before commissioning a craft or purchasing expensive enchants. An example item is neither a guaranteed drop nor automatically better than every replacement available to you.
Gems, enchants and consumables
Indecipherable Eversong Diamond provides a straightforward Intellect starting point. Powerful Eversong Diamond deserves a separate comparison on developed equipment, and its color-based effect must be activated with the appropriate gems. Do not transfer that color requirement to Indecipherable Eversong Diamond. For the remaining sockets, compare options such as Flawless Quick Garnet and suitable Critical Strike combinations.
Slot | Starting enchant |
Weapon | Jan'alai's Precision; compare alternatives in your simulation |
Helm | Empowered Rune of Avoidance |
Shoulders | Flight of the Eagle |
Chest | Mark of the Worldsoul |
Legs | Sunfire Silk Spellthread |
Boots | Lynx's Dexterity |
Rings | Silvermoon's Alacrity, checked against the stat you need |
Purpose | Preparation |
Flask | Flask of the Shattered Sun |
Combat potion | Light's Potential; compare Potion of Recklessness with low Versatility |
Healing | Concentrated Silvermoon Health Potion |
Weapon enhancement | Thalassian Phoenix Oil |
Food | Royal Roast or an appropriate feast |
Additional stats | Void-Touched Augment Rune when your budget allows |
Enchant recommendations can differ between finished equipment sets. Do not replace an expensive enhancement after every incidental drop without comparing the result. Complete basic preparations and staying alive usually matter more than guessing a small difference from someone else's table.
Learning and reviewing mistakes
While leveling, first establish pet control, shard spending and the summons available to you. Apex Talents begin at level 81, so do not expect an earlier character to reproduce the complete endgame cycle. Choose professions for crafting, consumables or personal interest rather than as a requirement for playing Demonology.
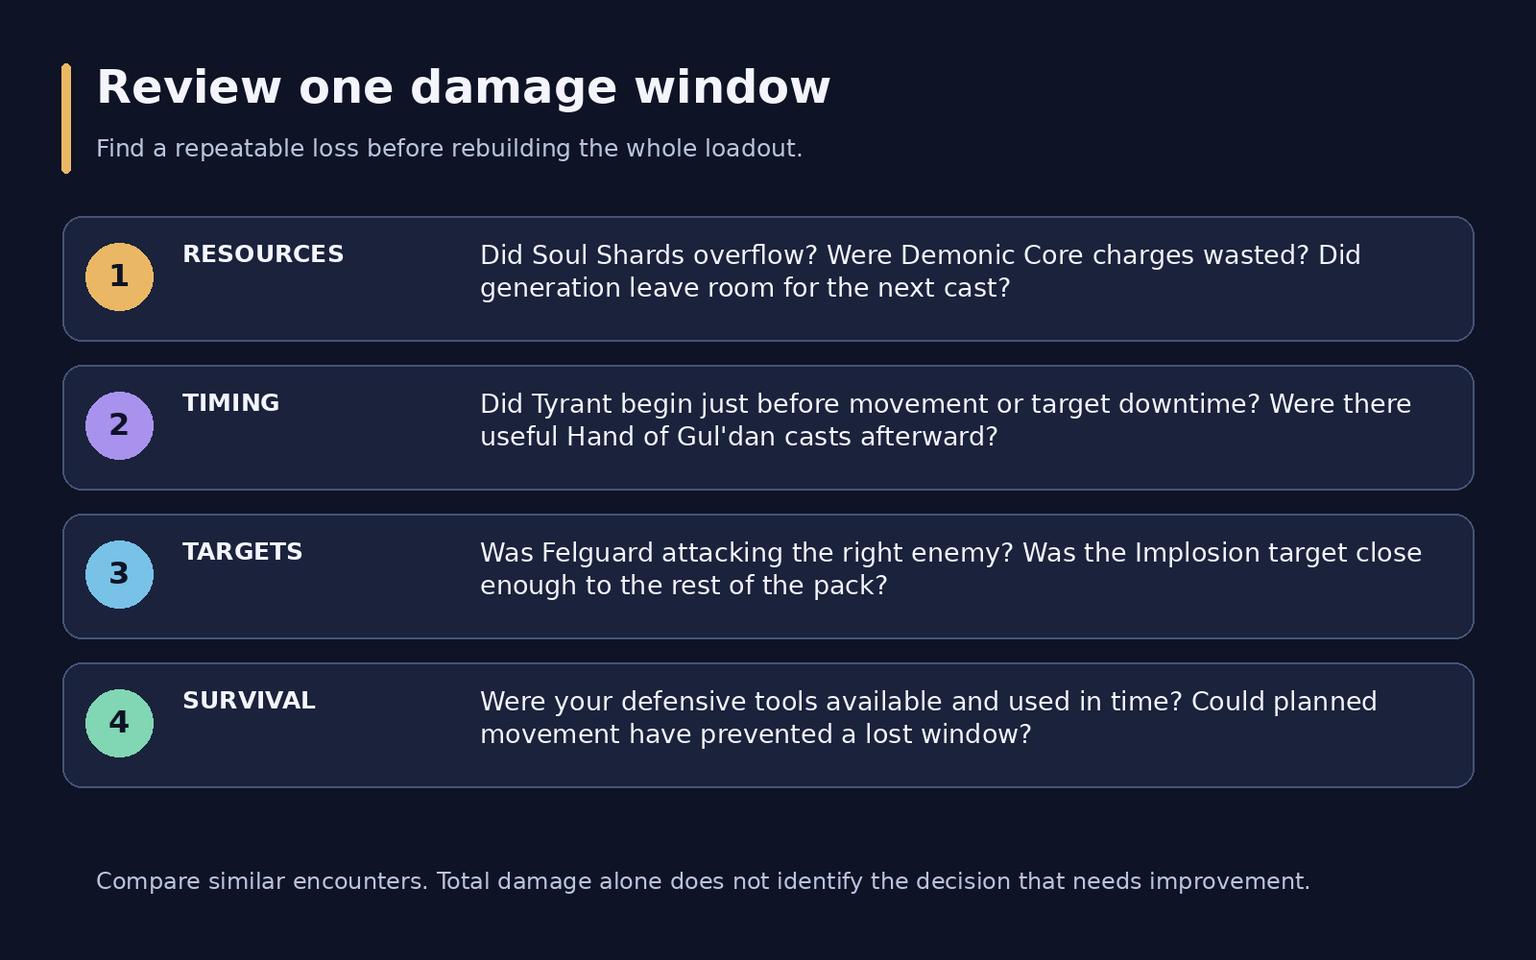
After a difficult encounter, inspect one Tyrant window. Check idle time, shard overflow and whether a mechanic immediately forced you away. Then examine the pet and primary target. Fixing one repeated loss is more useful than changing ten talents at random.
Frequently asked questions
Should I always use one Hero Talent tree?
No. Pure single targets and enemy groups require different tradeoffs. Save separate loadouts and evaluate them against actual assignments.
Should I always detonate imps before moving on?
No. If the next pull starts shortly, retained imps and resources can improve its opening. Consider the route and the remaining lifetime of your summons.
Why does a strong Tyrant not fix low damage?
Summoning it does not replace the actions afterward. Check generation, Hand of Gul'dan casts during the window, target uptime and unnecessary movement.