WoW Midnight Restoration Druid Guide: Talents and Healing
Restoration Druid prepares allies for incoming damage, maintains healing over time and uses direct healing when health becomes dangerous. The starting point is the next encounter event: who will take damage, when additional throughput is needed and how much setup time remains. Keeping a healthy raid covered in unnecessary spells is not a useful goal by itself.
This guide covers PvE in Midnight Season 2 and Patch 12.1.5. Raids and Mythic+ demand different decisions even when they share a Hero Talent tree. There is no universal healer ranking here: assignments, group composition and execution all affect the result.
Question | Starting answer |
What should I learn first? | Lifebloom, Swiftmend and the Abundance cycle |
Which Hero Talents? | Wildstalker is the default starting point for raids and dungeons |
Which stats? | Intellect, then Haste and Mastery, adjusted for your equipment |
Main risk? | Spending mana on unnecessary casts before the dangerous phase |
How do I improve? | Review specific mistakes rather than total healing alone |
Choose the spec if you enjoy watching the party, moving and planning several actions ahead. The early challenge is reading effect durations, mana and ground mechanics at the same time. Build dependable healing first, then introduce damage and more detailed talent adjustments.
The Season 2 changes that matter
Abundance now activates with five Rejuvenation effects running, increasing Regrowth's critical strike chance by 60% and reducing its mana cost by 60%. Maintain the required effects and then spend the available window on efficient direct healing. Continually blanketing the raid with additional Rejuvenations makes that cycle harder to execute.
Patch 12.1.5 redesigned Nature's Bounty: Regrowth also heals up to three allies affected by Rejuvenation for 15% of its healing, prioritizing injured allies. Do not use the previous talent description. Verdant Infusion no longer extends heal-over-time effects either, so older advice about extending them through Swiftmend needs revision.
Make Abundance visible on your interface and track Lifebloom separately. A party frame that only displays missing health conceals information you need to make these decisions.
Talents: save a raid and a dungeon setup
Wildstalker is the main starting choice because of its healing and Everbloom interaction. It does not require you to spend your spare time in Cat Form. Keeper of the Grove remains an alternative built around Grove Guardians; an older recommendation is not a sufficient reason to select it automatically for raids.
Save separate raid and dungeon loadouts. Their foundation includes Everbloom, Photosynthesis, Abundance and Swiftmend interactions. Lifetreading is especially useful in dungeons because Efflorescence follows the Lifebloom target. Avoid changing a familiar setup during encounter progression without knowing what problem the change solves.
Setup | Main focus |
Raid | Strengthen Everbloom through healing on your own Lifebloom target; maintain Abundance and schedule major cooldowns |
Dungeon | Choose the right Lifebloom target, position Efflorescence and combine urgent healing with useful control |
Raid alternative | Consider Incarnation: Tree of Life instead of Convoke the Spirits when substantial movement changes your healing opportunities |
Convoke the Spirits supplies concentrated burst healing and makes a useful default. Incarnation: Tree of Life makes it easier to continue healing while moving. Choose for the encounter you are actually playing, rather than a single impressive cast in someone else's recording.
If mana is difficult, do not casually trade away Master Shapeshifter for a small throughput gain. First learn to use quieter periods to recover resources. Check exact point allocations against the current tree after updates: an old import string can contain a different set of nodes.
Your core spells
Spell | Job |
Lifebloom | Anchors Everbloom interactions; its target changes with the encounter type |
Rejuvenation | Prepares allies for damage, enables Abundance and supports priority targets |
Regrowth | Direct healing that becomes particularly efficient with Abundance |
Swiftmend | Triggers several talent interactions, making it more than an emergency button |
Wild Growth | Group healing whose mana cost needs attention in raids |
Efflorescence | An efficient healing area when players actually stand inside it |
Mastery increases healing on a target according to your heal-over-time effects affecting that target. Maintaining different effects on an important ally therefore serves a different purpose from placing one effect on a random healthy player. Setup must still yield to an immediate emergency: a target about to die needs direct healing first.
Understand the Everbloom loop
Everbloom turns Lifebloom blooms into additional healing for nearby allies. Swiftmend triggers multiple blooms, while Photosynthesis connects them to periodic healing on the Lifebloom target. Maintain the interaction rather than waiting for the Lifebloom recipient to become seriously injured.
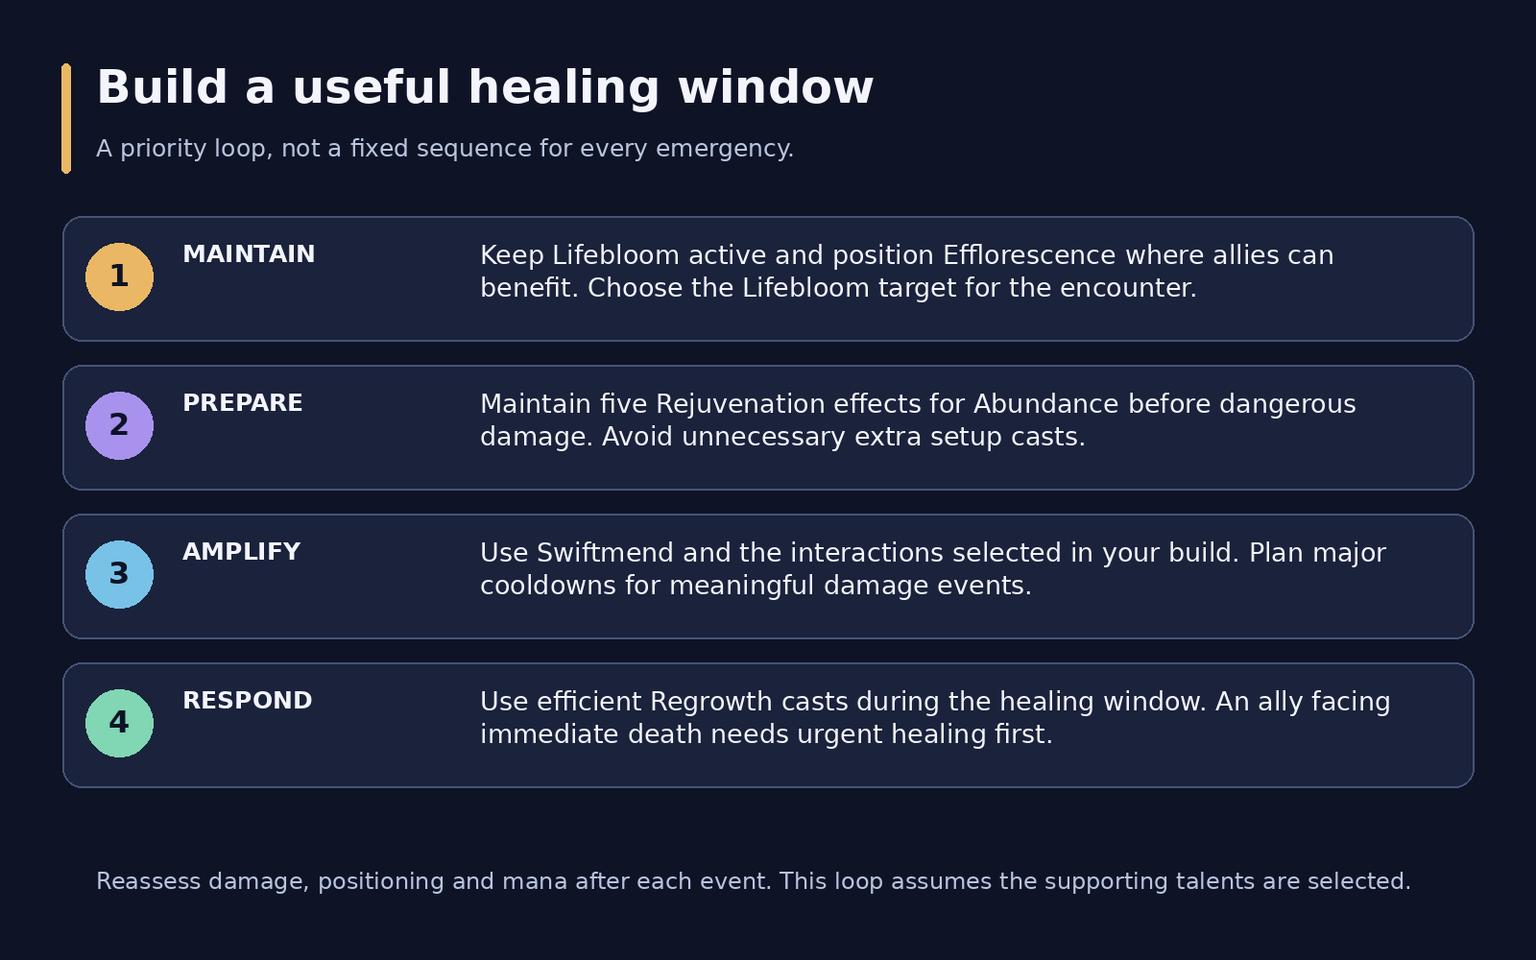
Start with three checks: Lifebloom remains active, Swiftmend is used deliberately and your setup leaves time for Regrowth. Once those habits are reliable, investigate smaller optimizations for the encounter.
Healing a raid
In the main raid setup, maintain Lifebloom on yourself alongside your own periodic effects to support Everbloom. Self-cast Swiftmend, then follow with Rejuvenation to spread effects through Power of the Archdruid. This is part of healing the raid, rather than a recommendation to focus exclusively on saving yourself.
Keep five Rejuvenations active for Abundance and use the available casting time on Regrowth. Refresh setup effects while moving when appropriate, then use stationary windows for direct healing. Reserve Wild Growth for meaningful group damage, especially when mana is running low.
Before a pull, identify dangerous events and assign Tranquility, Convoke the Spirits or Incarnation: Tree of Life to them. Avoid automatically combining every cooldown on the first damage spike: the next event may be harder. Coordinate with the other healers so two major spells do not cover an assignment that one could handle.
If the group spreads, reassess your position and healing area first. Another spell cannot make up for Efflorescence continually missing the raid. Choose a location with the next mechanic in mind, rather than only the current casting opportunity.
Healing Mythic+ dungeons
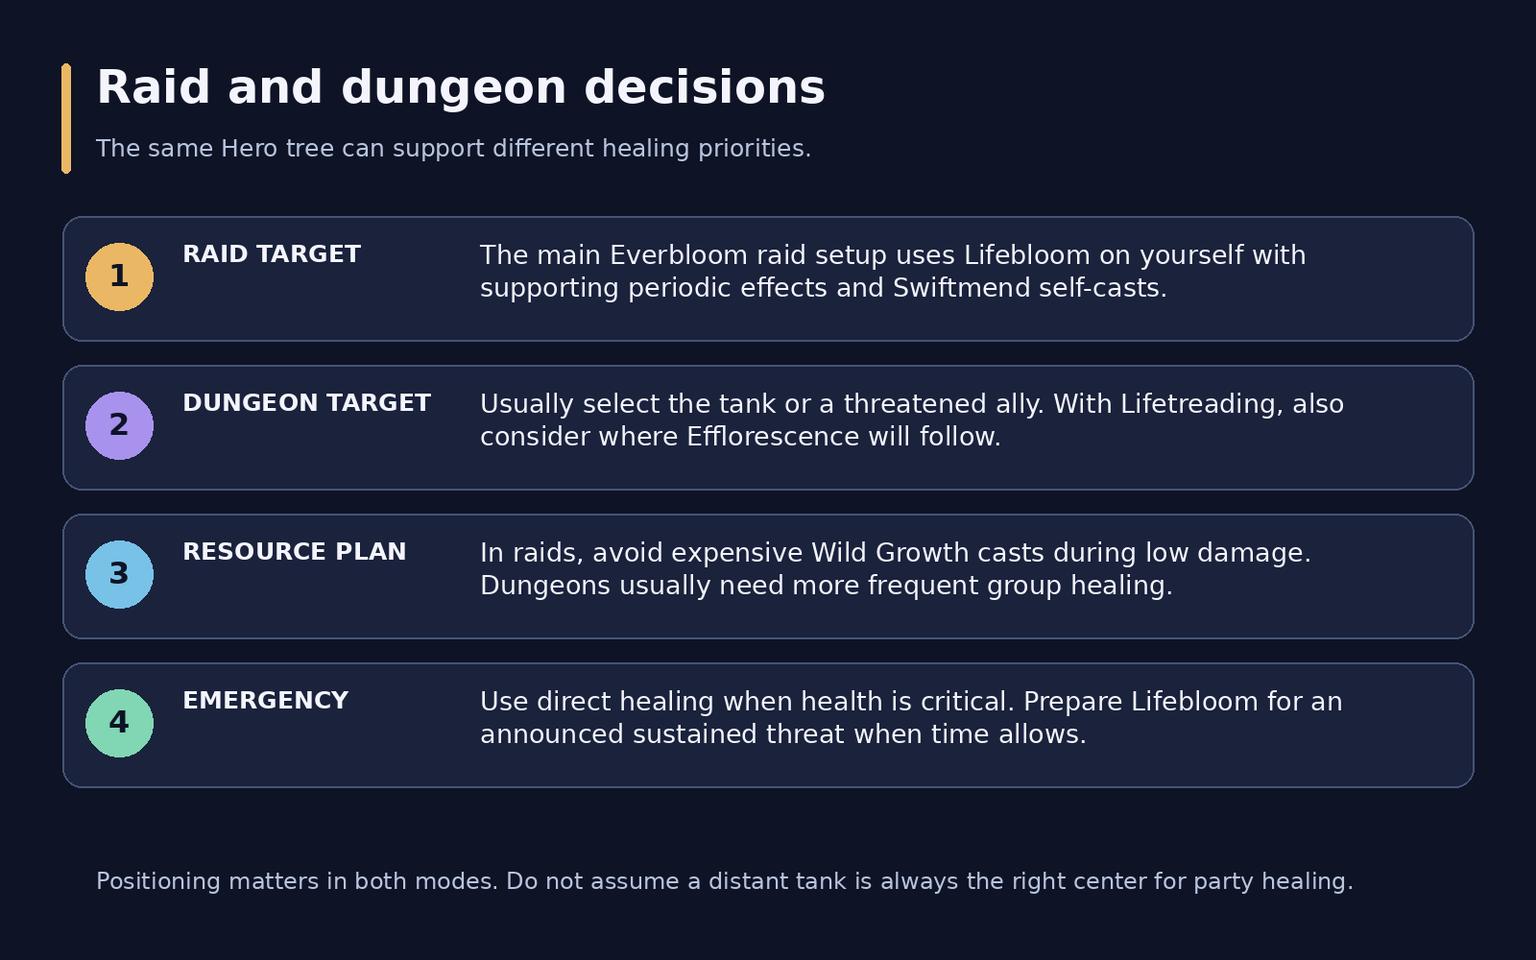
Lifebloom usually belongs on the tank or another ally taking heavy damage. With Lifetreading, also consider where that places Efflorescence. A tank standing far away from everyone else is not automatically the best center for party healing.
Prepare Rejuvenations before a predictable party damage event and check that your maintenance healing is active. Swiftmend followed by Regrowth helps answer dangerous damage already happening. When the party is comfortable, following Swiftmend with Rejuvenation can prepare for the next wave instead. Wild Growth sees more frequent use here than in a mana-conscious raid sequence.
When one player suddenly loses most of their health, do not spend several actions arranging a perfect set of effects. Use Regrowth, pairing it with Nature's Swiftness when needed. An announced, sustained threat gives you more time to move Lifebloom and prepare the target. Ironbark is particularly useful before a dangerous hit rather than after it.
After an unexpected party mistake, reassess the next unavoidable mechanic. Spending a cooldown changes the immediate plan: tell the tank when necessary and allow the party to recover before another demanding pull.
Defensives, utility and damage
Keep Barkskin, Ironbark, Innervate and Rebirth accessible. They protect you, protect an ally, restore mana and return a fallen player to combat respectively; Rebirth follows the shared combat resurrection pool. Do not wait until you have no mana before using Innervate. An earlier cast can make another use possible during the encounter.
Apply Mark of the Wild before combat and use Stampeding Roar for group movement. Soothe removes enemy Enrage effects. Nature's Cure removes Magic effects from an ally, with the relevant talent adding Poisons and Curses. Check the dangerous debuff type before trying to compensate with healing alone. Select available control such as Typhoon and Ursol's Vortex for the route. Moving enemies should help the group rather than pushing them out of its damage areas.
Deal damage when healing is stable. A straightforward caster approach uses Starsurge and Wrath against one target, Starfire against a group, and Moonfire or Sunfire during movement. Account for your selected talents. Cat Form is another approach to learn after healing becomes comfortable; it does not require changing into Agility gear.
Stats and equipment
Start with Intellect equipment and strong item levels. Haste and Mastery are your principal secondary stats, followed by Versatility; Critical Strike is generally less attractive because of Abundance. These are not universal weights. Your full equipment set, special effects and assignment change the value of an individual item.
Mastery has more opportunities in dungeons because several effects can cover each of five players. Defensive value also matters more in demanding keys. Do not dismiss a substantial item-level increase solely because it breaks a familiar stat order, and do not search for a single mandatory Haste threshold that every character must reach.
Upgrade direction | Examples and purpose |
Raid weapon | Jan'thrazet, the Soul Fang, compared against weapons you can actually obtain |
Dungeon weapon | Staff of the Lightning Serpent for a character without a raid weapon |
Trinkets | Soulcoiler Ritual Vessel and Wavecaller's Seastone |
Dungeon alternative | Lightspire Core |
Crafted equipment | Silvermoon Agent's Mantle or Sneakers, assessed within the full set |
Season set | Plan for four pieces without overlooking useful stats and item effects |
The Season 2 two-piece gives Rejuvenation a chance to grant Genesis, increasing heal-over-time healing. Four pieces extend the effect and let major cooldowns grant it. That does not make repeatedly casting unnecessary Rejuvenations a better plan than effective healing.
Use a healer evaluation tool such as Questionably Epic Live and your own encounter records when comparing complicated trinkets or crafts. Do not order an item just because it tops another player's list. Check the slot, season, quality and alternatives available to your character first.
Gems, enchants and consumables
One Indecipherable Eversong Diamond is a straightforward Intellect starting point. Fill other sockets with Haste and Mastery suited to your set; Flawless Quick Amethyst remains a Haste option. Avoid buying a collection of different gem colors for an assumed bonus your diamond does not provide.
Slot | Starting enchant |
Weapon | Acuity of the Ren'dorei |
Helm | Empowered Hex of Leeching |
Shoulders | Silvermoon's Mending |
Chest | Mark of the Worldsoul |
Legs | Arcanoweave Spellthread |
Boots | Shaladrassil's Roots |
Rings | Silvermoon's Alacrity; adjust to the stat you need |
Purpose | Preparation |
Raid flask | Flask of the Blood Knights |
Difficult damage window | Potion of Recklessness |
Personal health recovery | Concentrated Silvermoon Health Potion |
Weapon enhancement | Thalassian Phoenix Oil |
Intellect food | Harandar Celebration or another appropriate feast |
Additional stats | Void-Touched Augment Rune when your budget allows |
Bind your healing potion separately. It is a personal survival resource that is easy to forget while saving everyone else. Use expensive consumables for meaningful attempts after checking that your equipment is enchanted and the basic healing plan works.
Review one decision after each difficult pull
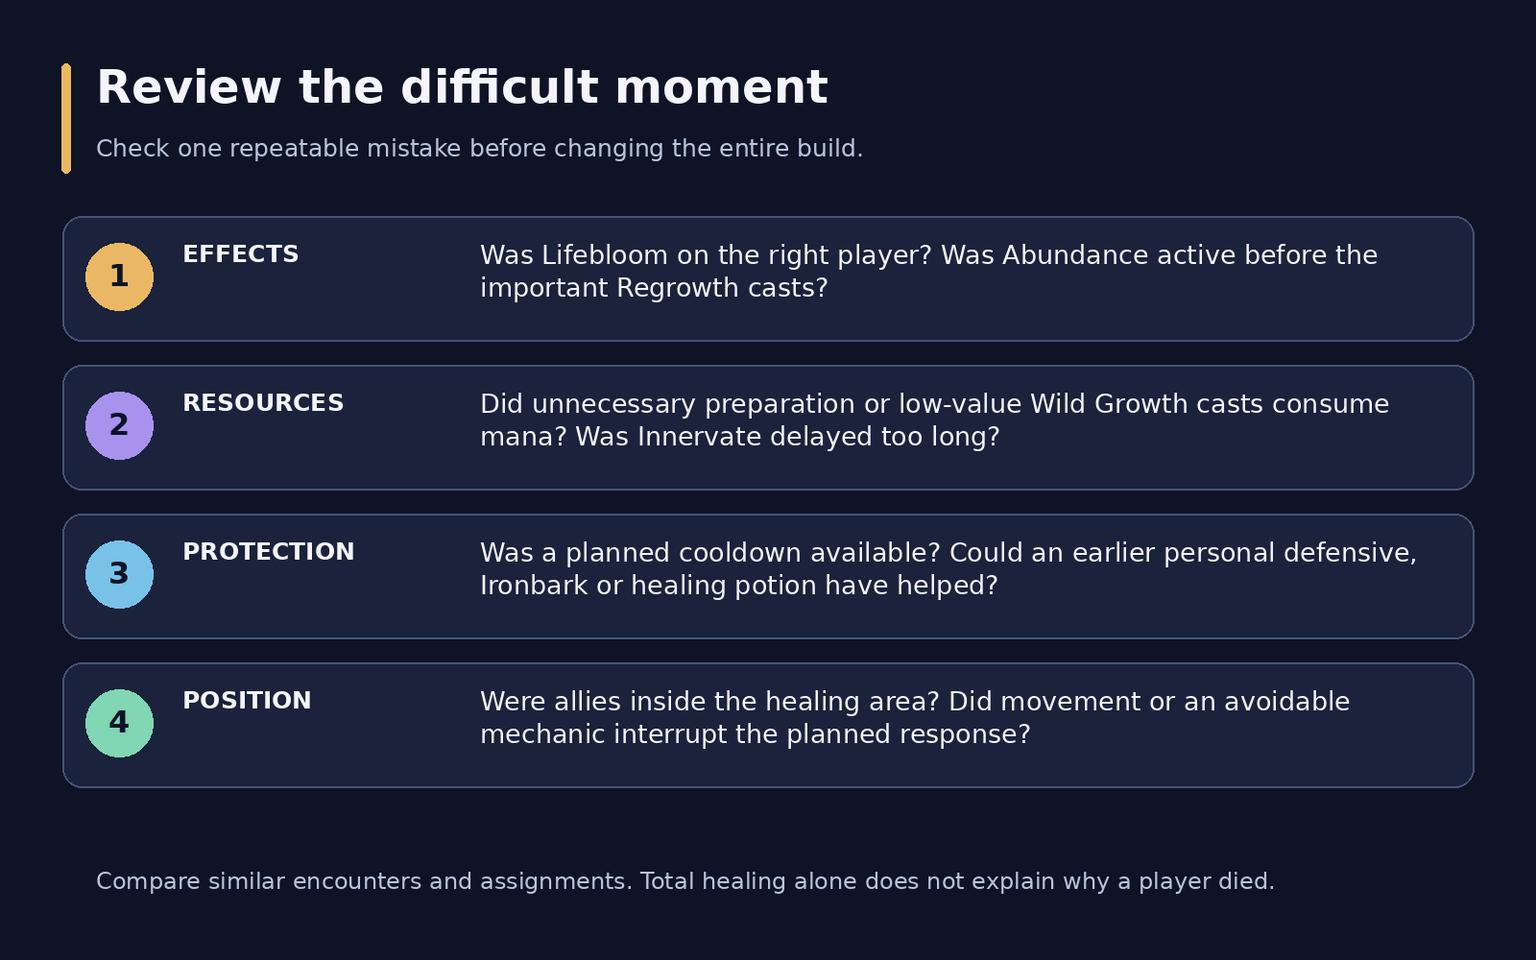
Choose one failed mechanic and reconstruct the sequence. Was Lifebloom on the right player? Was Abundance active before the Regrowth sequence? Had a major cooldown already been spent during a safe period? The answer gives you a specific objective for the next attempt.
Total healing also depends on other healers and the damage your group receives. Compare similar situations rather than the final numbers from unrelated encounters. Fix one recurring error at a time so you can tell which adjustment helped.
Frequently asked questions
Do I have to play in Cat Form?
No. Wildstalker is also selected for its healing. Start with accessible caster damage when the group is safe, and introduce the more complicated approach gradually.
Why am I running out of mana?
Check unnecessary raid Wild Growth casts, Regrowth without Abundance and delayed Innervate usage. Then examine the encounter length and how much setup healing was actually necessary.
Can I share equipment between raids and dungeons?
Yes. An Intellect, Haste and Mastery set provides a useful starting point for both. Save separate talent loadouts and adjust healing decisions for the group and encounter mechanics.