WoW Midnight Warrior Guide: Specs, Talents and Gear
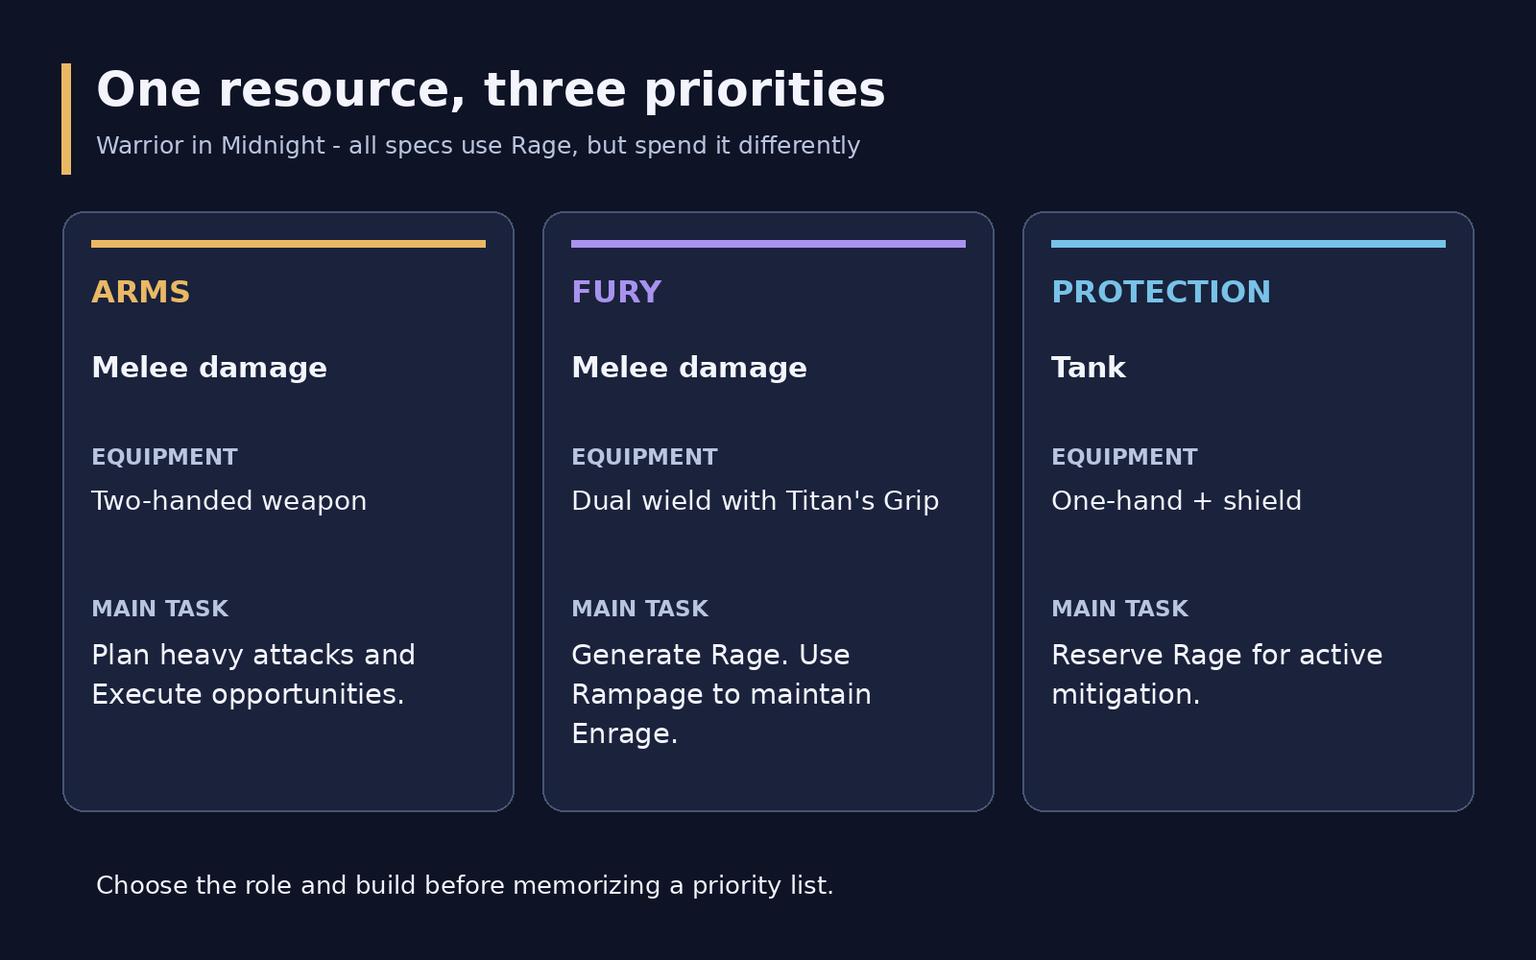
Warrior in WoW Midnight offers two melee damage specializations and one tank. Arms plans heavy attacks, Bleeds and Execute damage. Fury maintains a rapid exchange of attacks, Rage and Rampage. Protection turns its resource into durability while holding enemies. All three use Rage, but they should not spend it according to one shared priority list.
This guide covers Season 2 PvE in patch 12.1.5, checked on October 15, 2026. It explains specialization choices, Hero Talents, combat fundamentals, equipment and preparation for raids and Mythic+ dungeons. Start with the role and decisions you want to learn rather than a class ranking presented without encounter context.
Specialization | Role and weapons | Main learning task |
Arms | Damage dealer with a two-handed weapon | Plan Rage spending, heavy attacks and Execute opportunities |
Fury | Damage dealer; usually two two-handed weapons with Titan's Grip | Maintain Enrage and keep generating Rage |
Protection | Tank with a one-handed weapon and shield | Maintain active mitigation, threat and a resource reserve |
For questing, choose the damage specialization whose rhythm you enjoy. Fury keeps you pressing abilities frequently; Arms is less forgiving when an unnecessary spender leaves you short for an important attack. Protection is a route into tanking, but also requires learning paths, dangerous enemy abilities and what your party can handle. Carrying a shield does not make every pull safe.
What changed in Season 2
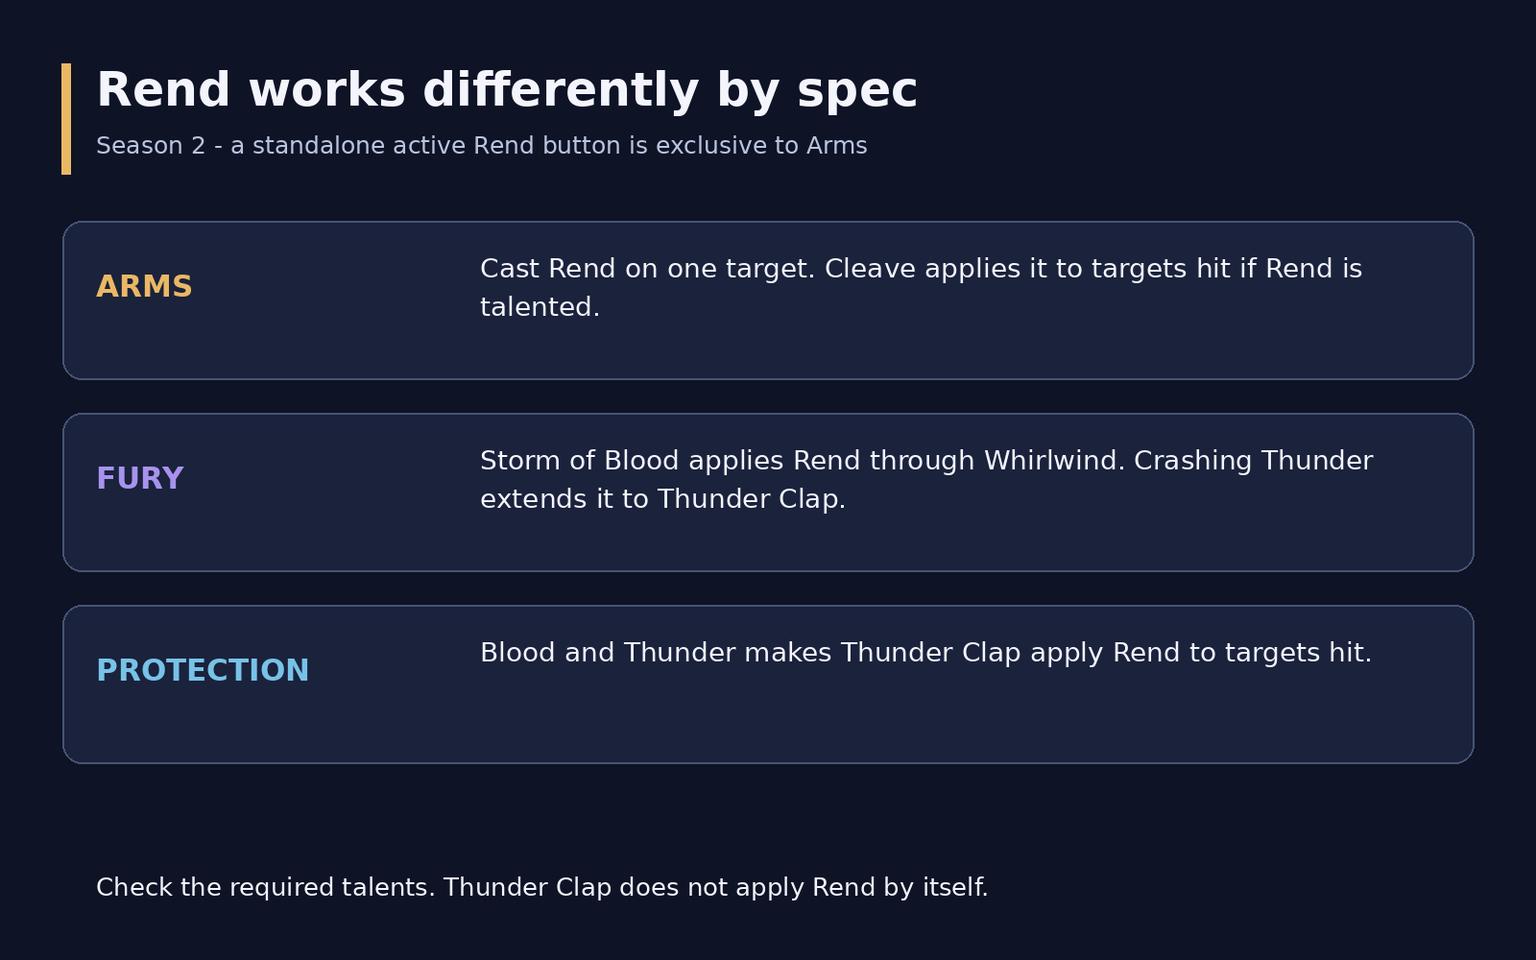
Rend should no longer be treated as an identical standalone button for every Warrior. In 12.1, the active ability became exclusive to Arms and returned to single-target application. Cleave applies it to affected enemies if Rend is talented. Fury uses Storm of Blood through Whirlwind; Mountain Thane extends that interaction to Thunder Clap through Crashing Thunder. Protection requires Blood and Thunder for its application.
That distinction matters when returning to the class. An old action bar can contain an obsolete button or hide the current method of maintaining a Bleed. Inspect the selected loadout and its actual talents before practising. The instruction to maintain Rend manually on all three specializations is no longer correct.
Patch 12.1.5 changes focus on Protection: Execute damage increased by 30%, while Colossus's Practiced Strikes additionally reduces the Rage cost of Execute and Revenge by 10. This is not a 30% increase to all tank damage, and it does not remove defensive priorities. The patch notes contain no comparable rotation redesign for Arms or Fury.
Talents and Hero trees
A loadout combines the class tree, specialization tree and one of two available Hero trees. Class talents help tailor mobility, control and defense; the other trees shape combat. You cannot transfer an entire Arms loadout to Fury just because some ability names overlap.
Specialization | Hero Talent trees | What to consider |
Arms | Colossus / Slayer | Planned Demolish channels or Execute and Bladestorm interactions |
Fury | Mountain Thane / Slayer | Thunder and lightning in the resource cycle or different Execute and Bladestorm priorities |
Protection | Mountain Thane / Colossus | Rage flow, defensive interactions and the encounter's demands |
Arms Colossus adds Demolish, which requires an opportunity to channel without forced movement. Slayer changes the value of procs and finishing attacks. Fury Mountain Thane weaves Thunder Clap and Thunder Blast into Rage generation, while Slayer follows a different set of priorities. Compare current builds for the intended activity rather than choosing only by animation theme.
For Protection, the choice also affects durability and the feel of the basic cycle. A damage total from someone else's dungeon run is not enough to select your tree: gear, pull sizes and group composition may differ. Keep separate raid and dungeon loadouts and inspect the defensive talents in each.
Apex Talents belong to the specialization as well: Master of Warfare for Arms, Rampaging Berserker for Fury and Phalanx for Protection. Master of Warfare is not a universal Warrior selection. When importing a current build, inspect both the allocation and action bar. An export from an older patch may no longer fit the live tree.
Arms
Rage and heavy attacks
Mortal Strike, Overpower, Bleeds and Colossus Smash windows form the core of Arms. Much of its Rage comes from auto-attacks, so losing contact with the target interrupts both damage and resource income. Most important buttons also spend Rage. A full bar can waste generation, while an empty bar before a major attack can delay that attack.
Reserve enough for the next important ability rather than filling every gap with an optional spender. Track Mortal Strike and Overpower availability and avoid unnecessary delays. Sudden Death allows Execute outside its normal finishing phase and changes the next useful action.
Plan offensive cooldowns around target lifetime and your ability to stay in reach. A short delay for a dangerous add can be sensible; holding abilities indefinitely for an ideal window is not. During practice, check how many important casts were lost to poor resource planning or avoidable movement.
Execute and multiple targets
When Execute becomes available, your priorities change, but the rest of the build still matters. Talents and procs affect availability. Avoid building your entire understanding around one health threshold that may not match the next saved loadout.
Cleave matters more against several enemies, while Sweeping Strikes lets some attacks reach an additional target. Account for setup and channel time when playing Demolish. Starting it just before an unavoidable movement mechanic sacrifices the opportunity you prepared.
Before Bladestorm, check where enemies will be. An offensive window cannot help if the targets have moved outside its reach. Where necessary, reach the priority enemy first and then commit the cooldown. Learning to select that moment is more useful than memorizing an opener that only works on a stationary dummy.
Fury
Rampage and Enrage
Fury's basic cycle generates Rage through attacks, spends it on Rampage and maintains Enrage. Bloodthirst and Raging Blow contribute to resource income; talent choices and empowered versions affect their order. Idle time beside an enemy usually means missed attacks and a later next Rampage.
However, using Rampage immediately whenever its minimum cost is available is too crude a rule. If Enrage is already active and you are far from the Rage cap, another available ability may have more value. Recklessness increases Rage flow, making the resource bar especially important. Learn reliable Enrage maintenance first, then refine delays using the current priority list for your build.
Useful interface elements include remaining Enrage duration, current Rage and relevant procs. If every target change forces you to rebuild the entire cycle, examine movement and your first available attacks. Add tracking because it solves a problem, rather than because another player displays more icons.
Multiple enemies and offensive windows
Your chosen Whirlwind interactions matter for hitting additional enemies. Mountain Thane transfers some of those tasks to Thunder Clap and its empowered version. Track Thunder Blast availability and avoid losing useful procs. Do not transplant the Slayer priority unchanged into the other Hero tree.
Use major cooldowns in combat that will last long enough to benefit from them. On a dangerous priority enemy, maintaining contact and performing the assigned interrupt can be worth more than increasing damage to secondary targets. Area damage does not remove responsibility for dungeon mechanics.
Personal defense also depends on talents. If your build includes Enraged Regeneration, keep it accessible for dangerous events. Before difficult content, check which defensive tools are actually selected. An icon left over from an old profile is not proof that the current character can use the ability.
Protection
Active mitigation comes first
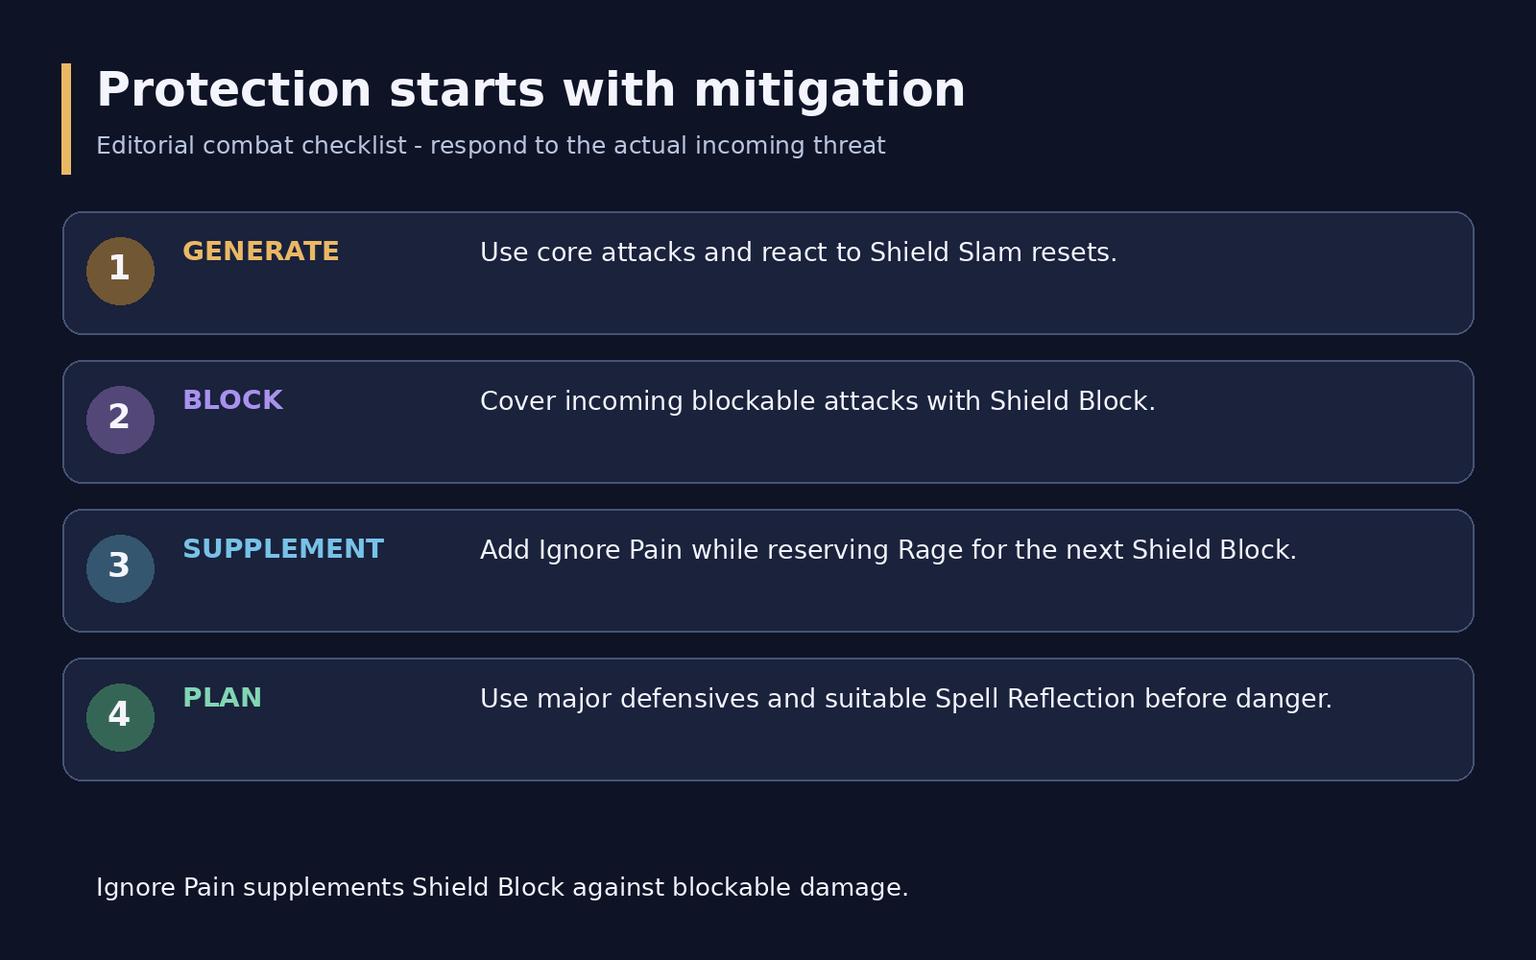
Shield Slam and Thunder Clap support the core cycle and Rage generation. That resource is not exclusively for damage. When you are taking blockable attacks, Shield Block is the main tool for smoothing incoming damage. Ignore Pain adds an absorb rather than automatically replacing it.
Measure useful Shield Block coverage: protecting actual hits matters more than increasing a report's overall uptime percentage. A boss spending time casting, or attacking the other tank, creates a different requirement. Whether a specific attack can be blocked depends on that encounter mechanic.
Do not spend all available Rage on Ignore Pain and leave too little for the next Shield Block. Its absorb has a cap, so another application into an already full reserve can lose value. Fit Revenge and Execute around defensive requirements, especially when trying the new 12.1.5 interactions.
Dangerous hits and positioning
Shield Wall and other selected defensives should cover predictable danger before it lands. Spell Reflection helps against suitable spells; it does not reflect every boss mechanic. Learn the encounter and distinguish a reflectable spell from an unblockable hit.
Face enemies away from allies and leave room for the next move. Shockwave helps against enemies susceptible to stuns, but coordinate it with other party stops. Do not treat control as guaranteed mitigation against an immune target.
In raids, discuss tank swaps and external healing support in advance. In dungeons, increase pull size after the existing route is reliable. If every pack requires all defensives at once, review resource allocation and enemy selection before adding more opponents.
Equipment and stats
All Warriors use Strength and plate armor, but weapons and trinkets need a role-specific check. Switching from Fury to Protection requires an appropriate one-handed weapon and shield; changing talents alone does not provide them. Fury should compare both weapons as part of its equipment setup.
Specialization | Secondary-stat starting point | Check separately |
Arms | Critical Strike, then Haste; Mastery and Versatility generally lower | Your equipment, set bonuses and actual stat distribution |
Fury | Focus initially on Mastery and Haste | Their relative value changes with gear and build; there is no fixed order for everyone |
Protection | Haste is important to the core cycle | Item level, armor, Stamina and defensive reliability |
Strength and overall equipment quality matter, but a ring without Strength, a set bonus and a special trinket effect cannot all be evaluated by one rule. Avoid chasing an arbitrary Haste percentage at the expense of everything else. Damage dealers can simulate available items; a tank must also consider actual threats rather than only simulated damage output.
Check whether replacing a piece preserves a useful set bonus before comparing the replacement. Plan crafting orders and enchants around items that will remain in the setup. Blacksmithing is convenient for weapons and plate, but you do not need to own the profession personally to wear suitable crafted equipment. Convenience and personal preference also matter when choosing professions and a race.
Consumables and enchants
Select consumables around your role and current stats. Potion of Recklessness cannot automatically be called best for every distribution: the secondary stat it actually supplies matters.
Specialization | Flasks to compare | Practical potion choice |
Arms | Flask of the Blood Knights / Flask of the Shattered Sun | Potion of Recklessness with suitable stats; Liquid Luster as a simpler option |
Fury | Flask of the Magisters / Flask of the Blood Knights | Check that Potion of Recklessness gives the intended Mastery; otherwise compare Liquid Luster |
Protection | Flask of the Blood Knights / Flask of the Shattered Sun | Light's Potential as an option without additional ground hazards |
For Protection, Draught of Rampant Abandon can provide more primary stat but creates silencing ground effects. While learning mechanics, a potion without that extra requirement is easier to manage. Your consumable should not interfere with enemy positioning or defensive casts.
Carry Concentrated Silvermoon Health Potion, suitable food and Thalassian Phoenix Oil. Weapon enchant examples to compare include Rite of the Hash'ey and Berserker's Rage. The choice depends on specialization and current equipment; an older generic table is not a reason to buy one enchant for every Warrior.
Powerful Eversong Diamond requires considering the colors of your other gems. Indecipherable Eversong Diamond is simpler when sockets are limited. Compare the entire setup before an expensive replacement rather than judging one gem's description in isolation.
Macros and preparation for your first group
A focus interrupt for an English client:
#showtooltip Pummel
/cast [@focus,harm,nodead][] Pummel
The macro selects a suitable living enemy focus and otherwise falls back to normal casting rules. It does not check range or whether a particular spell can be interrupted.
Heroic Leap at the cursor location:
#showtooltip Heroic Leap
/cast [@cursor] Heroic Leap
This skips manual confirmation of the targeting circle. Practise in a safe area first: an inaccurate cursor position can send you toward unwanted enemies. Range and suitable ground requirements still apply.
Before your first run, check weapons, stance, Battle Shout, interrupt access and personal defense. Coordinate Rallying Cry as temporary Health support rather than a replacement healing spell. Use questing to learn movement and recovery, then add control and priority targeting in easier dungeons.
PvP needs separate preparation. Talent choices, control, pressure targets and defensive timing are evaluated differently there. This PvE overview does not assign arena rankings or suggest transferring a raid loadout unchanged.
Frequently asked questions
Which damage specialization is better
Choose by rhythm and content. Arms plans heavy attacks; Fury maintains a fast, continuous cycle. Reliable execution of a suitable build is more useful than a ranking without encounter context.
Should every Warrior cast Rend
No. In Season 2 the standalone active ability belongs to Arms. The other specializations apply its effect through the relevant talents and attacks.
Can Protection tank using only Ignore Pain
Against blockable attacks, it supplements Shield Block. Allocate Rage so that the necessary mitigation is available for the next threat.
Are a particular race and Blacksmithing mandatory
No. Racial abilities can help in certain situations, and the profession is convenient for crafting. They do not replace equipment, encounter knowledge or learning your role.